
Quick Single-Node Deployment Guide
Operating systems: Windows 10, 11, Server 2022; Ubuntu 22.04, 24.04; RHEL 9, Rocky 9, Debian 12 ✅
Software requirements: Docker, MySQL, npm, Git
Xinchuang (domestic) operating systems: Kylin Advanced Server V10 SP3, openEuler 22.03 LTS SP4 ✅
OpenPartner cannot be installed or run on any other unverified system.
Table of Contents
- I. Dependency Requirements
- II. Windows Version
- III. Linux Version
- IV. Common Commands
- Appendix A · JSON Configuration Parameters
- Appendix B · JSON Example
- Appendix C · Configuration File Locations
- Appendix D · FAQ
I. Dependency Requirements
| Dependency | Minimum version | Purpose |
|---|---|---|
| Docker | ≥ 20.10 | Runs the AI agent containers (one isolated environment per user) |
| MySQL | ≥ 8.0 | Stores users, permissions, and business data |
| Node.js / npm | ≥ 18 | Required by Method 1 only: install the openpartner package |
| Git | Latest | Edit Skill scripts |
Versions supported on Xinchuang environments (align with these versions if possible):
| Operating system | Git | Node.js / npm | Docker | MySQL |
|---|---|---|---|---|
| Kylin Advanced Server V10 SP3 | 2.34.1 | v18.17.1 / npm 9.6.7 | 20.10.24 | 8.0.36 |
| openEuler 22.03 LTS SP4 | 2.39.1 | v18.17.1 / npm 9.6.7 | 24.0.7-ce (containerd 1.6.28) | 8.0.40 |
The table above lists the version combinations that are supported on Xinchuang environments; the installation steps are the same as for Ubuntu / RHEL (see the Linux Version section below).
II. Windows Version
2.1 Preparation
2.1.1 Install Docker
⚠️ Skip this section if Docker is already installed.
- Download and install Docker Desktop: https://www.docker.com/products/docker-desktop/
- Restart your computer after the installation finishes; Docker will start as a background service
- Verify: open PowerShell, enter
docker --version, and a version number means you are good
⚠️ CPU virtualization and WSL2 must be enabled.
⚠️ Docker Hub (https://hub.docker.com) must be reachable.
2.1.2 Install MySQL (Docker version)
⚠️ Skip this section if MySQL is already installed.
Run the following in Administrator PowerShell:
docker pull mysql:8.4
docker run -d --name mysql8 --restart unless-stopped -p 3306:3306 `
  -e MYSQL_ROOT_PASSWORD="openpartner2049" -e TZ=Asia/Shanghai -v mysql8-data:/var/lib/mysql `
  mysql:8.4 --character-set-server=utf8mb4 --collation-server=utf8mb4_general_ci
2.1.3 Install Node.js (npm)
⚠️ Skip this section if it is already installed; only Method 1 (NPM installation) requires it.
Download and install Node.js LTS: https://nodejs.org/; or run the following in Administrator PowerShell:
powershellwinget install --id OpenJS.NodeJS.LTS -e --source wingetReopen your terminal once the installation finishes.
⚠️ After npm is installed, add the npm installation directory to the PATH environment variable; otherwise the terminal cannot find the
openpartnercommand (it reports "command not found").
2.1.4 Install Git
⚠️ Skip this section if Git is already installed.
Download and install Git: https://git-scm.com/downloads; or run the following in Administrator PowerShell:
powershellwinget install --id Git.Git -e --source winget
2.1.5 Verify the environment
docker --version    # should display a version number
docker ps --filter name=mysql8   # should show the mysql8 container running
node --version      # should display ≥ 18
npm --version       # should display a version number
git --version       # should display a version number
If all of the commands above print a version number, the environment is ready (Method 2 does not require node / npm).
Choose one of the two installation methods: Method 1: One-Click NPM Install (2.2) or Method 2: Manual Installation via Official Download (2.3).
2.2 Method 1: One-Click NPM Install
The commands you get after the installation:
openpartner: the backend service and the command-line toolopenpartner-init-ui: the graphical initialization wizard
Run the following in Administrator PowerShell:
# -g=global install; installs the latest version by default; to pin a version: npm i -g @sogood360/openpartner@<VERSION>
npm i -g @sogood360/openpartner
⚠️ If
openpartnerreports "is not recognized as an internal or external command" after the installation: refresh PATH and reopen your terminal with$env:Path = [Environment]::GetEnvironmentVariable("Path","User") + ";" + $env:Path; if it reports Permission denied, reinstall withnpm i -g @sogood360/openpartner --force.
Verify the version:
openpartner version # expected: prints a version number like openpartner 1.5.xInitialization
⚠️ Method 1 and Method 2 are mutually exclusive.
Method 1: Graphical wizard (recommended)
The initialization wizard is an interactive TUI program that asks a few key questions: how to connect to Docker, how to connect to MySQL, where to pull the images from, and how to set the administrator password.
Run the following in Administrator PowerShell:
openpartner-init-ui # enter the graphical initialization interfaceInterface controls:
Tabswitches between form fields,↑↓switches between options,Enterconfirms. ⚠️ It must run in a real terminal (Windows Terminal / PowerShell); Git Bash and IDE built-in terminals exit immediately because they have no TTY.
Questions the wizard asks (in order):
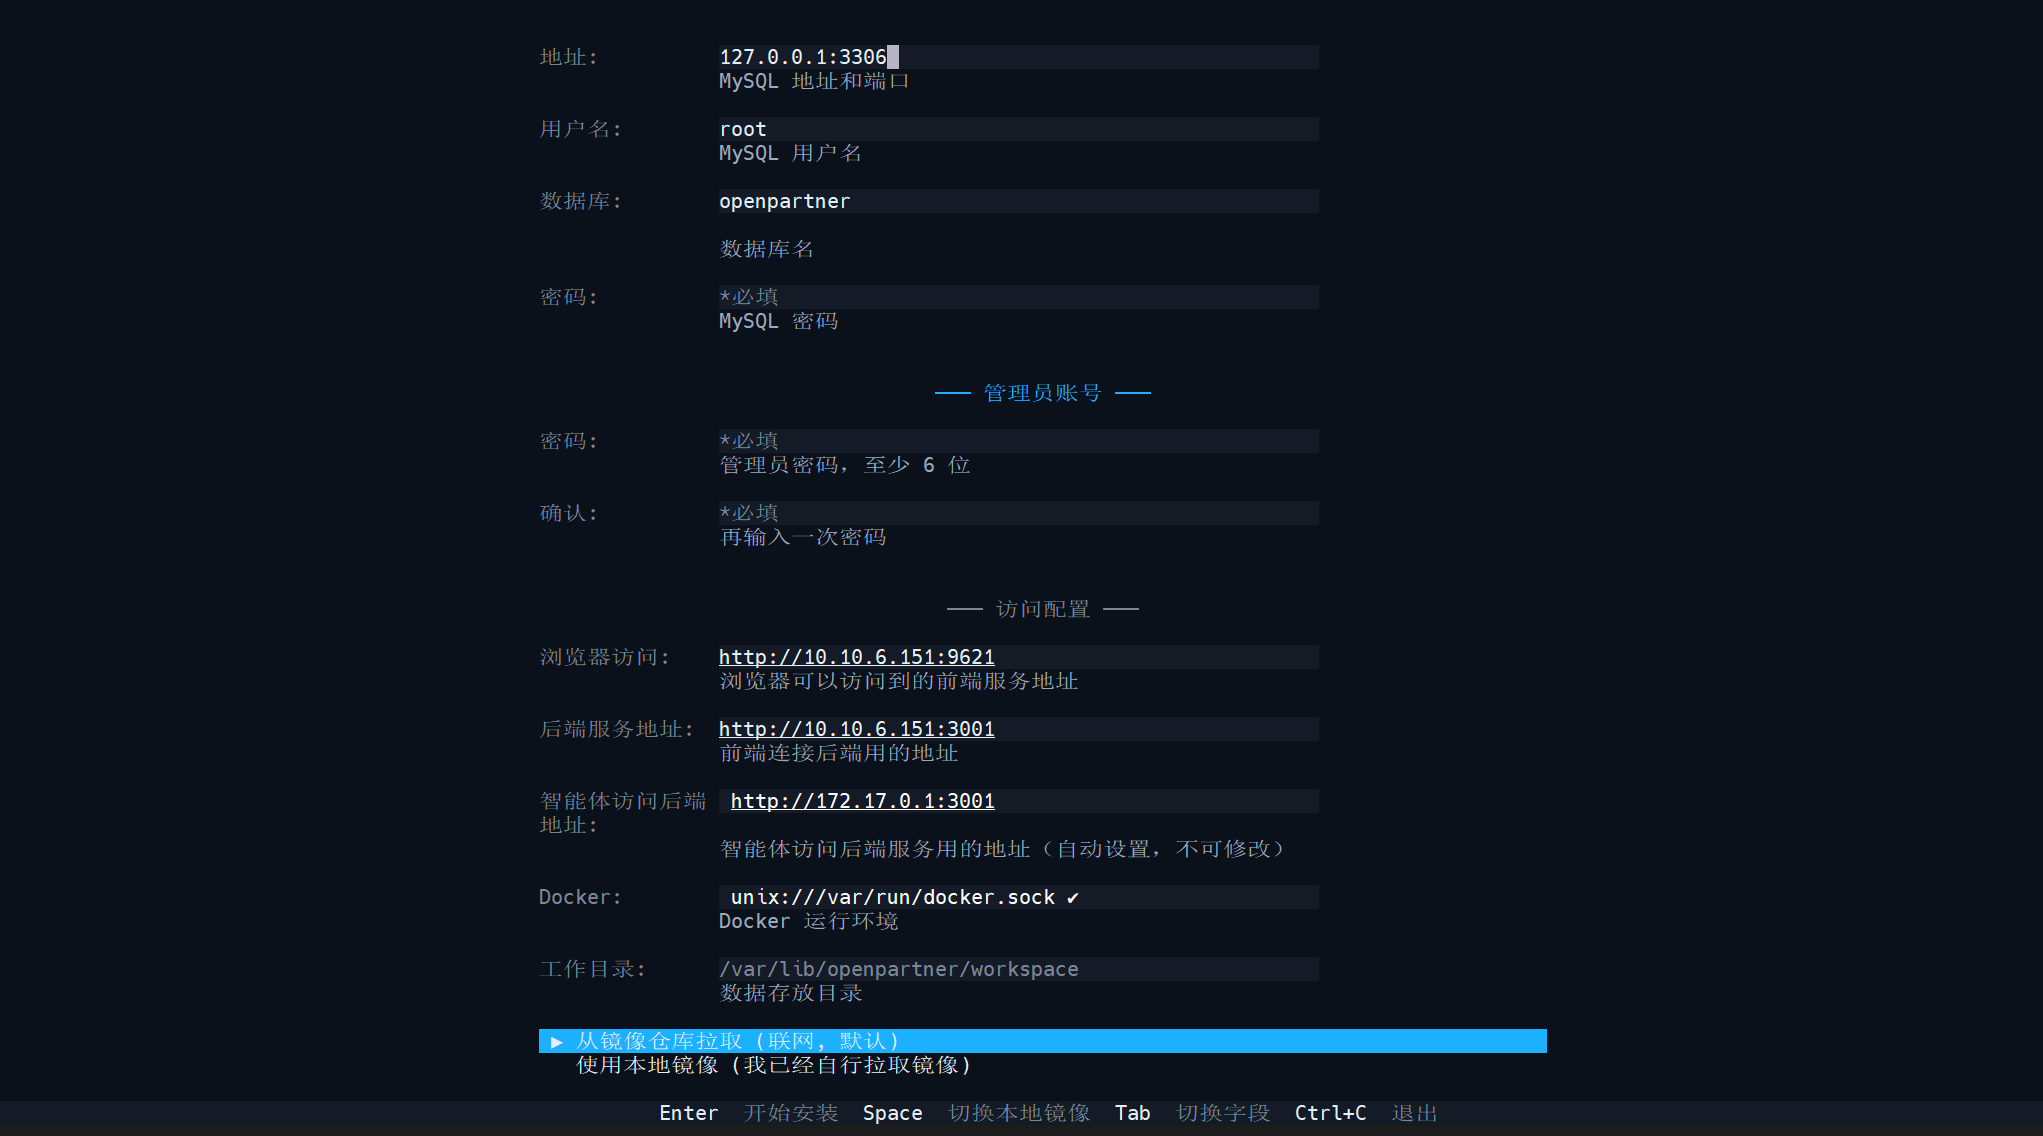
- Database connection: the address defaults to
127.0.0.1:3306(changeable; for a remote database enter<PUBLIC_IP>:<PORT>); - Username: defaults to
root(it needs read/write and database-creation permissions); - Password: enter the MySQL password (
<MYSQL_PASSWORD>, for exampleopenpartner2049). - Administrator account: set the admin password (
<ADMIN_PASSWORD>, at least 6 characters, confirm it once more). - Access and ports: the service address defaults to the internal IP; for public access change it to the public IP (
<PUBLIC_IP>); keep the default service port (maximum 65535); - Working directory: defaults to
D:\openpartner\workspace(changeable) - Image source: the images are pulled from the network by default; if local images are available, switch to using the local images.
- Run the installation: check that everything is correct and press
Enter; "OpenPartner initialization complete" means success, pressCtrl+Cto exit.
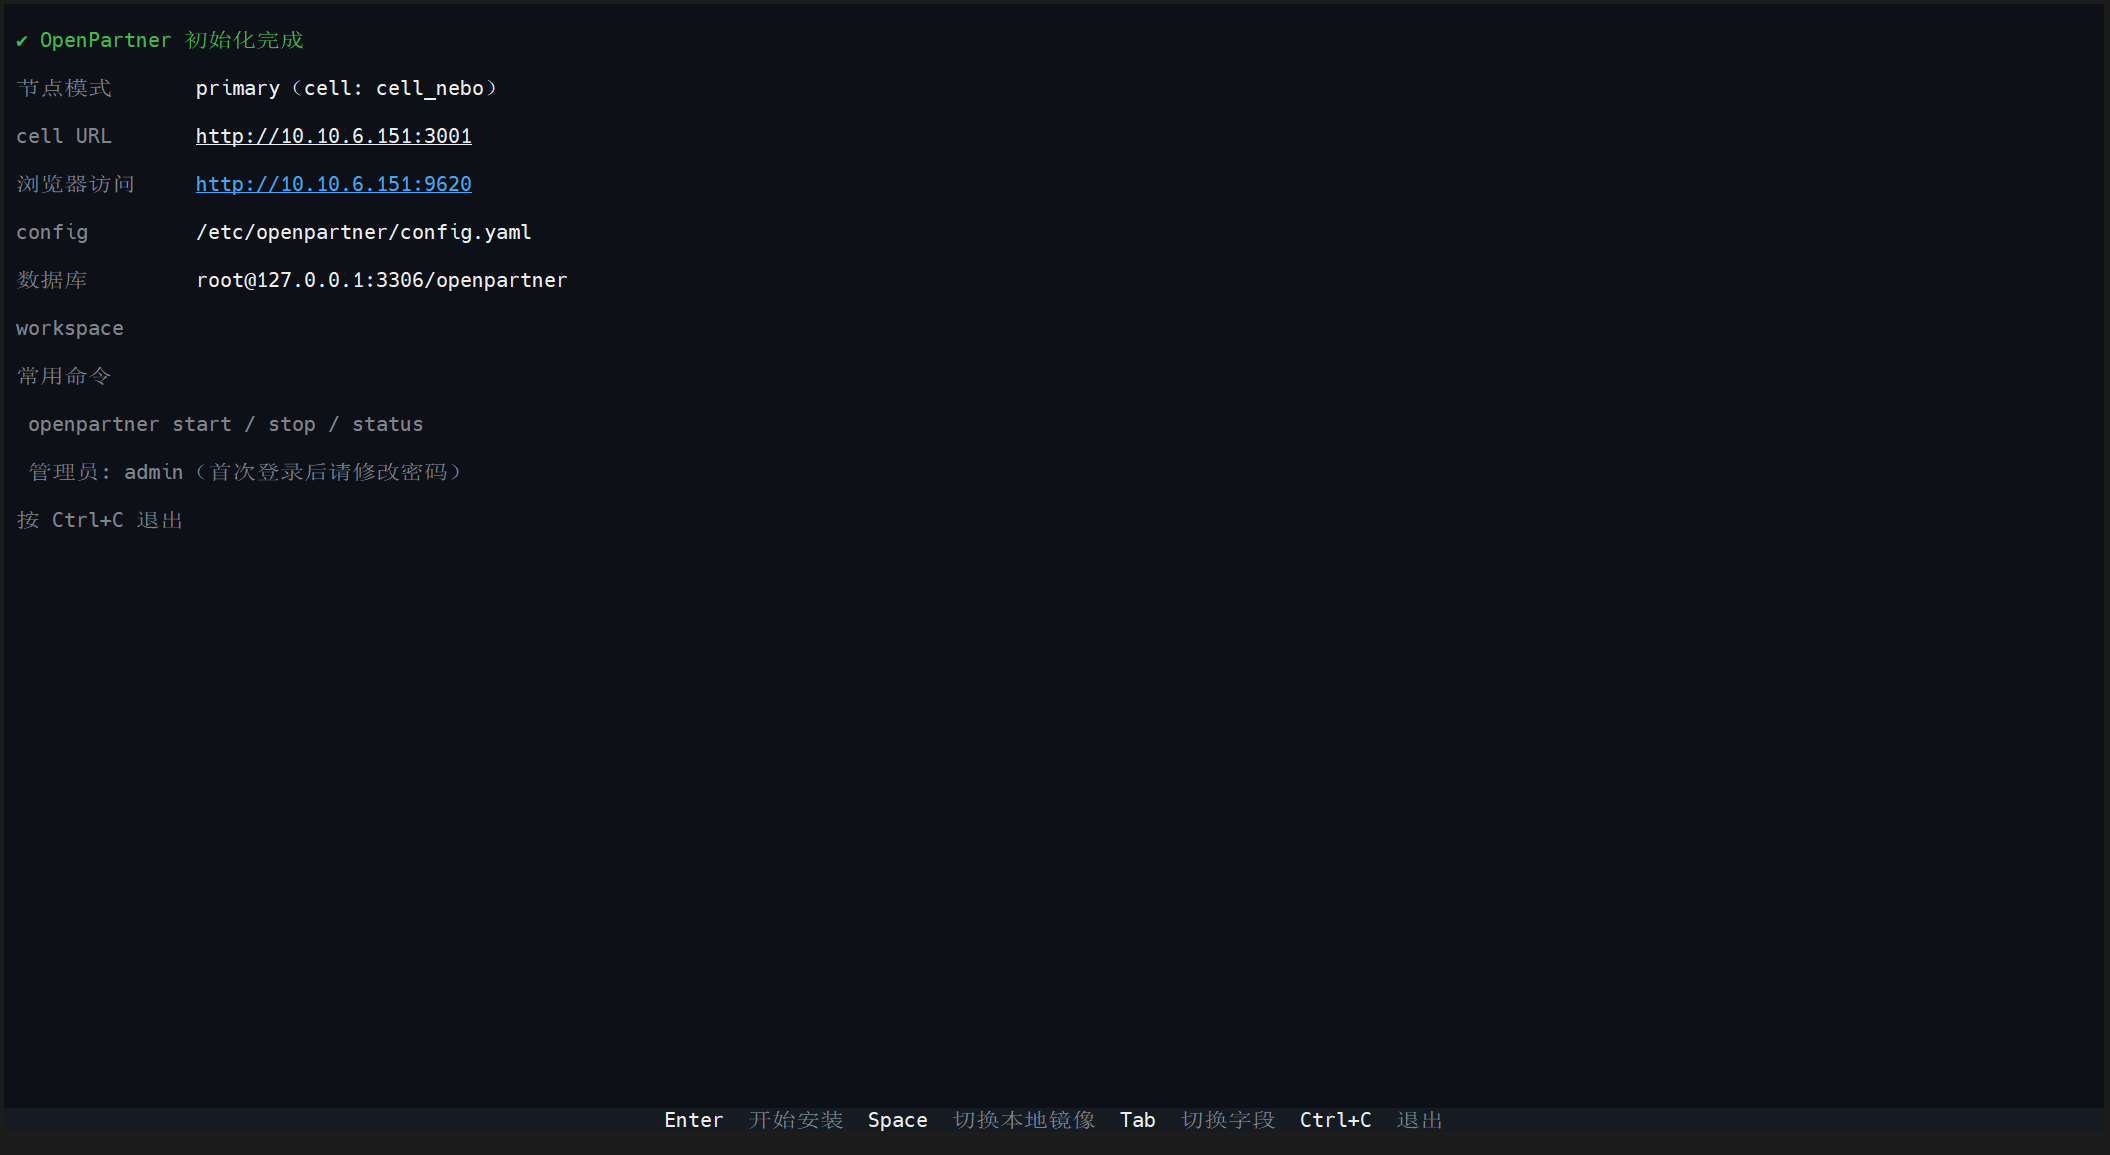
Method 2: Unattended (PowerShell)
For scripts / CI scenarios you can skip the TUI; run the following in Administrator PowerShell:
$params = @{
  server   = @{ port = 3001 }        # changeable: backend API port
  frontend = @{ port = 9620 }        # changeable: web port
  # host=database address; port=database port; user=database account; password=replace with the real password; name=database name (cleared and recreated only when reset_db=true)
  database = @{ host = "127.0.0.1"; port = 3306; user = "root"; password = "<MYSQL_PASSWORD>"; name = "openpartner" }
  workspace = @{ root = "D:\openpartner\workspace" }   # changeable: working directory
  # changeable: frontend image / AI agent image
  images   = @{ frontend = "sogood360/openpartner-frontend:latest"; agent = "sogood360/openpartner-agent:latest" }
  # generated automatically when left empty: login / encryption / internal communication keys, do not change them manually
  secrets  = @{ jwt_secret = ""; encryption_key = ""; encryption_salt = ""; internal_token = "" }
  admin    = @{ password = "<ADMIN_PASSWORD>" }   # changeable: web login password (at least 6 characters)
  # leaving id empty auto-generates cell_a; cell_url=address reachable from the other nodes, use the real IP
  cell     = @{ id = ""; cell_url = "http://<LOCAL_IP>:3001" }
  mode     = "primary"                 # fixed: primary=primary node
  public_base_url = "http://<LOCAL_IP>:9620"   # browser access address, use the real IP
  container_api_url = ""                     # address the container uses to reach the backend, auto-derived when left empty
  # pull_images=init pulls the images automatically; create_frontend_container=creates the frontend container; register_autostart=registers auto-start on boot; reset_db=true only for the first deployment (clears and recreates the database)
  actions  = @{ pull_images = $true; create_frontend_container = $true; register_autostart = $true; reset_db = $true }
}
[System.IO.File]::WriteAllText((Join-Path $PWD "params.json"), ($params | ConvertTo-Json -Depth 10), (New-Object System.Text.UTF8Encoding($false)))
⚠️
register_autostart = $truemeans register auto-start on boot (enabled by default): the backend starts automatically after the computer reboots; if you do not need auto-start, change it to$falseand start the backend manually after every reboot (see below).For a detailed description of every parameter, see Appendix A, "JSON Configuration Parameters".
Run it (Administrator PowerShell):
openpartner init --from-json .\params.json --non-interactive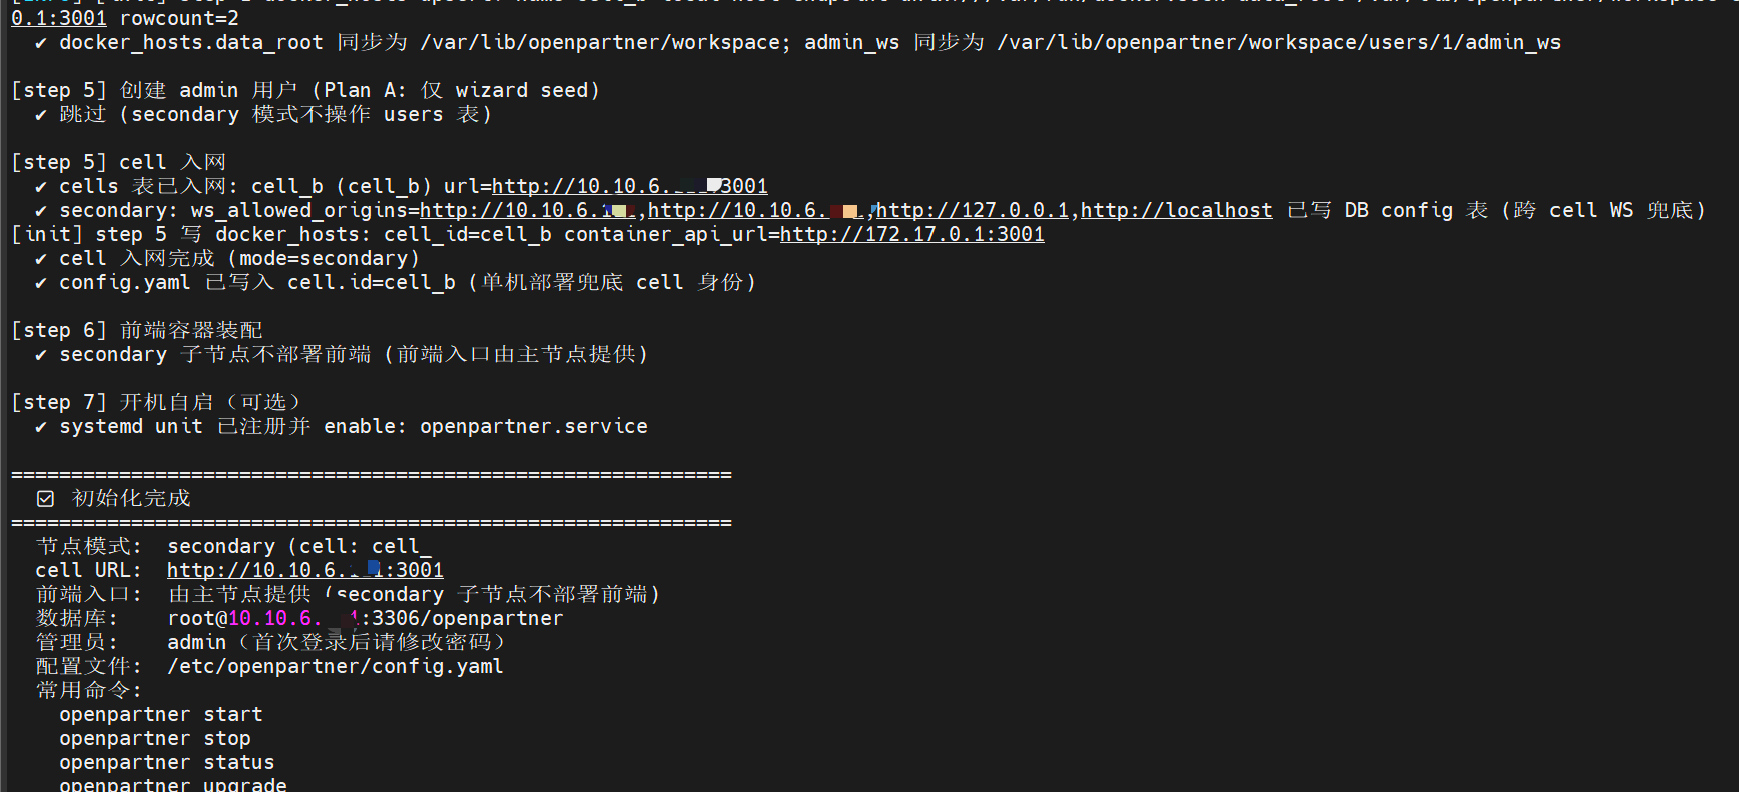
Start and Access
Start the Backend
• Start (Administrator PowerShell):
openpartner start # starts in the background by default
Access
Open
http://<LOCAL_IP>:9620in your browser.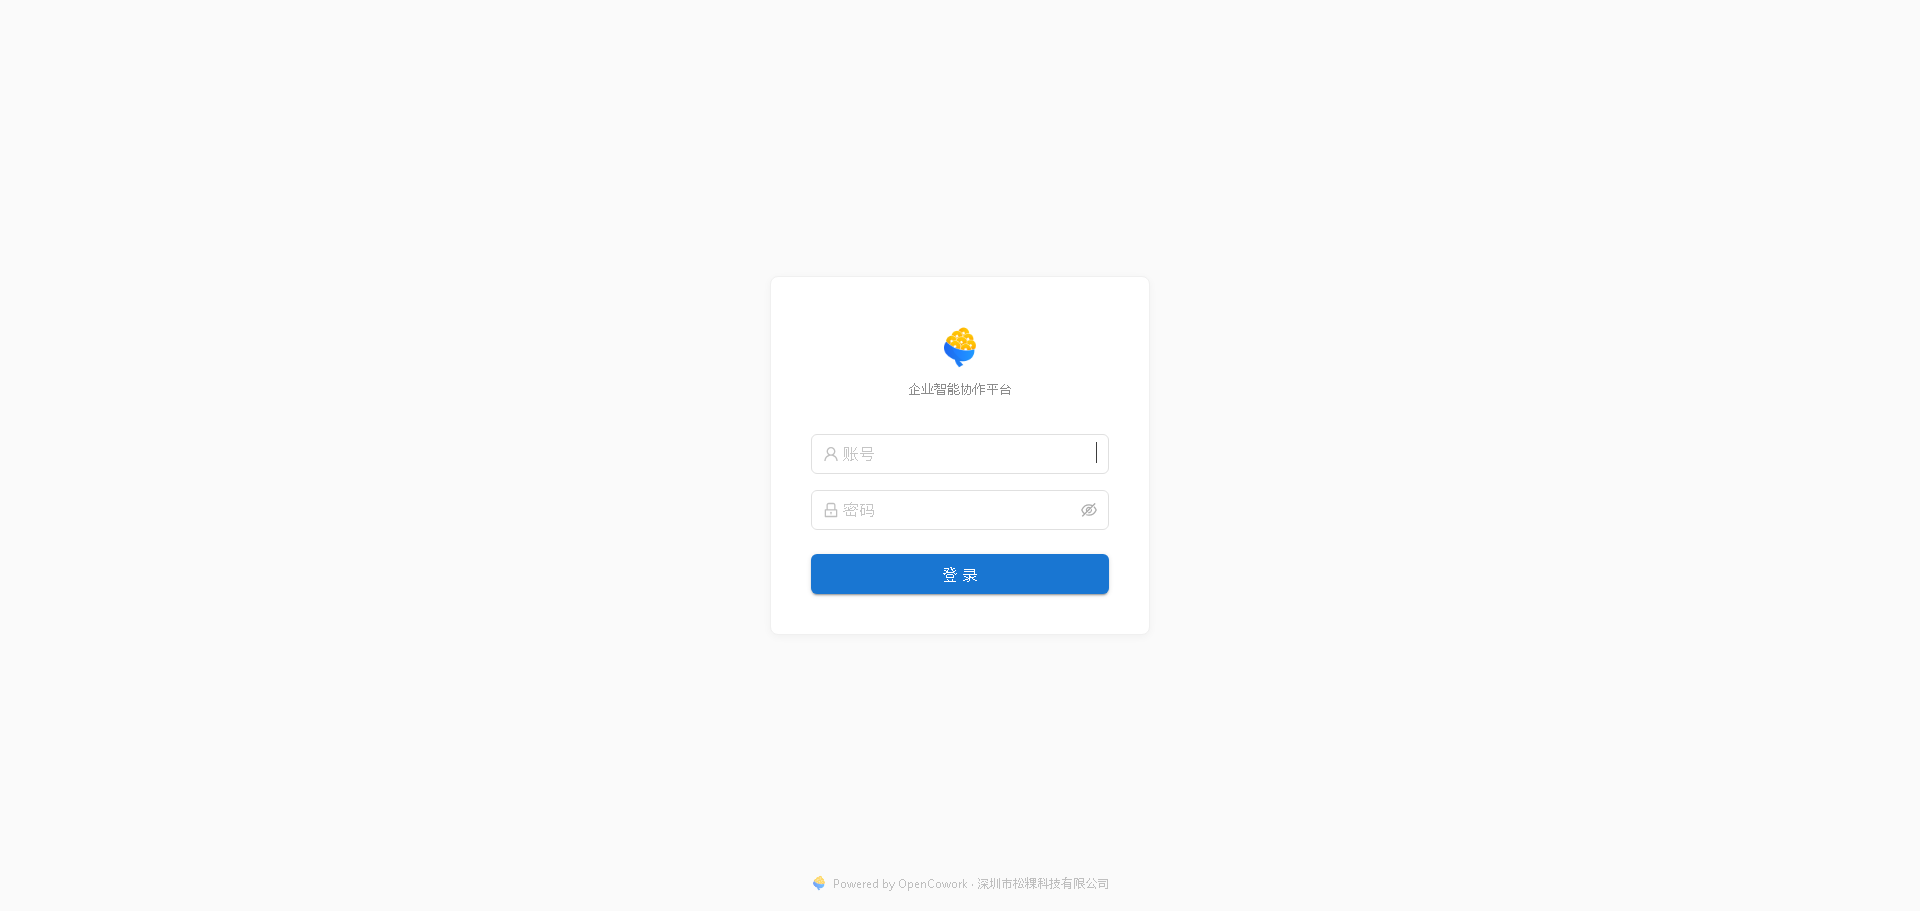
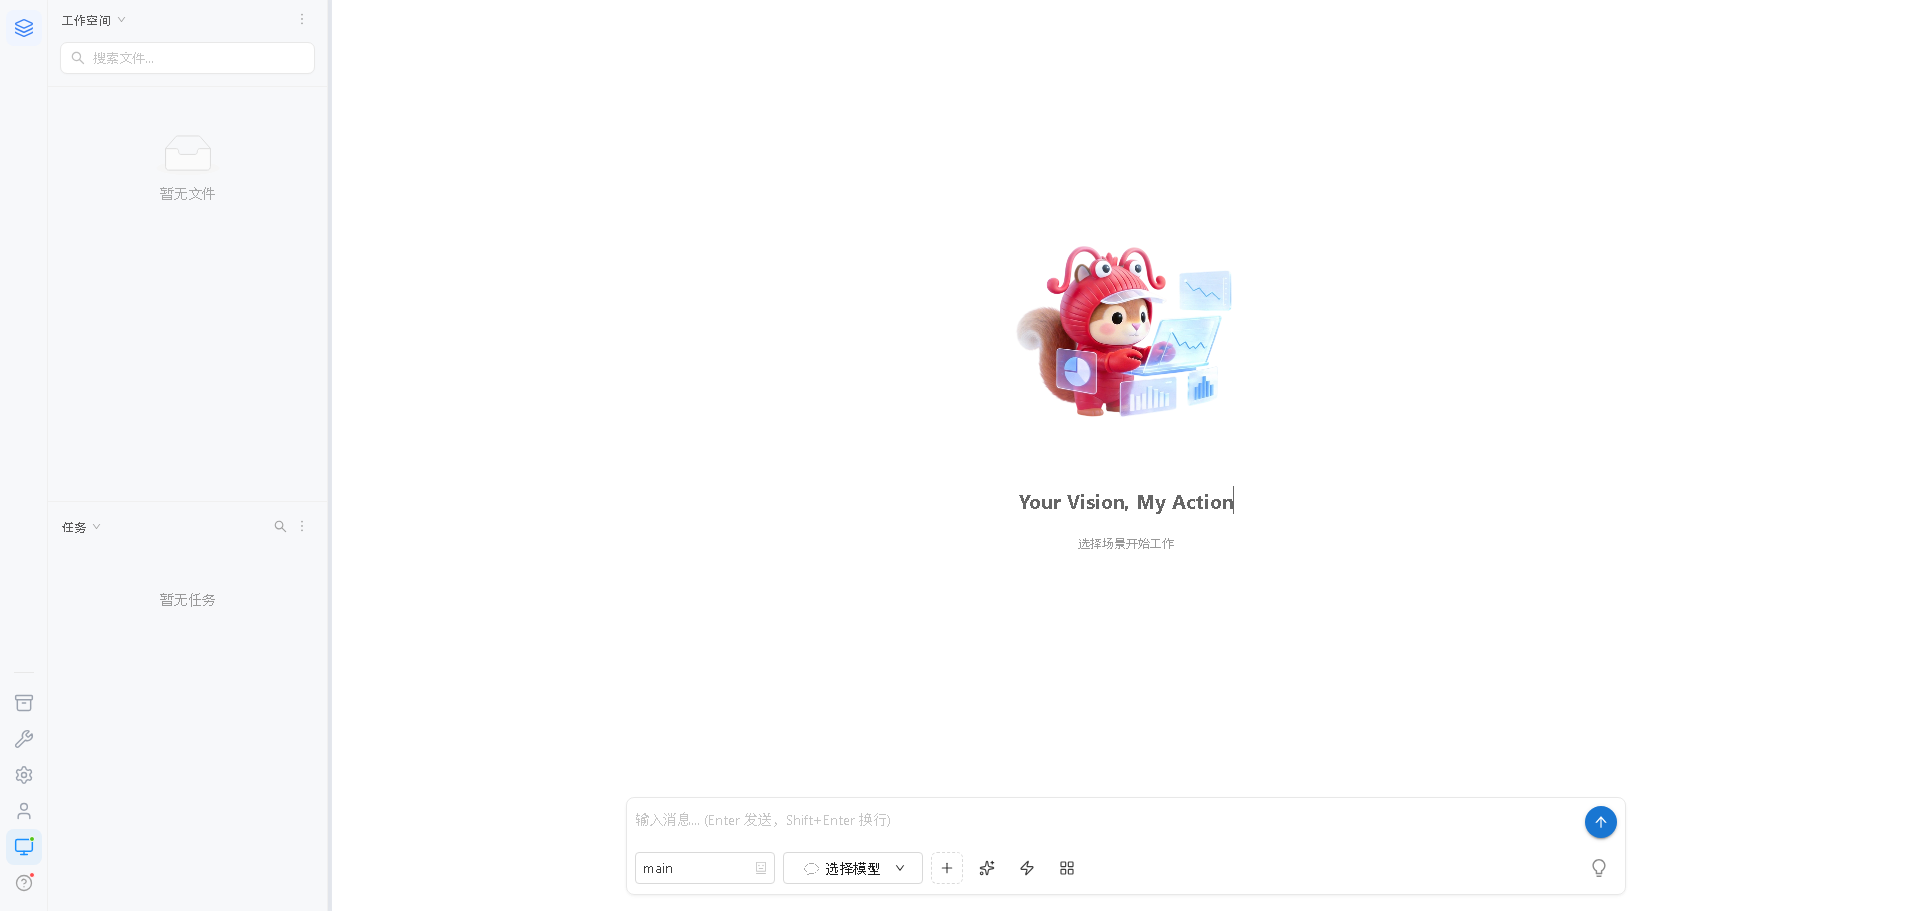
Enter admin and the password you set during initialization, then click Log in.
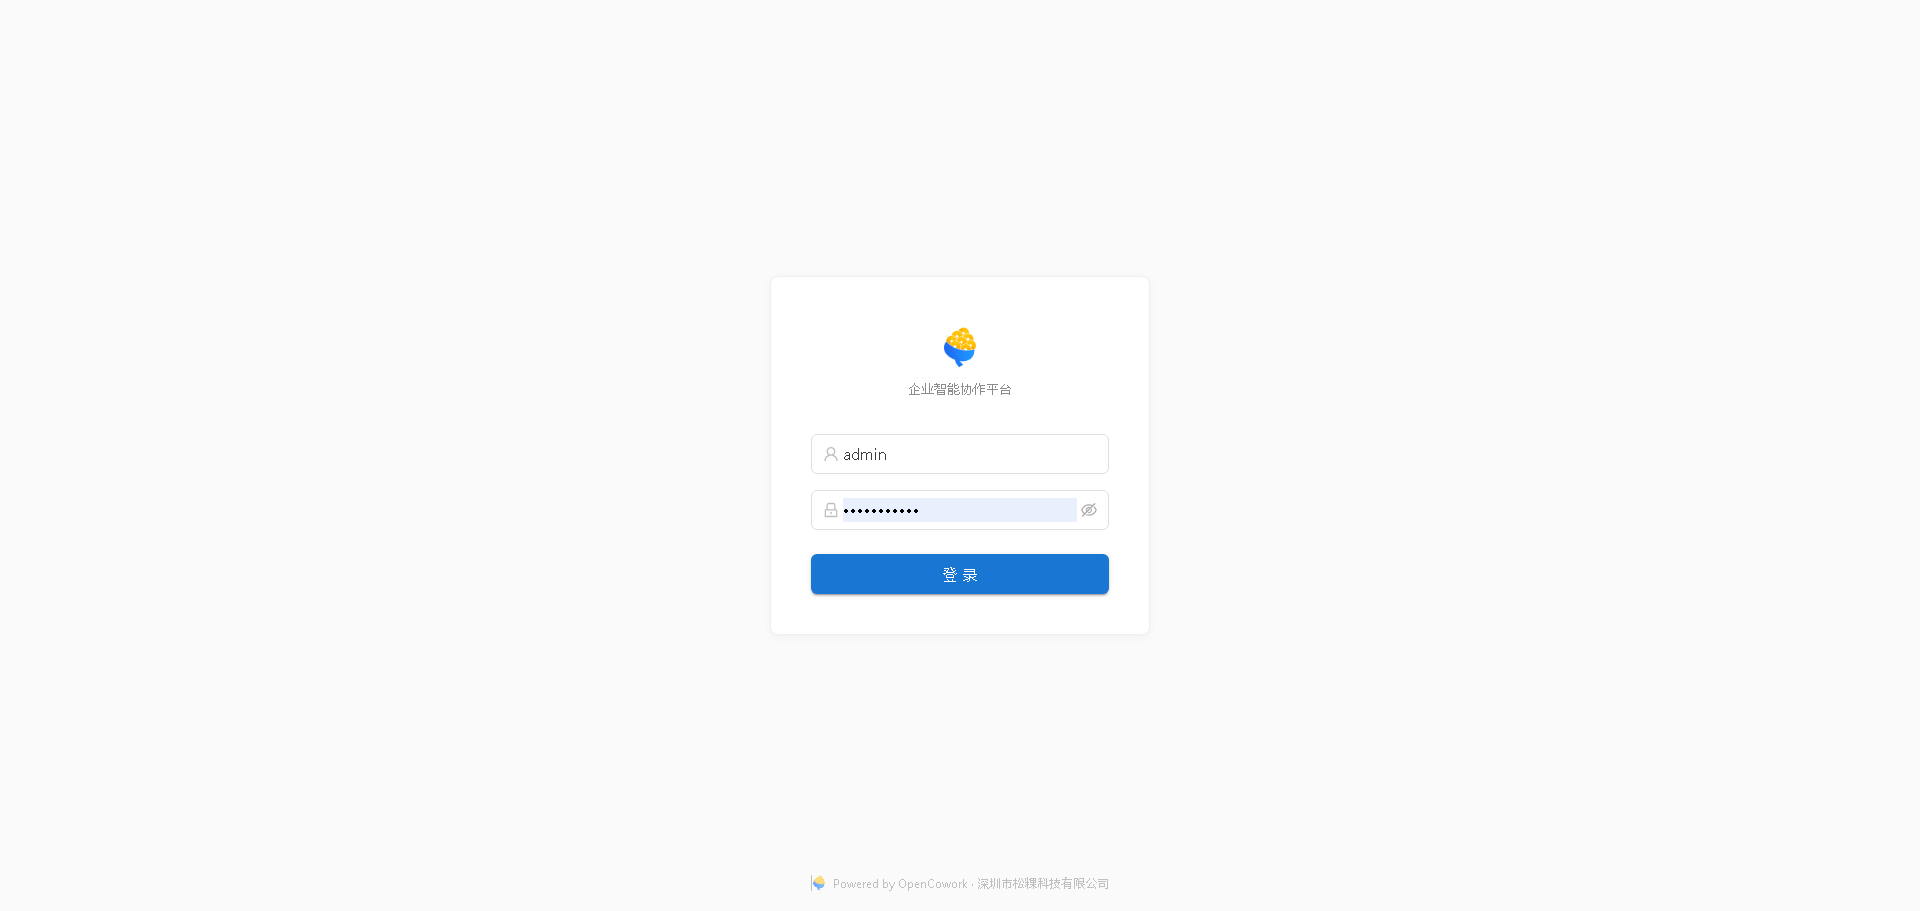
You are ready to use it once you are logged in.
2.3 Method 2: Manual Installation via Official Download
- Open the download page https://openpartner.sogood360.com/download.html;
- Find Manual Installation via Official Download on the page: download the two Windows x64 zip files (the backend service
openpartner-serverand the initialization wizardopenpartner-init-ui);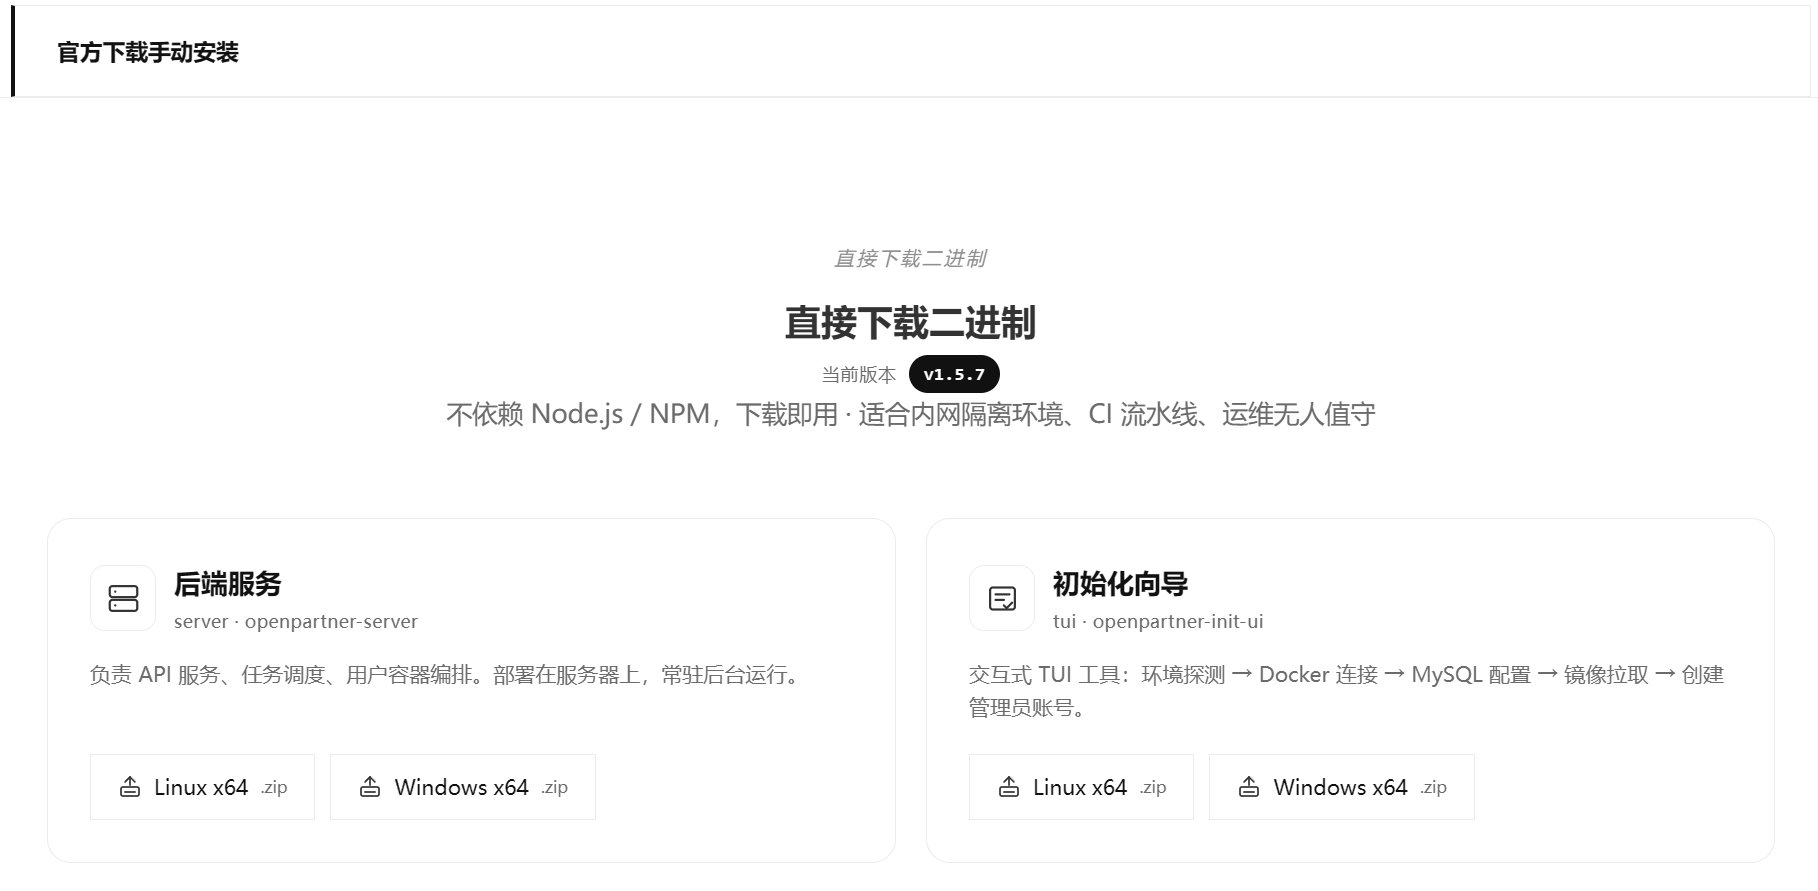
- In Administrator PowerShell, extract them to a fixed directory and add that directory to PATH (run this in the directory where the zip files are):
# create the extraction directory
New-Item -ItemType Directory -Force -Path "C:\openpartner\bin" | Out-Null
# extract the two zip files
Expand-Archive -Path "openpartner-server-*.zip" -DestinationPath "C:\openpartner\bin"
Expand-Archive -Path "openpartner-init-ui-*.zip" -DestinationPath "C:\openpartner\bin"
# add the extraction directory to PATH
[Environment]::SetEnvironmentVariable("Path", "$env:Path;C:\openpartner\bin", "Machine")
⚠️ The PATH change takes effect only after you reopen your terminal.
⚠️ The official download provides the latest version only; to install a specific historical version, use Method 1 and specify the version number.
Verify the version:
openpartner version # expected: prints a version number like openpartner 1.5.xAfter the installation, the remaining steps are the same as in Method 1: for initialization, starting and access, see 2.2.
III. Linux Version
3.1 Preparation
Install Docker (run as administrator):
⚠️ Skip this section if Docker is already installed.
sudo apt update
sudo apt install -y docker.io
sudo systemctl enable --now docker
docker --version
⚠️ RHEL 9 / Rocky 9: use
dnfinstead ofaptfor the commands in this section (you must add the official yum repository for Docker first); the remaining steps are the same.⚠️ Docker Hub (https://hub.docker.com) must be reachable.
Install MySQL (Docker version) (run as administrator):
⚠️ Skip this section if MySQL is already installed.
docker pull mysql:8.4
docker run -d --name mysql8 --restart unless-stopped -p 3306:3306 \
  -e MYSQL_ROOT_PASSWORD="openpartner2049" -e TZ=Asia/Shanghai -v mysql8-data:/var/lib/mysql \
  mysql:8.4 --character-set-server=utf8mb4 --collation-server=utf8mb4_general_ci
Install Node.js (npm) (run as administrator):
⚠️ Skip this section if it is already installed; only Method 1 (NPM installation) requires it.
Debian / Ubuntu:
curl -fsSL https://deb.nodesource.com/setup_20.x | sudo -E bash -
sudo apt-get install -y nodejs
RHEL / Rocky:
curl -fsSL https://rpm.nodesource.com/setup_20.x | sudo bash -
sudo dnf install -y nodejs
⚠️ After npm is installed, add the npm installation directory to the PATH environment variable; otherwise the terminal cannot find the
openpartnercommand (it reports "command not found").
Install Git (run as administrator):
⚠️ Skip this section if Git is already installed.
sudo apt install -y git # use sudo dnf install -y git on RHEL / RockyVerify the environment:
docker --version    # should display ≥ 20.10
docker ps --filter name=mysql8   # should show the mysql8 container running
node --version      # should display ≥ 18
npm --version       # should display a version number
git --version       # should display a version number
If all of the commands above print a version number, the environment is ready (Method 2 does not require node / npm).
Regular User (Directory Authorization)
⚠️ Installing as a regular user requires the root account to authorize the directories on the target server once in advance.
On the target server, run the following as root, replacing <REGULAR_USERNAME> with the actual login account:
NORMAL_USER="<REGULAR_USERNAME>"
NORMAL_GROUP="$(id -gn "$NORMAL_USER")"
NORMAL_HOME="$(getent passwd "$NORMAL_USER" | cut -d: -f6)"

install -d -o "$NORMAL_USER" -g "$NORMAL_GROUP" -m 750 \
  "$NORMAL_HOME/.local" \
  "$NORMAL_HOME/.local/bin" \
  "$NORMAL_HOME/ocw" \
  "$NORMAL_HOME/openpartner" \
  "$NORMAL_HOME/openpartner/workspace" \
  "$NORMAL_HOME/openpartner/logs"

install -d -o "$NORMAL_USER" -g "$NORMAL_GROUP" -m 700 /tmp/openpartner-init-ui
install -d -o "$NORMAL_USER" -g "$NORMAL_GROUP" -m 750 /var/cache/git-edit
install -d -o "$NORMAL_USER" -g "$NORMAL_GROUP" -m 700 /etc/openpartner
chown -R "$NORMAL_USER:$NORMAL_GROUP" \
  /tmp/openpartner-init-ui /var/cache/git-edit /etc/openpartner
chmod -R u+rwX,go-rwx /tmp/openpartner-init-ui /etc/openpartner
chmod -R u+rwX,go-rwx /var/cache/git-edit

usermod -aG docker "$NORMAL_USER"
After the administrator has completed the authorization, the regular user logs out and logs back in, and first runs cd "$HOME/openpartner"; all of the following steps are executed in the same regular user terminal, without using sudo.
Choose one of the two installation methods: Method 1: One-Click NPM Install (3.2) or Method 2: Manual Installation via Official Download (3.3).
3.2 Method 1: One-Click NPM Install
The commands you get after the installation:
openpartner: the backend service and the command-line toolopenpartner-init-ui: the graphical initialization wizard
Run the following in the local terminal:
# installs the latest version by default; to pin a version: sudo npm i -g @sogood360/openpartner@<VERSION>
sudo npm i -g @sogood360/openpartner
⚠️ Regular user (no sudo required):
npm i -g --prefix "$HOME/.local" @sogood360/openpartner(prerequisite: the directory authorization in 3.1 is complete); the command is installed in$HOME/.local/bin, so add that directory to PATH manually if it is not there.
⚠️ If
openpartner: command not foundoropenpartner: Permission deniedappears after the installation, see the FAQ in this document.
Verify the version:
openpartner version # expected: prints a version number like openpartner 1.5.xInitialization
⚠️ Method 1 and Method 2 are mutually exclusive.
Method 1: Graphical wizard (recommended)
The initialization wizard is an interactive TUI program that asks a few key questions: how to connect to Docker, how to connect to MySQL, where to pull the images from, and how to set the administrator password.
Run the following in the local terminal:
openpartner-init-ui # enter the graphical initialization interfaceInterface controls:
Tabswitches between form fields,↑↓switches between options,Enterconfirms. ⚠️ It must run in a real terminal (a real SSH shell); Git Bash and IDE built-in terminals exit immediately because they have no TTY.
Questions the wizard asks (in order):
- Database connection: the address defaults to
127.0.0.1:3306(changeable; for a remote database enter<PUBLIC_IP>:<PORT>); - Username: defaults to
root(it needs read/write and database-creation permissions); - Password: enter the MySQL password (
<MYSQL_PASSWORD>, for exampleopenpartner2049). - Administrator account: set the admin password (
<ADMIN_PASSWORD>, at least 6 characters, confirm it once more). - Access and ports: the service address defaults to the internal IP; for public access change it to the public IP (
<PUBLIC_IP>); keep the default service port (maximum 65535); - Working directory: defaults to
/var/lib/openpartner/workspace; a regular user should enter the actual path (for example/home/<username>/openpartner/workspace), not$HOME/openpartner/workspacedirectly. - Image source: the images are pulled from the network by default; if local images are available, switch to using the local images.
- Run the installation: check that everything is correct and press
Enter; "OpenPartner initialization complete" means success, pressCtrl+Cto exit.
Method 2: Unattended (command line)
For scripts / CI scenarios you can skip the TUI; run the following in the local terminal:
Regular user: replace every
/tmp/ocwin the commands in this section with$HOME/ocw; replace/var/lib/openpartner/workspacein the JSON with$HOME/openpartner/workspace(writing$HOME/openpartner/workspacedirectly is enough, it is replaced with your home directory at execution time); changeregister_autostarttofalse. Regular users do not register the system to start automatically on boot.
mkdir -p /tmp/ocw
cat > /tmp/ocw/params.json <<EOF
{
  "server": { "port": 3001 },
  "frontend": { "port": 9620 },
  "database": { "host": "127.0.0.1", "port": 3306, "user": "root", "password": "<MYSQL_PASSWORD>", "name": "openpartner" },
  "workspace": { "root": "/var/lib/openpartner/workspace" },
  "images": { "frontend": "sogood360/openpartner-frontend:latest", "agent": "sogood360/openpartner-agent:latest" },
  "secrets": { "jwt_secret": "", "encryption_key": "", "encryption_salt": "", "internal_token": "" },
  "admin": { "password": "<ADMIN_PASSWORD>" },
  "cell": { "id": "", "cell_url": "http://<SERVER_IP>:3001" },
  "mode": "primary",
  "public_base_url": "http://<SERVER_IP>:9620",
  "container_api_url": "",
  "actions": { "pull_images": true, "create_frontend_container": true, "register_autostart": true, "reset_db": true }
}
EOF
For a detailed description of every parameter, see Appendix A, "JSON Configuration Parameters".
Run it (local terminal):
openpartner init --from-json /tmp/ocw/params.json --non-interactive
Start and Access
Start the Backend
• Start (local terminal):
openpartner start # starts in the background by default
Access
Open
http://<LOCAL_IP>:9620in your browser.Enter admin and the password you set during initialization, then click Log in.
You are ready to use it once you are logged in.
3.3 Method 2: Manual Installation via Official Download
- Open the download page https://openpartner.sogood360.com/download.html;
- Find Manual Installation via Official Download on the page: download the two Linux x64 zip files (the backend service
openpartner-serverand the initialization wizardopenpartner-init-ui); - Extract them to a fixed directory and add that directory to PATH:
sudo mkdir -p /opt/openpartner/bin
sudo unzip openpartner-server-*.zip -d /opt/openpartner/bin
sudo unzip openpartner-init-ui-*.zip -d /opt/openpartner/bin
sudo chmod +x /opt/openpartner/bin/*
echo 'export PATH=$PATH:/opt/openpartner/bin' >> ~/.bashrc
source ~/.bashrc
⚠️ Regular user: extract to
$HOME/openpartner/binand removesudofrom the commands; everything else is the same.⚠️ The official download provides the latest version only; to install a specific historical version, use Method 1 and specify the version number.
Verify the version:
openpartner version # expected: prints a version number like openpartner 1.5.xAfter the installation, the remaining steps are the same as in Method 1: for initialization, starting and access, see 3.2.
IV. Common Commands
openpartner start     # start (runs in the background by default since 1.5.7)
openpartner stop      # stop
openpartner status    # view the running status
To upgrade OpenPartner, see the "Upgrade Guide".
Appendix A · JSON Configuration Parameters
| Section | Key | Default | Description |
|---|---|---|---|
server | port | 3001 | Backend API port (changeable) |
frontend | port | 9620 | Web port (changeable) |
database | host | 127.0.0.1 | Database address (use the primary node address in a multi-node deployment) |
port | 3306 | Database port | |
user | root | Database account (changeable) | |
password | Empty | Database password (replace with the real value) | |
name | openpartner | Database name (cleared and recreated only when reset_db=true) | |
workspace | root | Platform default | Workspace root directory (changeable; for a regular user $HOME/openpartner/workspace) |
images | frontend / agent | Current tag | Image reference (changeable) |
cell | id | cell_a | Node ID, format cell_<SINGLE_LETTER>, must be unique within the cluster |
name | Same as id | Node display name | |
cell_url | — | Address reachable from the other nodes, 127.0.0.1 must not be used | |
container_api_url | — | Automatic when empty | Address the container uses to reach the backend (Windows host.docker.internal / Linux 172.17.0.1) |
mode | — | primary | primary=primary node; secondary=additional node |
public_base_url | — | Automatically derived | Browser access address, use the real IP |
secrets | jwt_secret etc. | Automatically generated when empty | Login / encryption / internal communication keys, generated automatically when left empty, do not change them manually |
admin | password | — | Initial administrator password (changeable) |
actions | reset_db | false | ⚠️ true=clears and recreates the database, use it for the first deployment only |
register_autostart | true | Whether to register auto-start on boot (false for regular users) | |
create_frontend_container | true | Whether to create the frontend container (false when adding a node) | |
pull_images | true | init pulls the images automatically (the tag matches the version installed through npm) |
Appendix B · JSON Example
When a regular user uses the following example, replace the working directory as described in the initialization section 3.2 and change register_autostart to false.
{
  "mode": "primary",
  "server": { "port": 3001 },
  "frontend": { "port": 9620 },
  "database": { "host": "127.0.0.1", "port": 3306, "user": "root", "password": "<MYSQL_PASSWORD>", "name": "openpartner" },
  "workspace": { "root": "/var/lib/openpartner/workspace" },
  "images": { "frontend": "sogood360/openpartner-frontend:<VERSION>", "agent": "sogood360/openpartner-agent:<VERSION>" },
  "secrets": { "jwt_secret": "", "encryption_key": "", "encryption_salt": "", "internal_token": "" },
  "admin": { "password": "admin123456" },
  "cell": { "id": "", "name": "", "cell_url": "http://<LOCAL_IP>:3001", "region": "", "zone": "" },
  "container_api_url": "",
  "public_base_url": "http://<LOCAL_IP>:9620",
  "actions": { "pull_images": true, "create_frontend_container": true, "register_autostart": true, "reset_db": true }
}
Appendix C · Configuration File Locations
| Platform | Path |
|---|---|
| Windows | C:\ProgramData\openpartner\config.yaml |
| Linux | /etc/openpartner/config.yaml |
Appendix D · FAQ
Q: The openpartner-init-ui wizard exits immediately with stdio.isTTY === false?
openpartner-init-uiis an interactive wizard and must run in a terminal that supports interaction (TTY). Run it again in Windows Terminal / PowerShell (Windows) or in the terminal of an SSH session (Linux); Git Bash and IDE built-in terminals do not support interaction and exit immediately.
Q: The MySQL connection fails with "Access denied for user 'root'"?
- Make sure the
rootpassword is correct; - When MySQL is remote, make sure the firewall allows port 3306 and permits remote connections.
Q: Docker fails to pull the images with permission denied?
- Windows: make sure Docker Desktop is running;
- Linux: the administrator runs
sudo usermod -aG docker <REGULAR_USERNAME>, and the regular user then logs out and logs back in.
Q: The web page cannot be opened (port 9620 is unreachable)?
- Windows:
New-NetFirewallRule -DisplayName "OpenPartner-9620" -Direction Inbound -Protocol TCP -LocalPort 9620 -Action Allow -Profile Any; - Linux: the administrator runs the firewall command. On Ubuntu / Debian use
sudo ufw allow 9620/tcp, on RHEL / Rocky usesudo firewall-cmd --zone=public --add-port=9620/tcp --permanent && sudo firewall-cmd --reload; - On cloud servers, also allow the port in the "security group" of the console.
Q: A user's AI container will not start and the log reports port already in use?
- Cause: by default, each user's AI container occupies a consecutive range of ports starting at 5097 (5097+); when those ports are taken by other processes, the container cannot start;
- Open
config.yaml(on Linux it is usually located at/etc/openpartner/config.yaml) and changeOPENPARTNER_USER_BASE_PORTto a new starting port (for example6097); - Restart the backend so that the configuration takes effect:
openpartner stop && openpartner start; - Start the AI container of the affected user again and confirm that the log no longer reports a port conflict.
Q: openpartner: command not found?
- Add the npm installation directory to PATH and write it into the shell configuration; it takes effect immediately: first run
echo 'export PATH=$PATH:$(npm config get prefix)/bin' >> ~/.bashrc, then runsource ~/.bashrc; - If the command is still not found, reinstall it:
npm i -g @sogood360/openpartner --force.
Q: openpartner: Permission denied?
- Run
chmod +x "$(npm config get prefix)/bin/openpartner"; - If it still does not work, reinstall it:
npm i -g @sogood360/openpartner --force.
Q: You forgot the administrator password?
- Run
openpartner reset-admin-password(interactive reset).