
Workspace
Applicable roles: All users
Prerequisites: Signed in; an administrator has configured the default language model and assigned a node to you
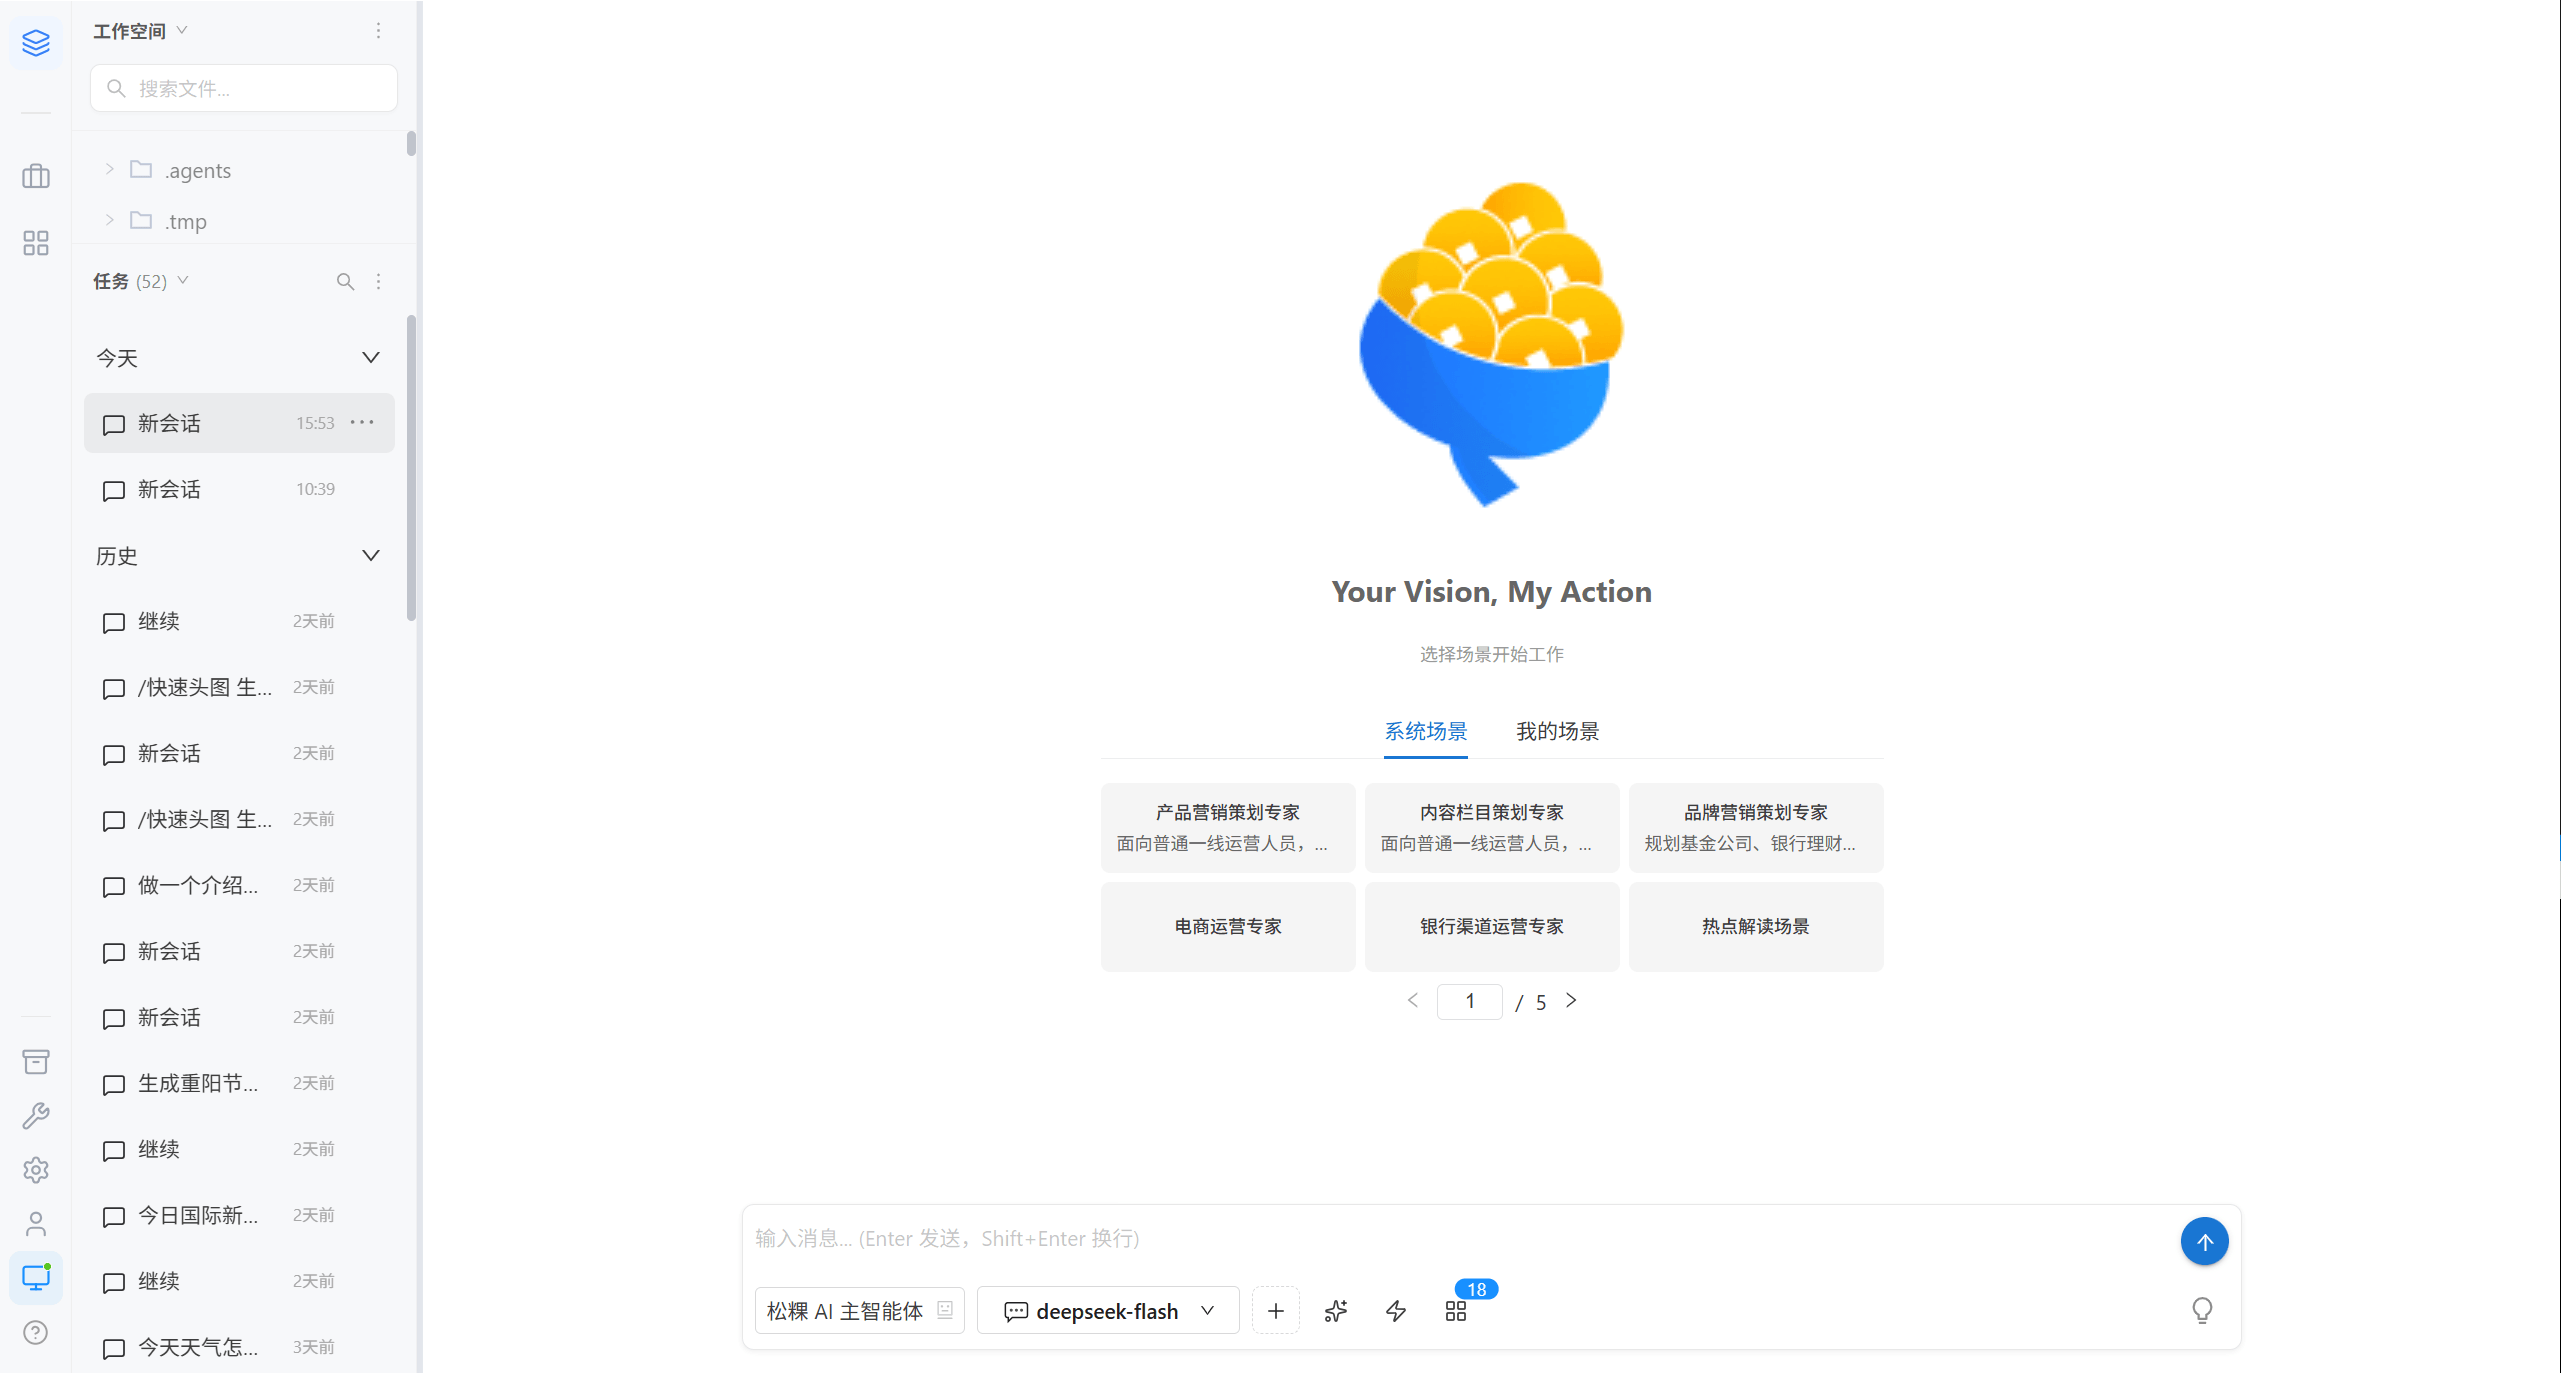
The workspace is the main interface for everyday use, and consists of three parts: the task list, the conversation area, and workspace files.
1. Task Management
A multi-turn conversation is one task, which is stored in the lower half of the left panel.
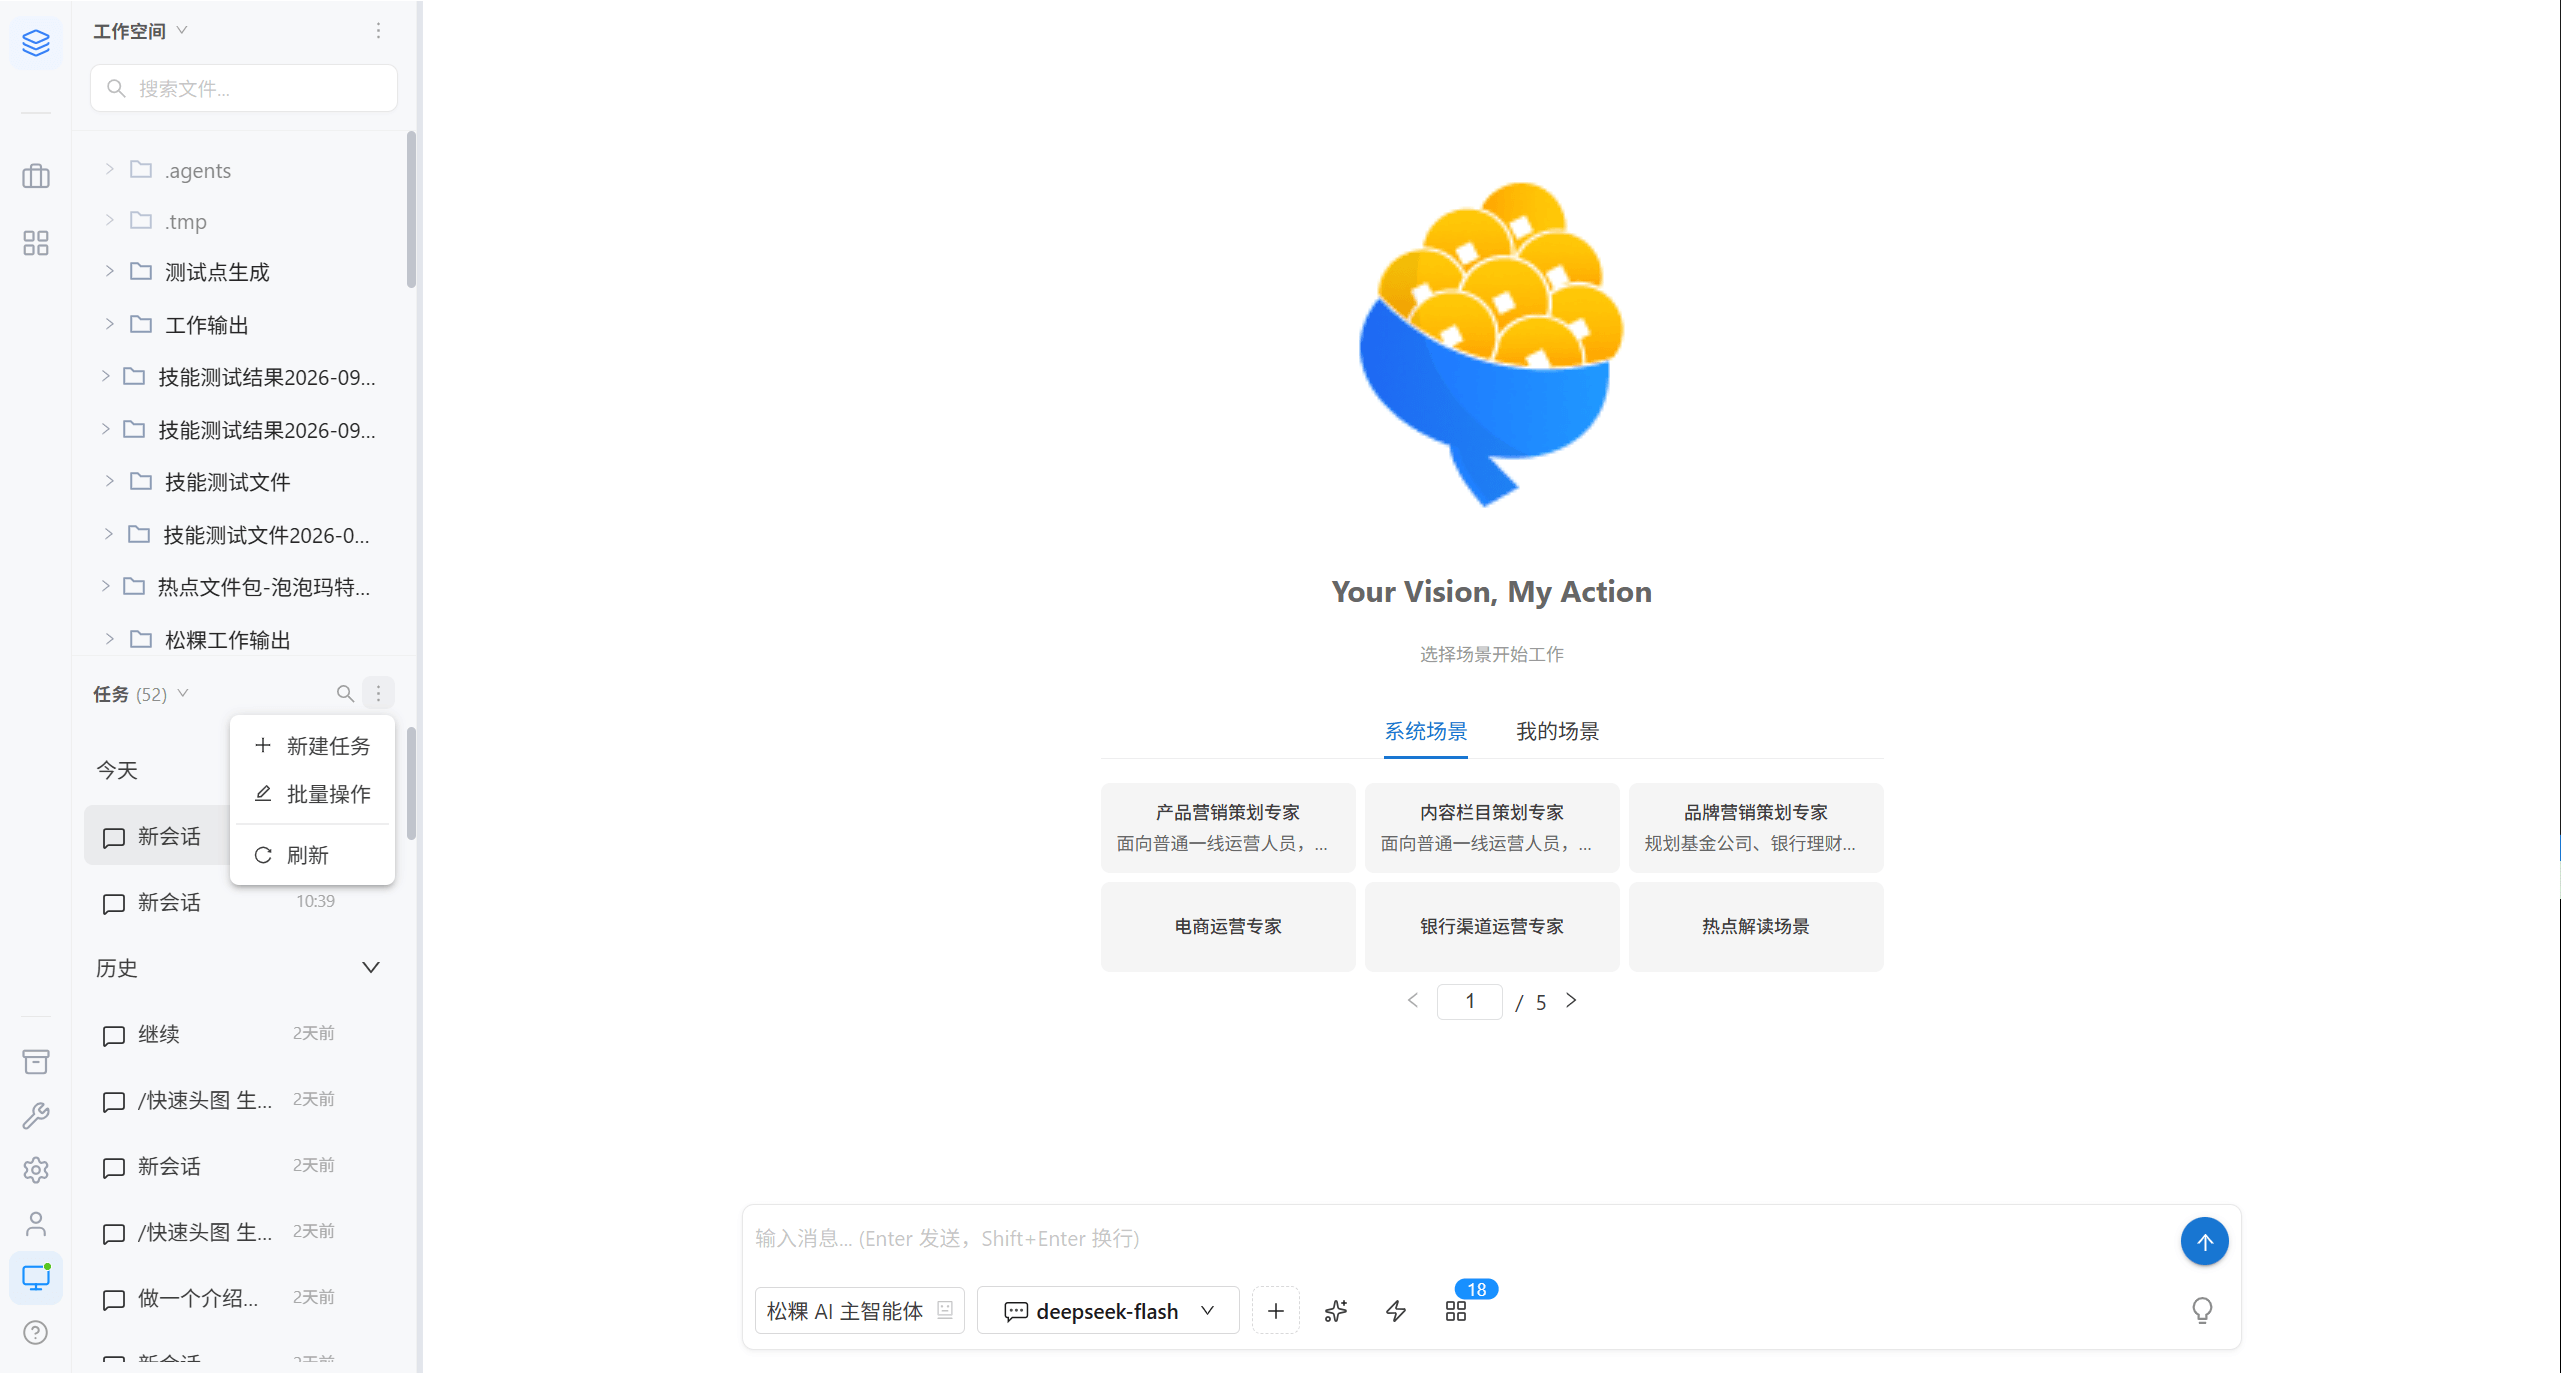
Grouping Rules
| Group | Contains |
|---|---|
| Today | Sessions created today |
| Yesterday | Sessions created yesterday |
| History | Earlier sessions |
Common Actions
| Action | Path | Description |
|---|---|---|
| New task | The "New" button in the input area, or the top-right corner of the task list | Each new task opens an independent context |
| Rename | The "⋯" on the right of a task list item | Makes it easy to search by topic |
| Delete | The "⋯" on the right of a task list item | Cannot be recovered after deletion |
| Search | The search box above the task list | Filters by title keyword |
| Bulk delete | "⋯" in the top-right of the task list → "Bulk Actions" | Check multiple items and delete them all at once |
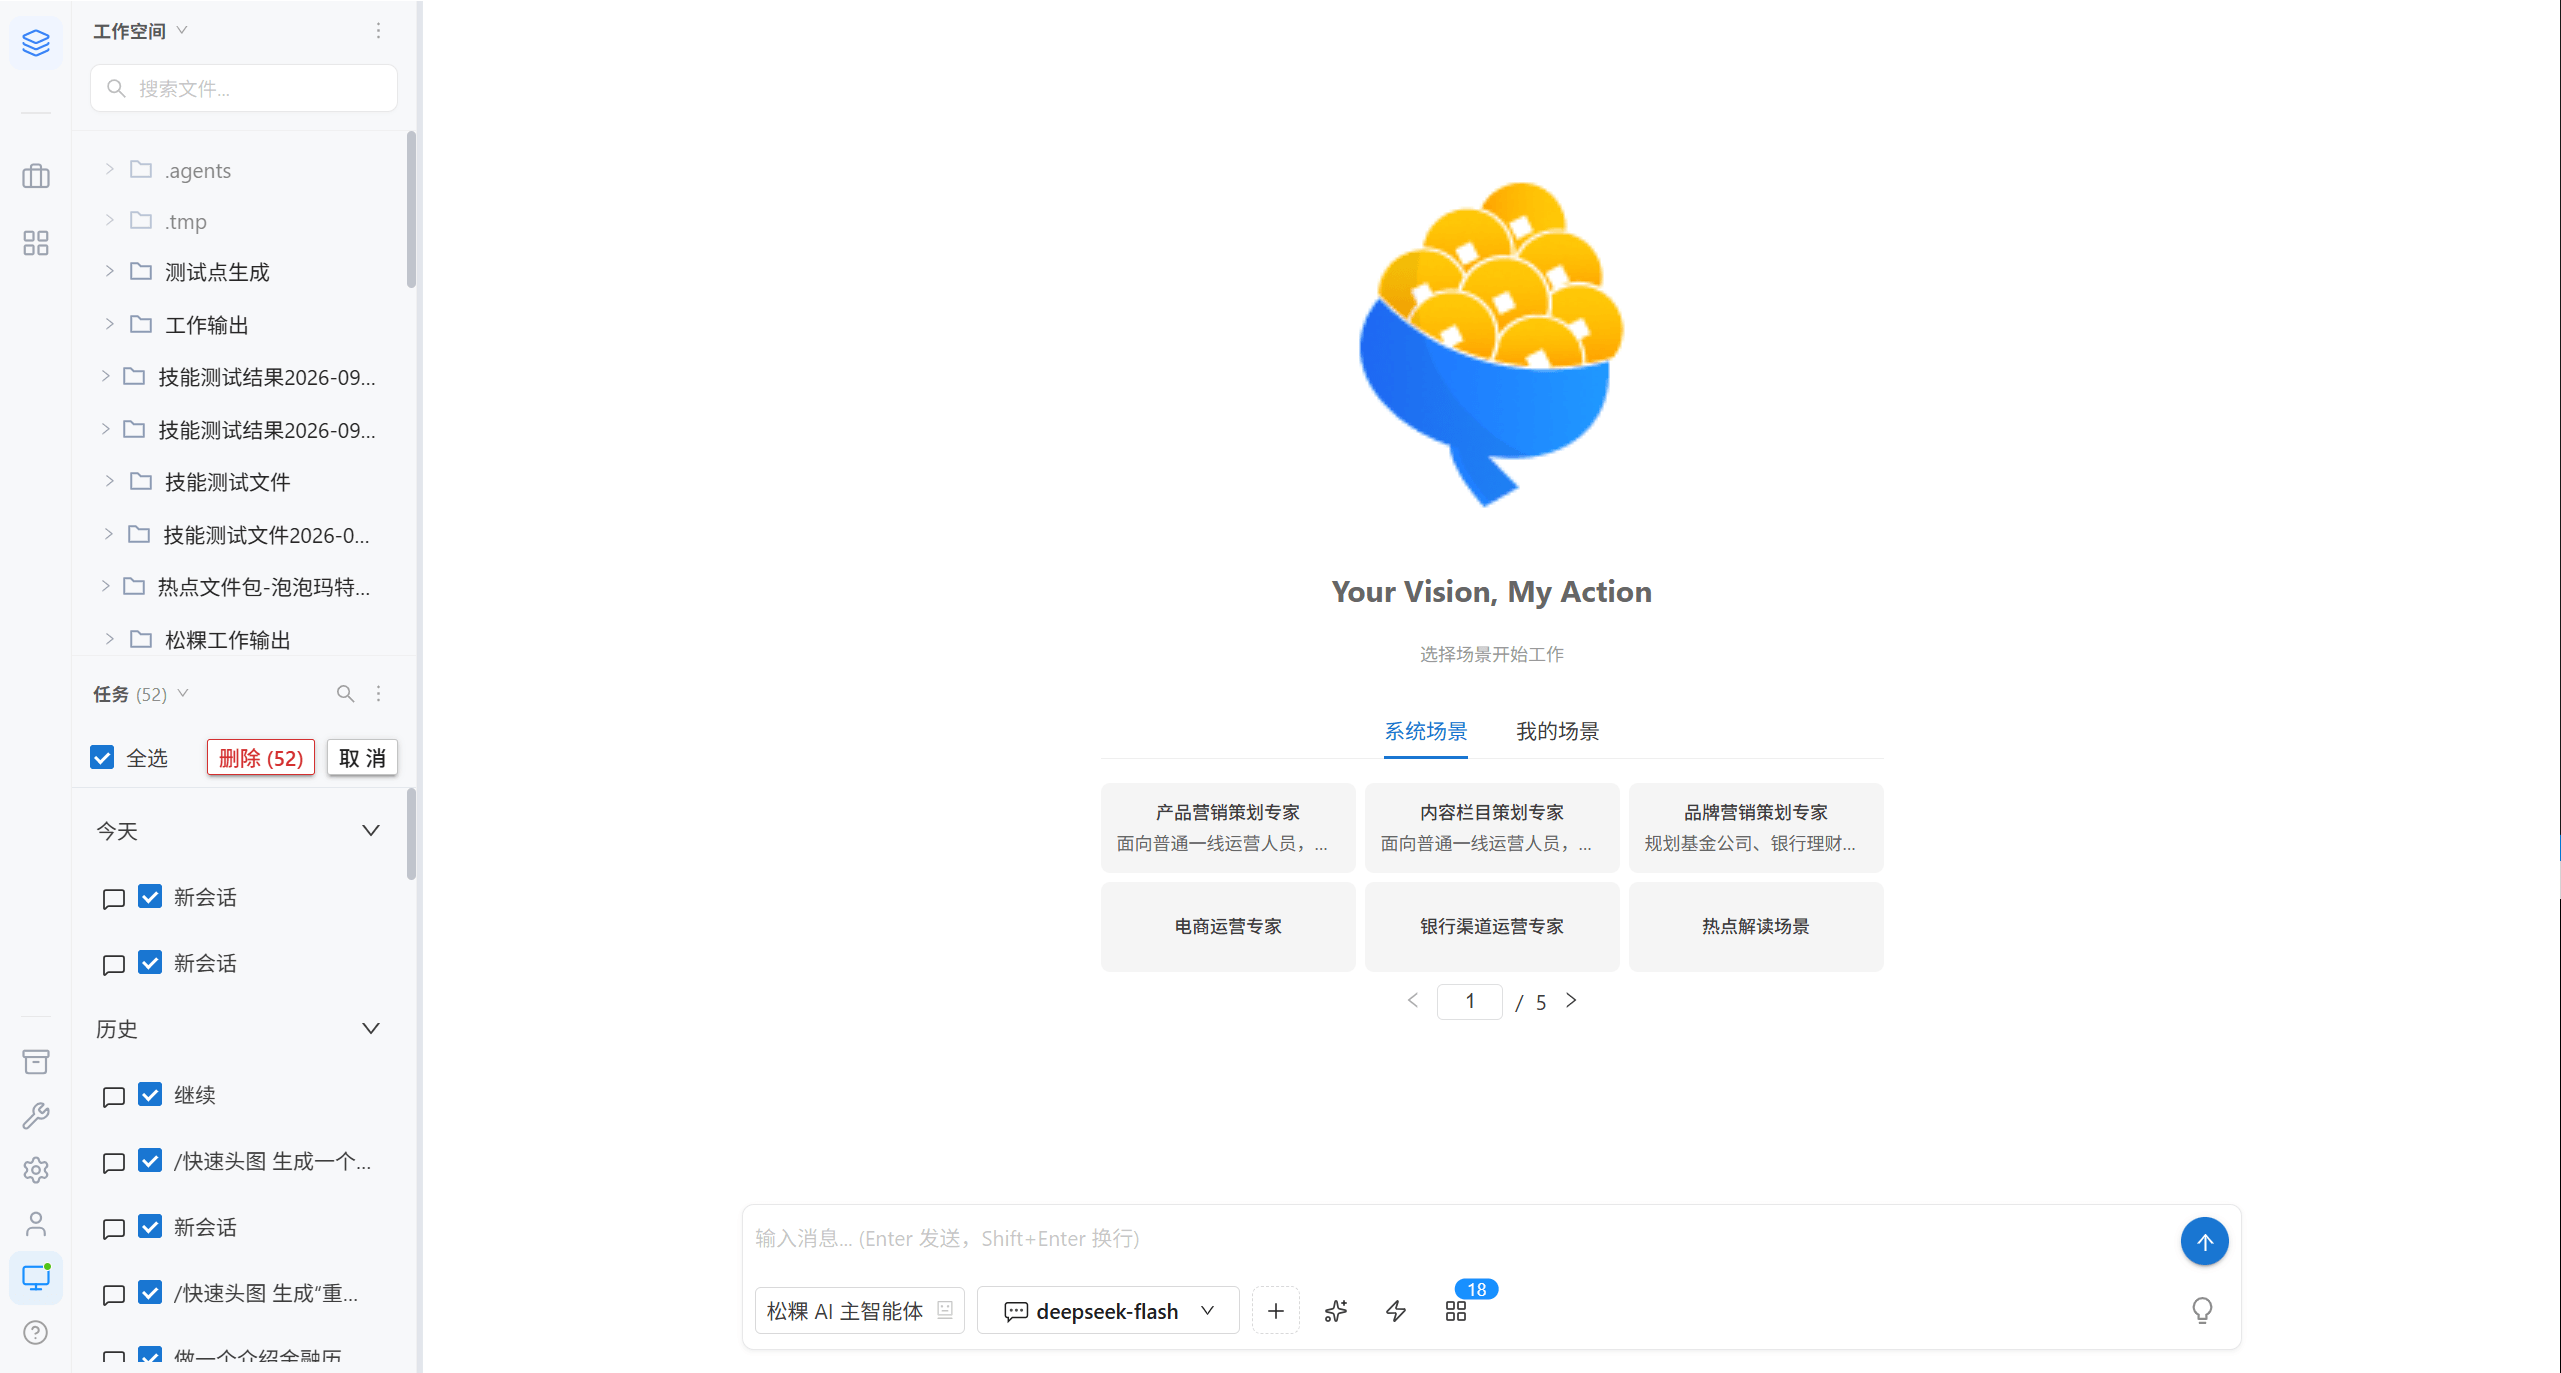
Bulk delete pops up a confirmation dialog showing the number of items to be deleted. Once confirmed, they cannot be recovered.
Tip · Deleting a task does not delete files in the workspace. Files and tasks are two separate sets of data.
2. AI Conversation
2.1 Starting a Conversation
Just describe what you need directly in the input box.
| Shortcut | Action |
|---|---|
Enter | Send |
Shift + Enter | New line |
Esc | Interrupt the request in progress |
The conversation area shows the AI's execution process in real time:
| Element | Meaning |
|---|---|
| Thinking | Can be expanded to view the reasoning chain, and collapsed again |
| Tool: xxx completed | A tool was invoked (read / bash / skill / image_generation, etc.) |
| Sub-agent | Displayed when a complex task is dispatched to a sub-agent, including its status and tool count |
| Answer | The final output |
Note · First use triggers a container cold start. The interface shows "OpenCode service cold starting (about 30-90 seconds on first run)", which is normal.
2.2 The Eight Capability Slots Around the Input Box
Eight capability slots are integrated around the input box; use them as needed.
Select AI Agent
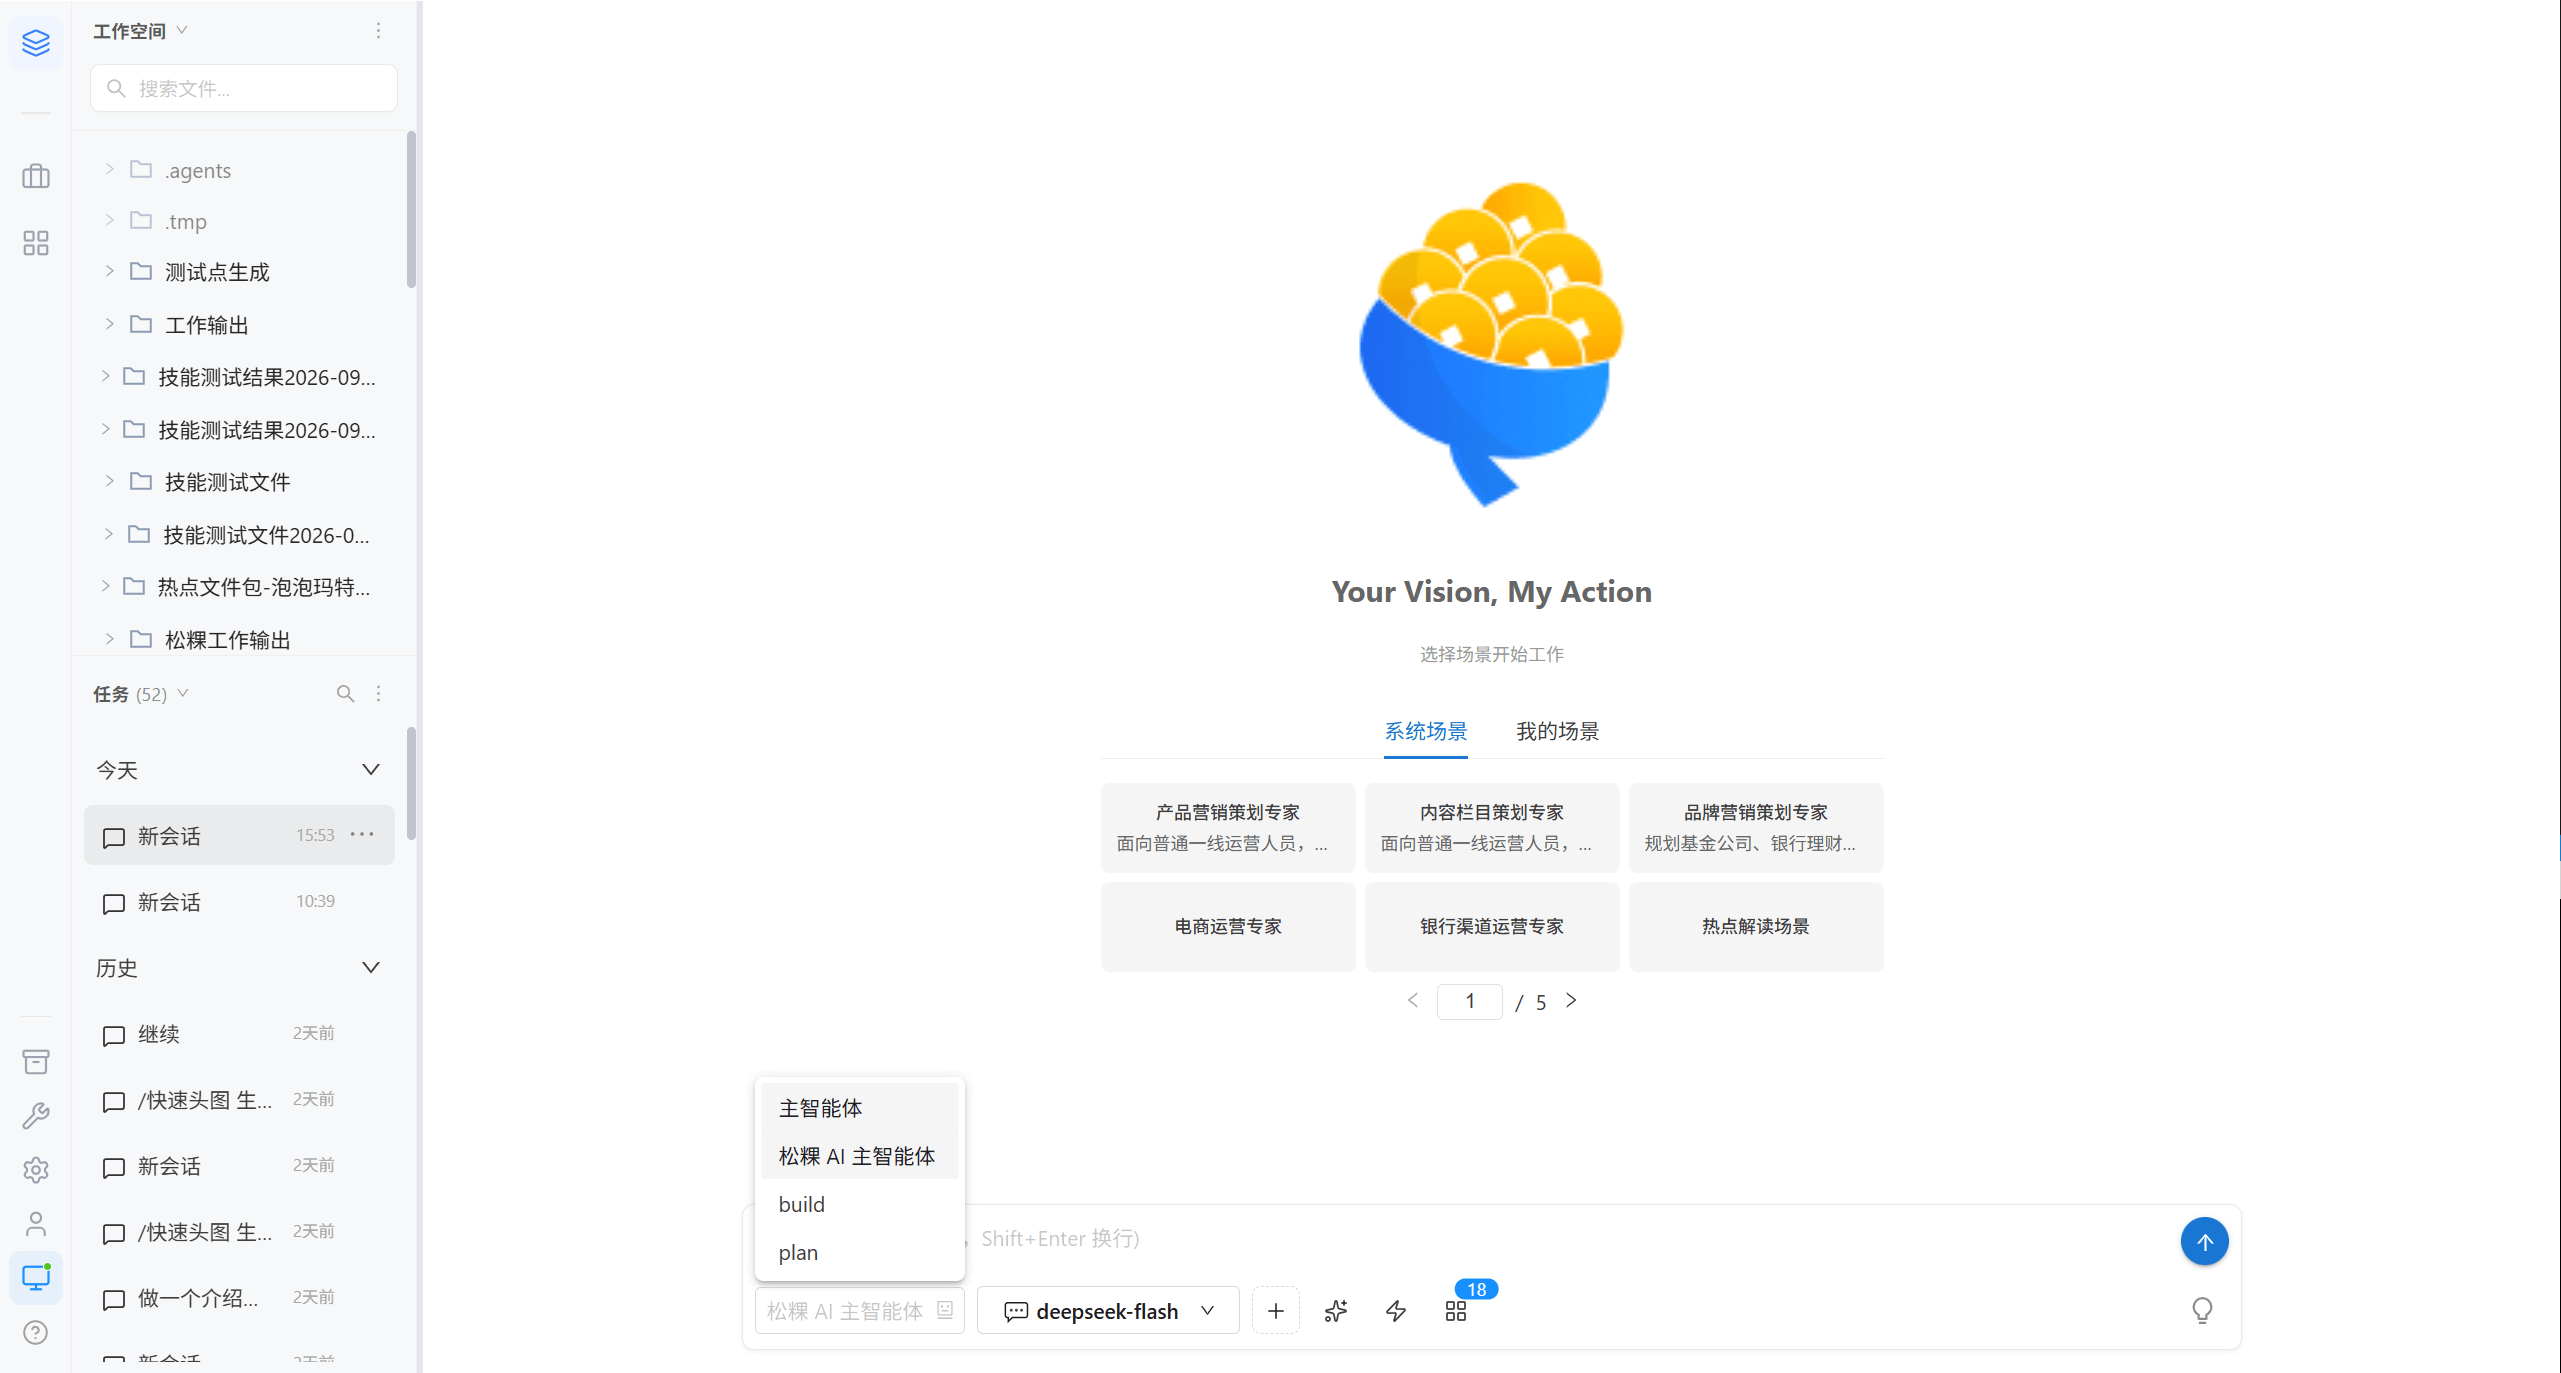
| Type | Meaning |
|---|---|
| Main agent | The platform's primary AI agent, used by default. An administrator maintains its prompt and tool permissions in Agent Settings |
| Sub-agent | A sub-agent dedicated to a specific task, invoked by the main agent as needed, and it can also be selected manually |
Select Model
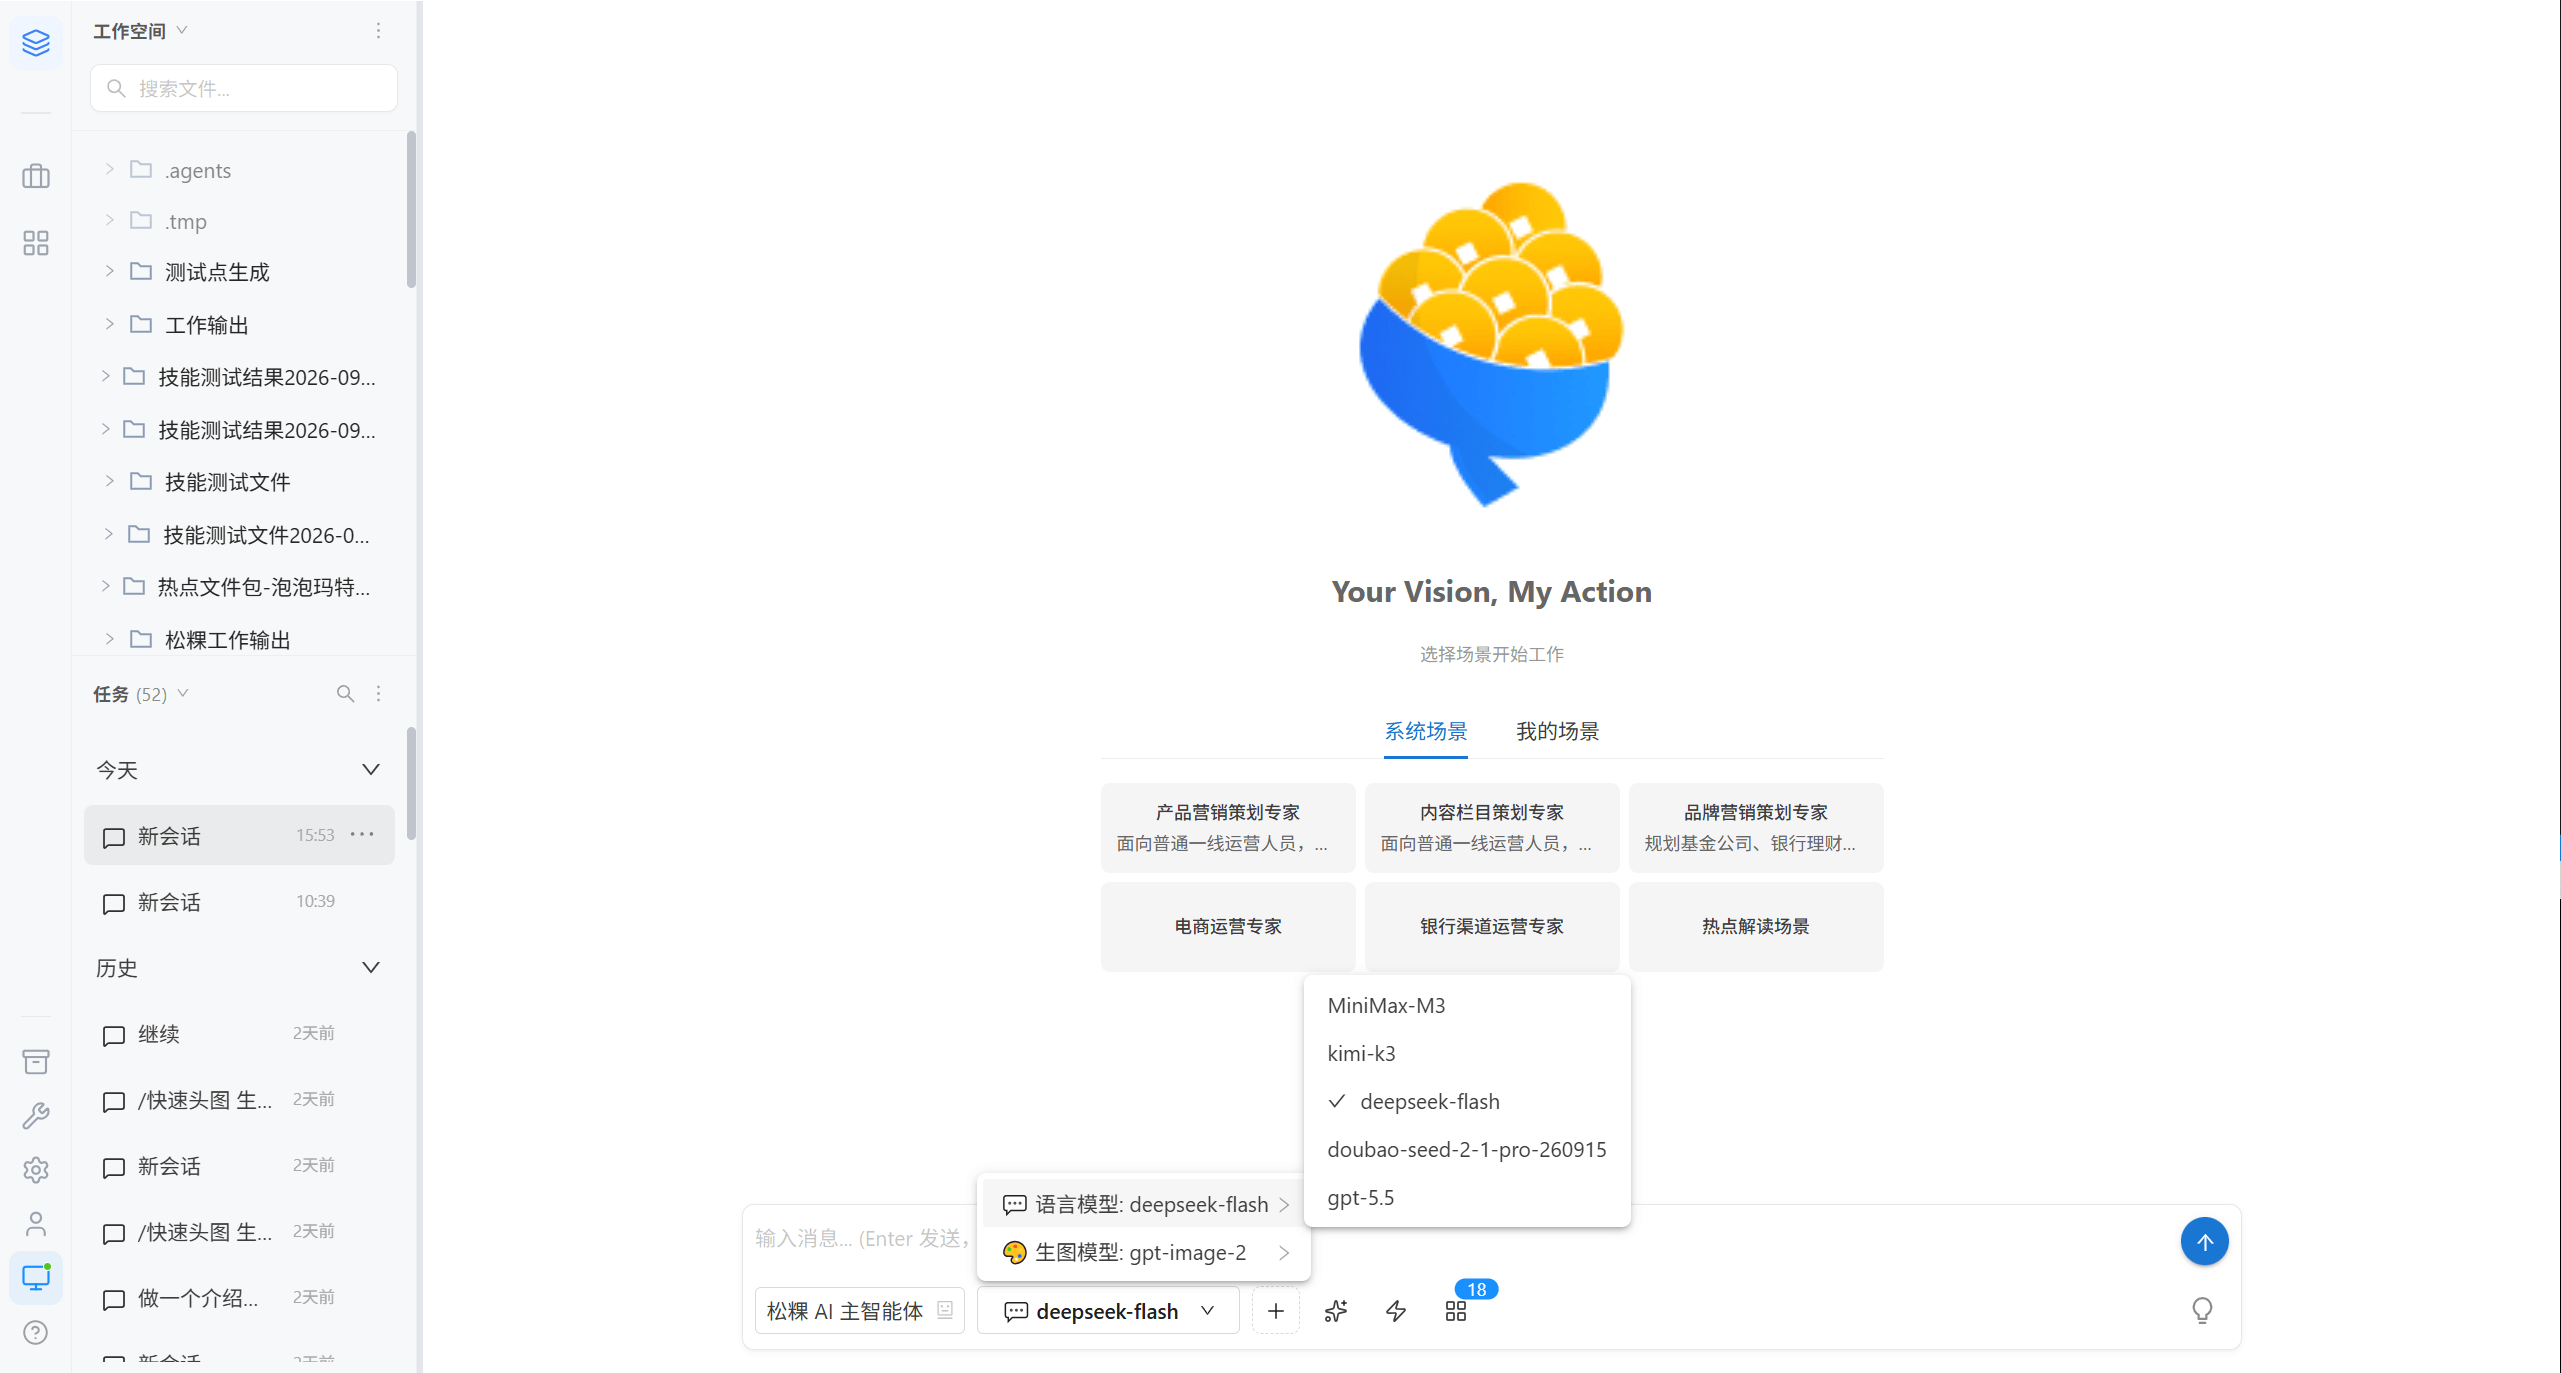
| Model type | Purpose | Required |
|---|---|---|
| Language model | Conversation, code generation, document writing | Required |
| Image generation model | Text-to-image, image-to-image, inpainting | Optional, only needed for image generation tasks |
Note · Administrators can restrict the models visible to users in Model Provider Access. A model that is not in the dropdown is not open to the current user.
Select Skill
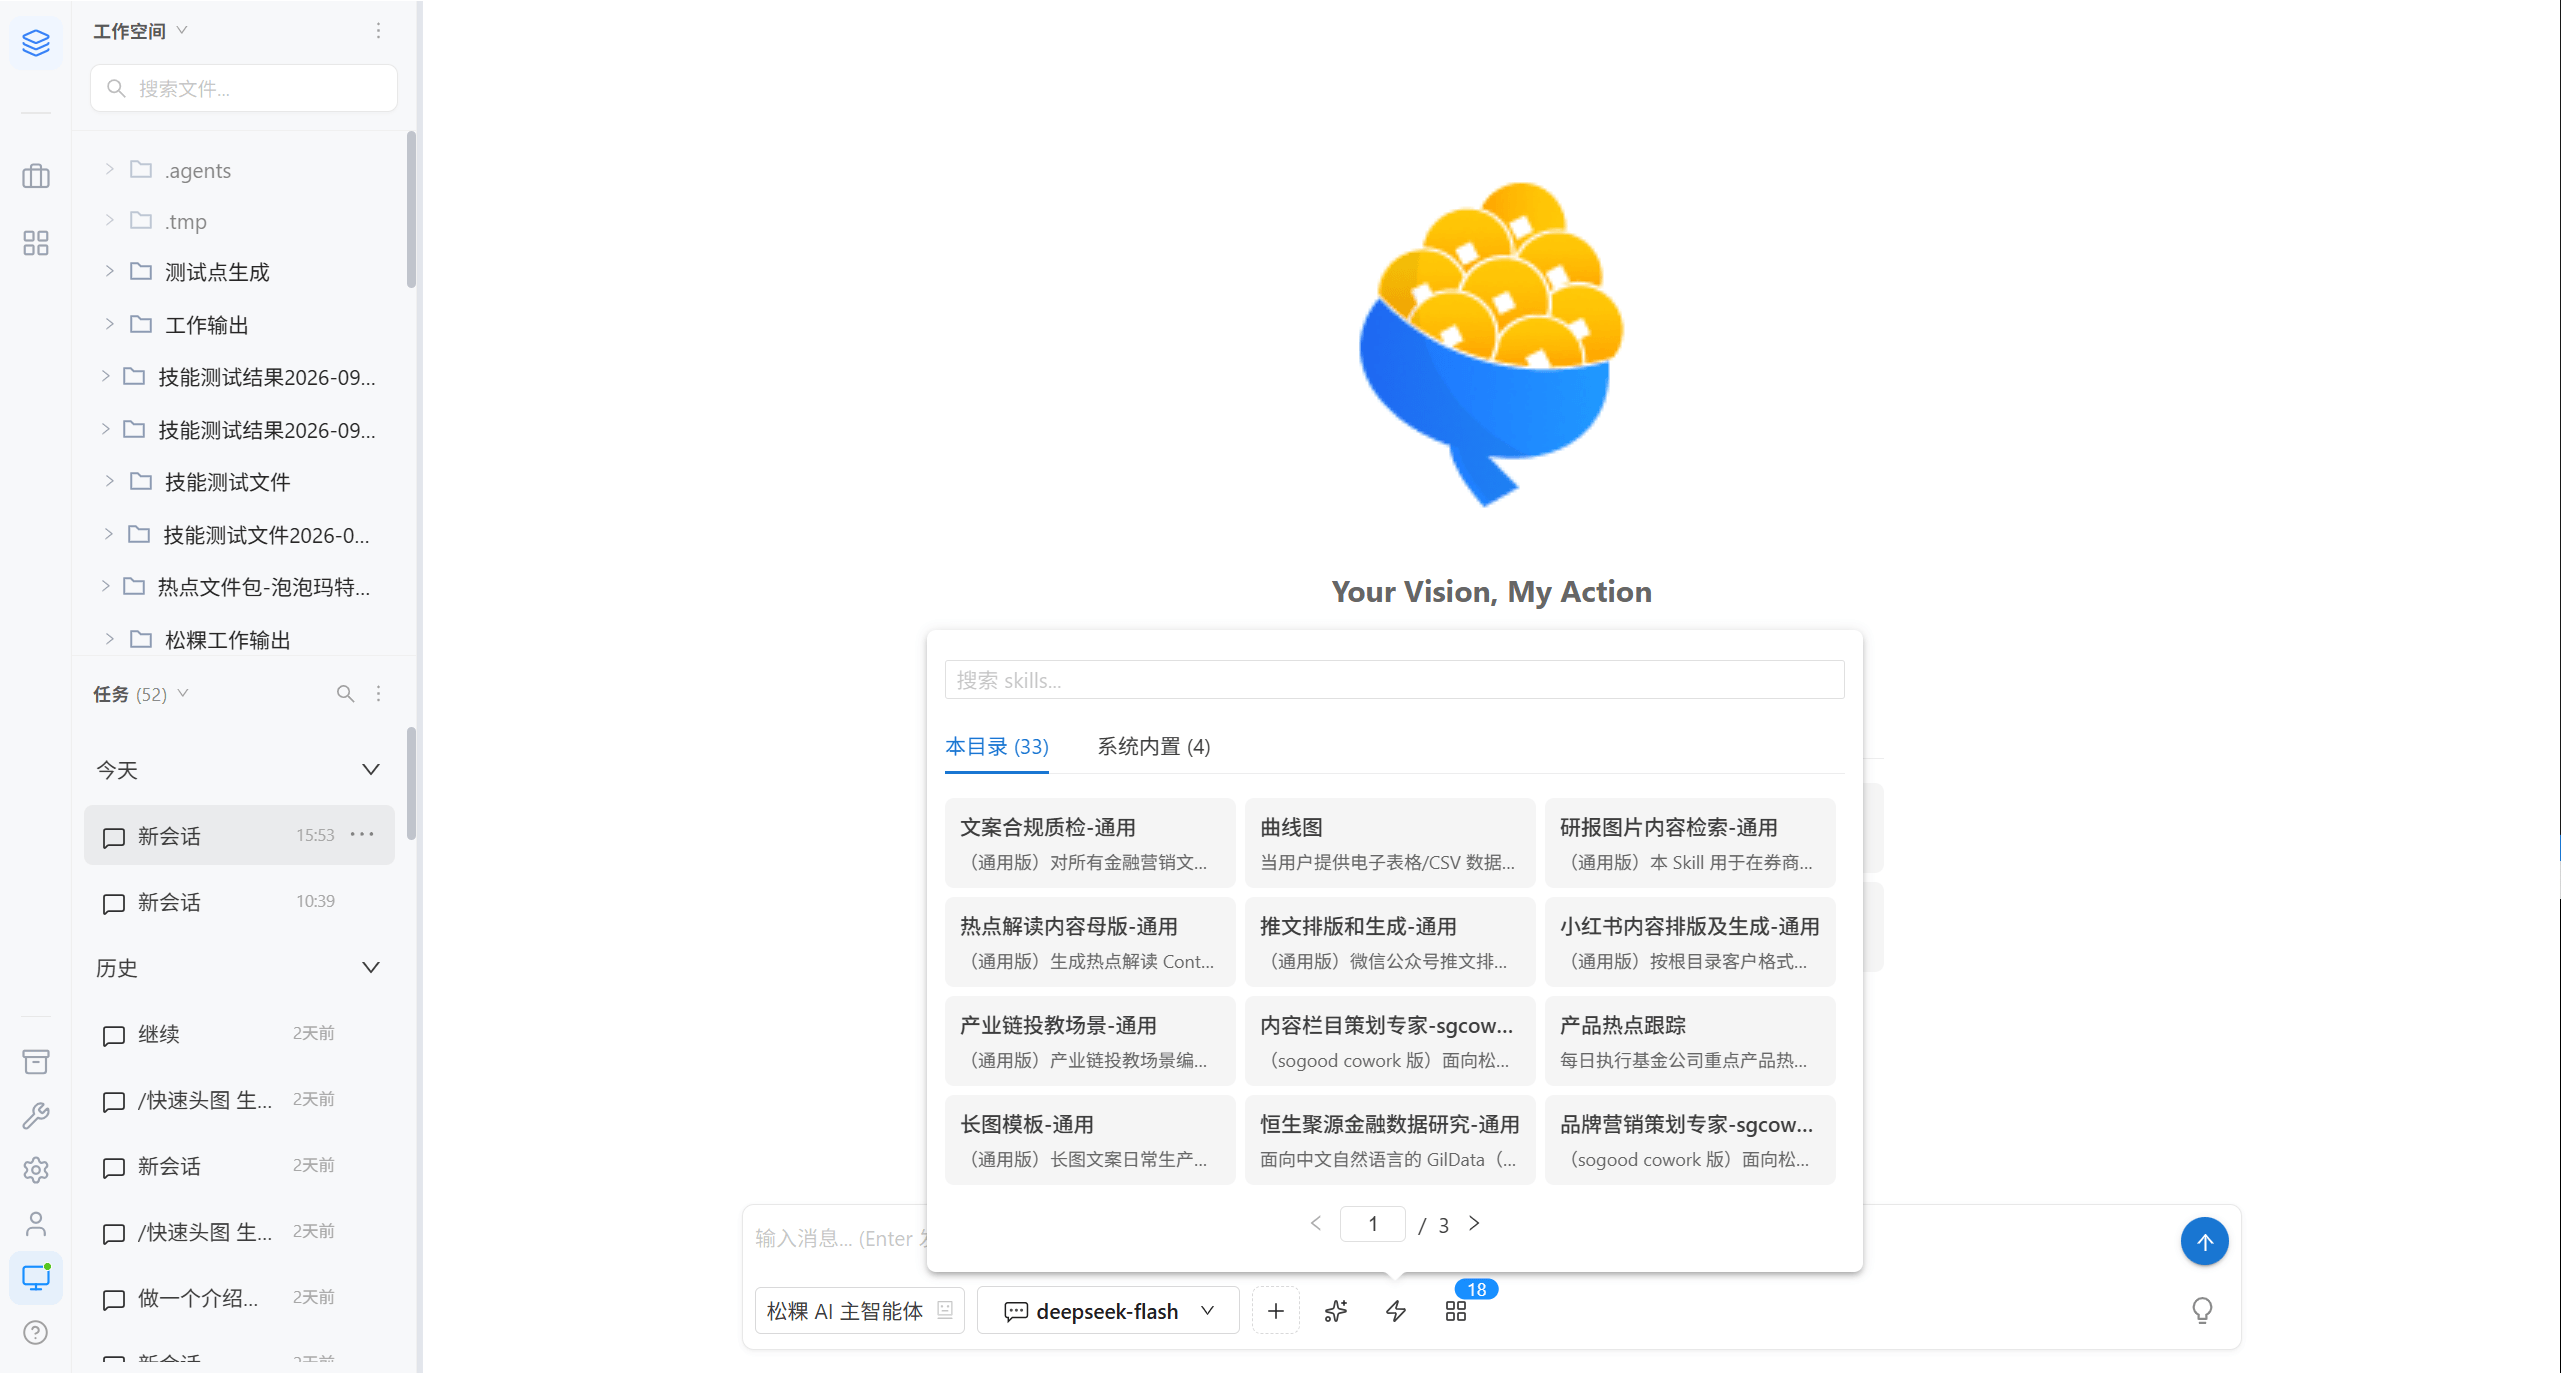
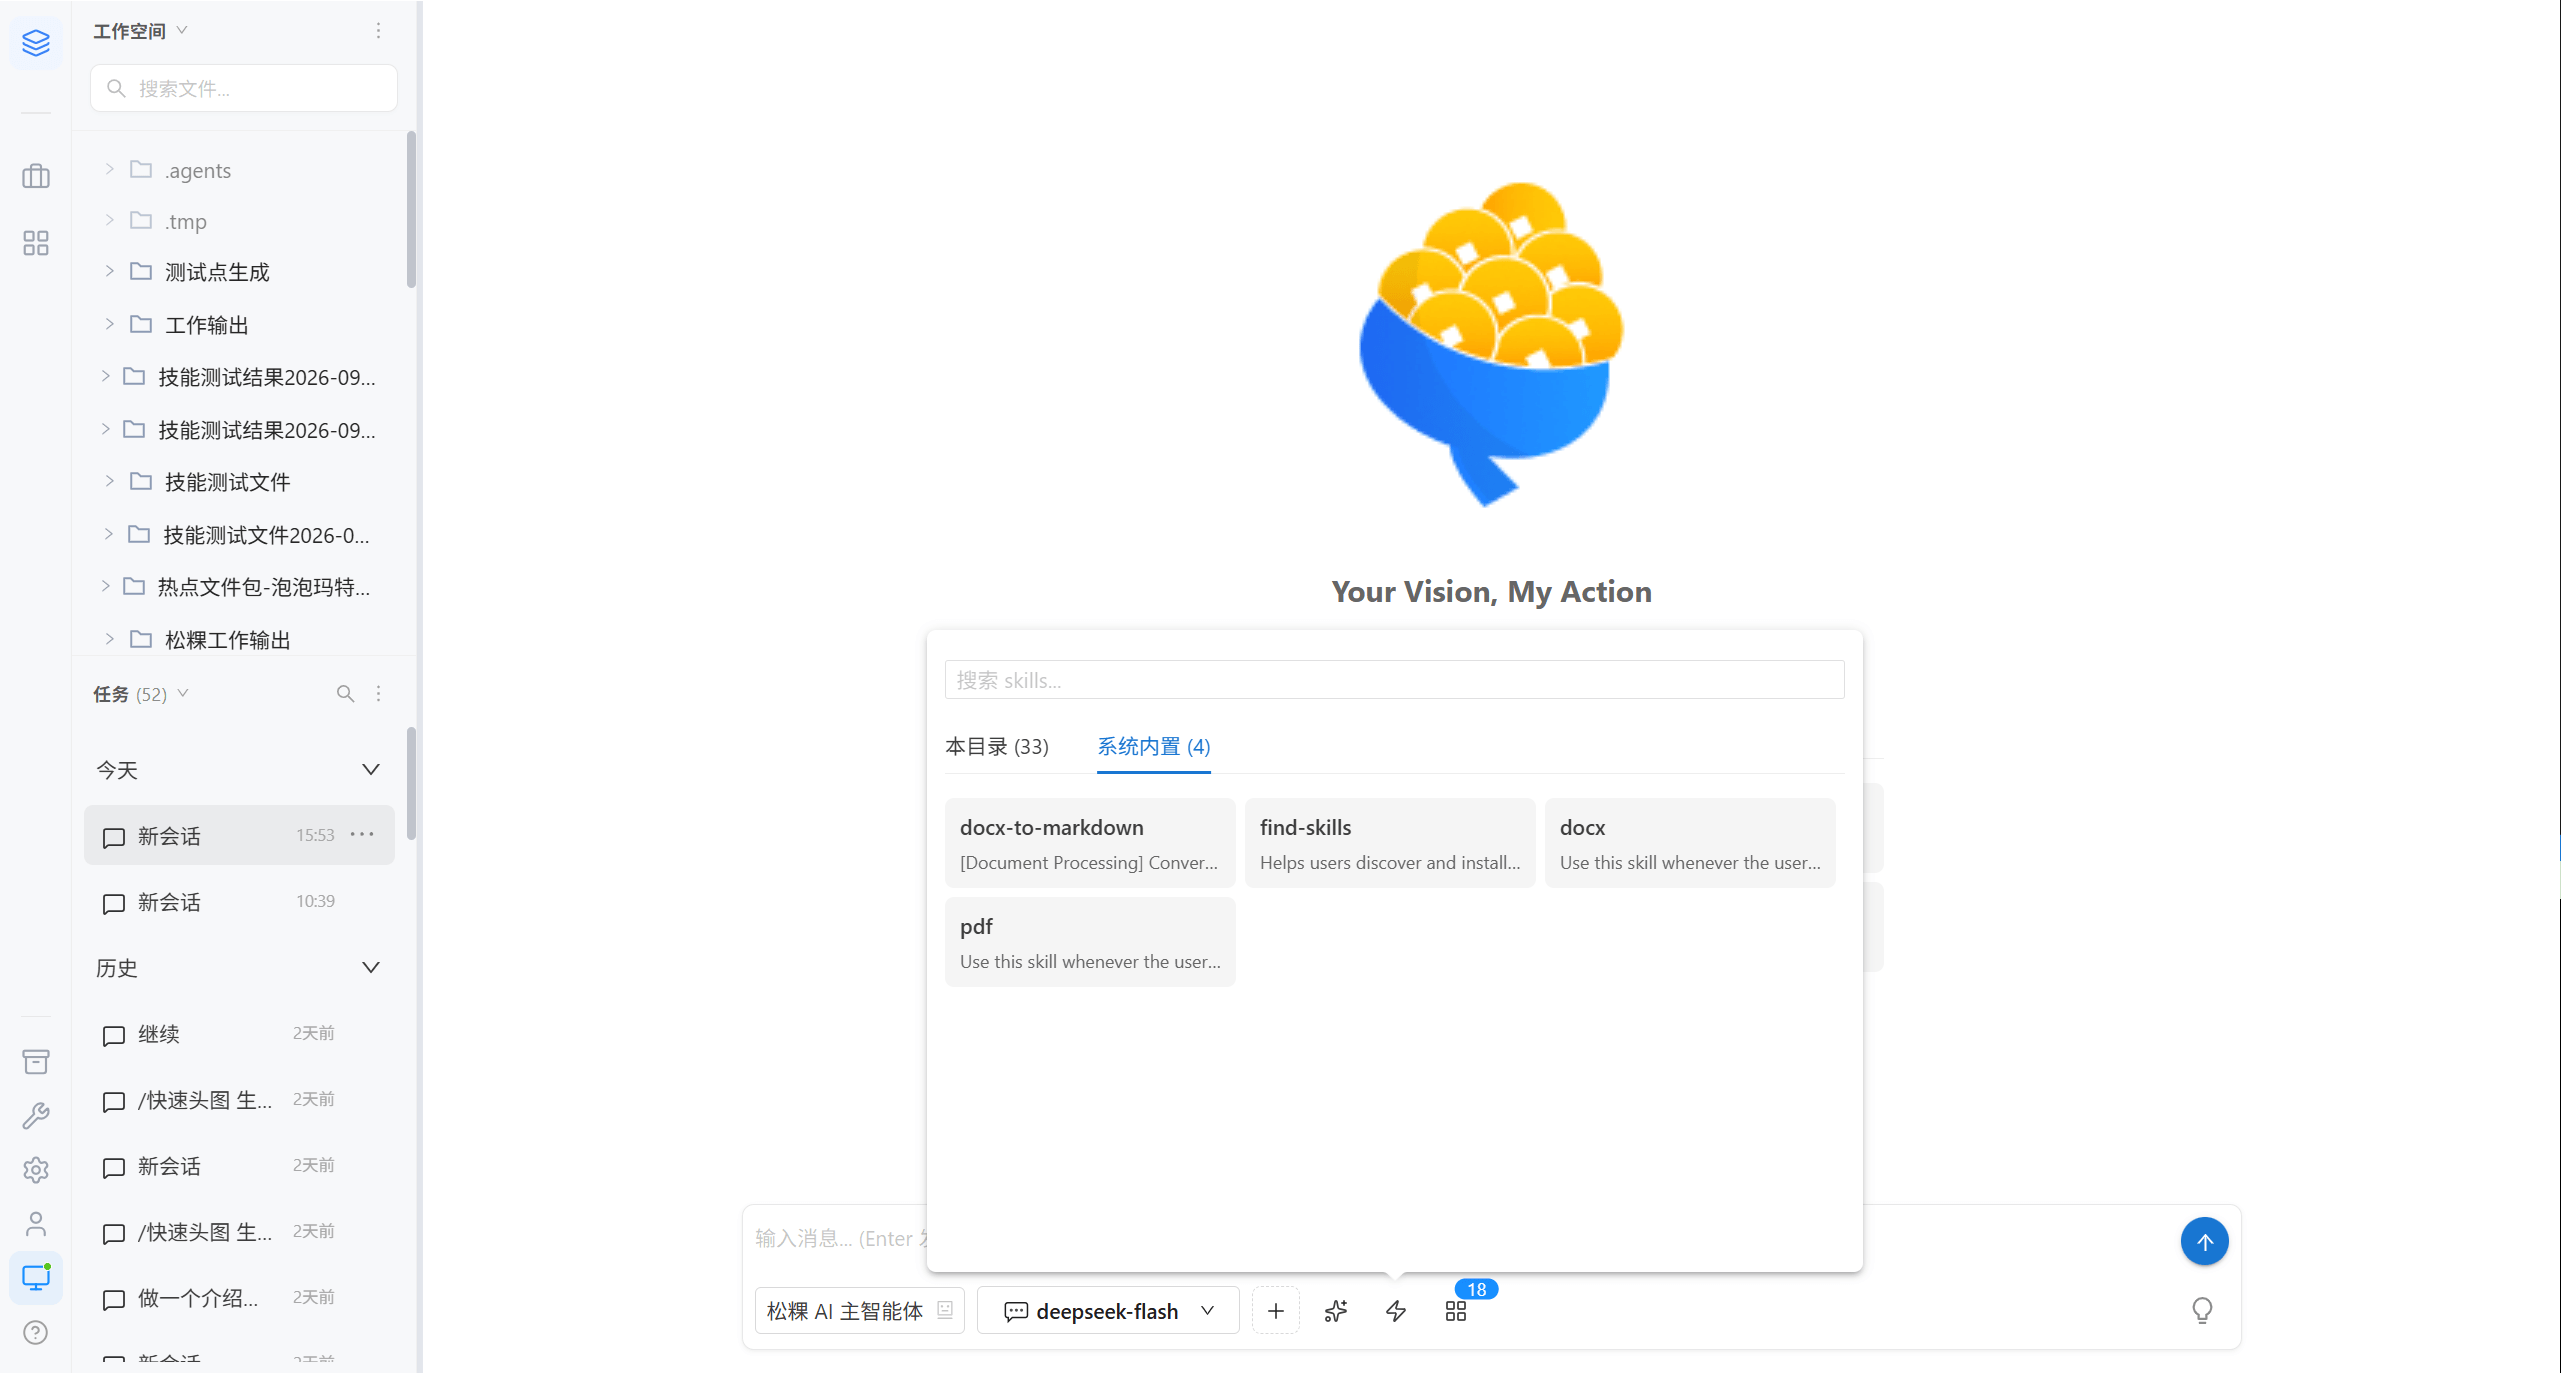
| Tab | Content | Source |
|---|---|---|
| This directory | Skills under the current workspace | Skill files you imported into the workspace |
| Built-in | Platform preset skills | Distributed with the platform |
A Skill is a reusable working method. Once selected, its content is brought into the current conversation as supplementary instructions.
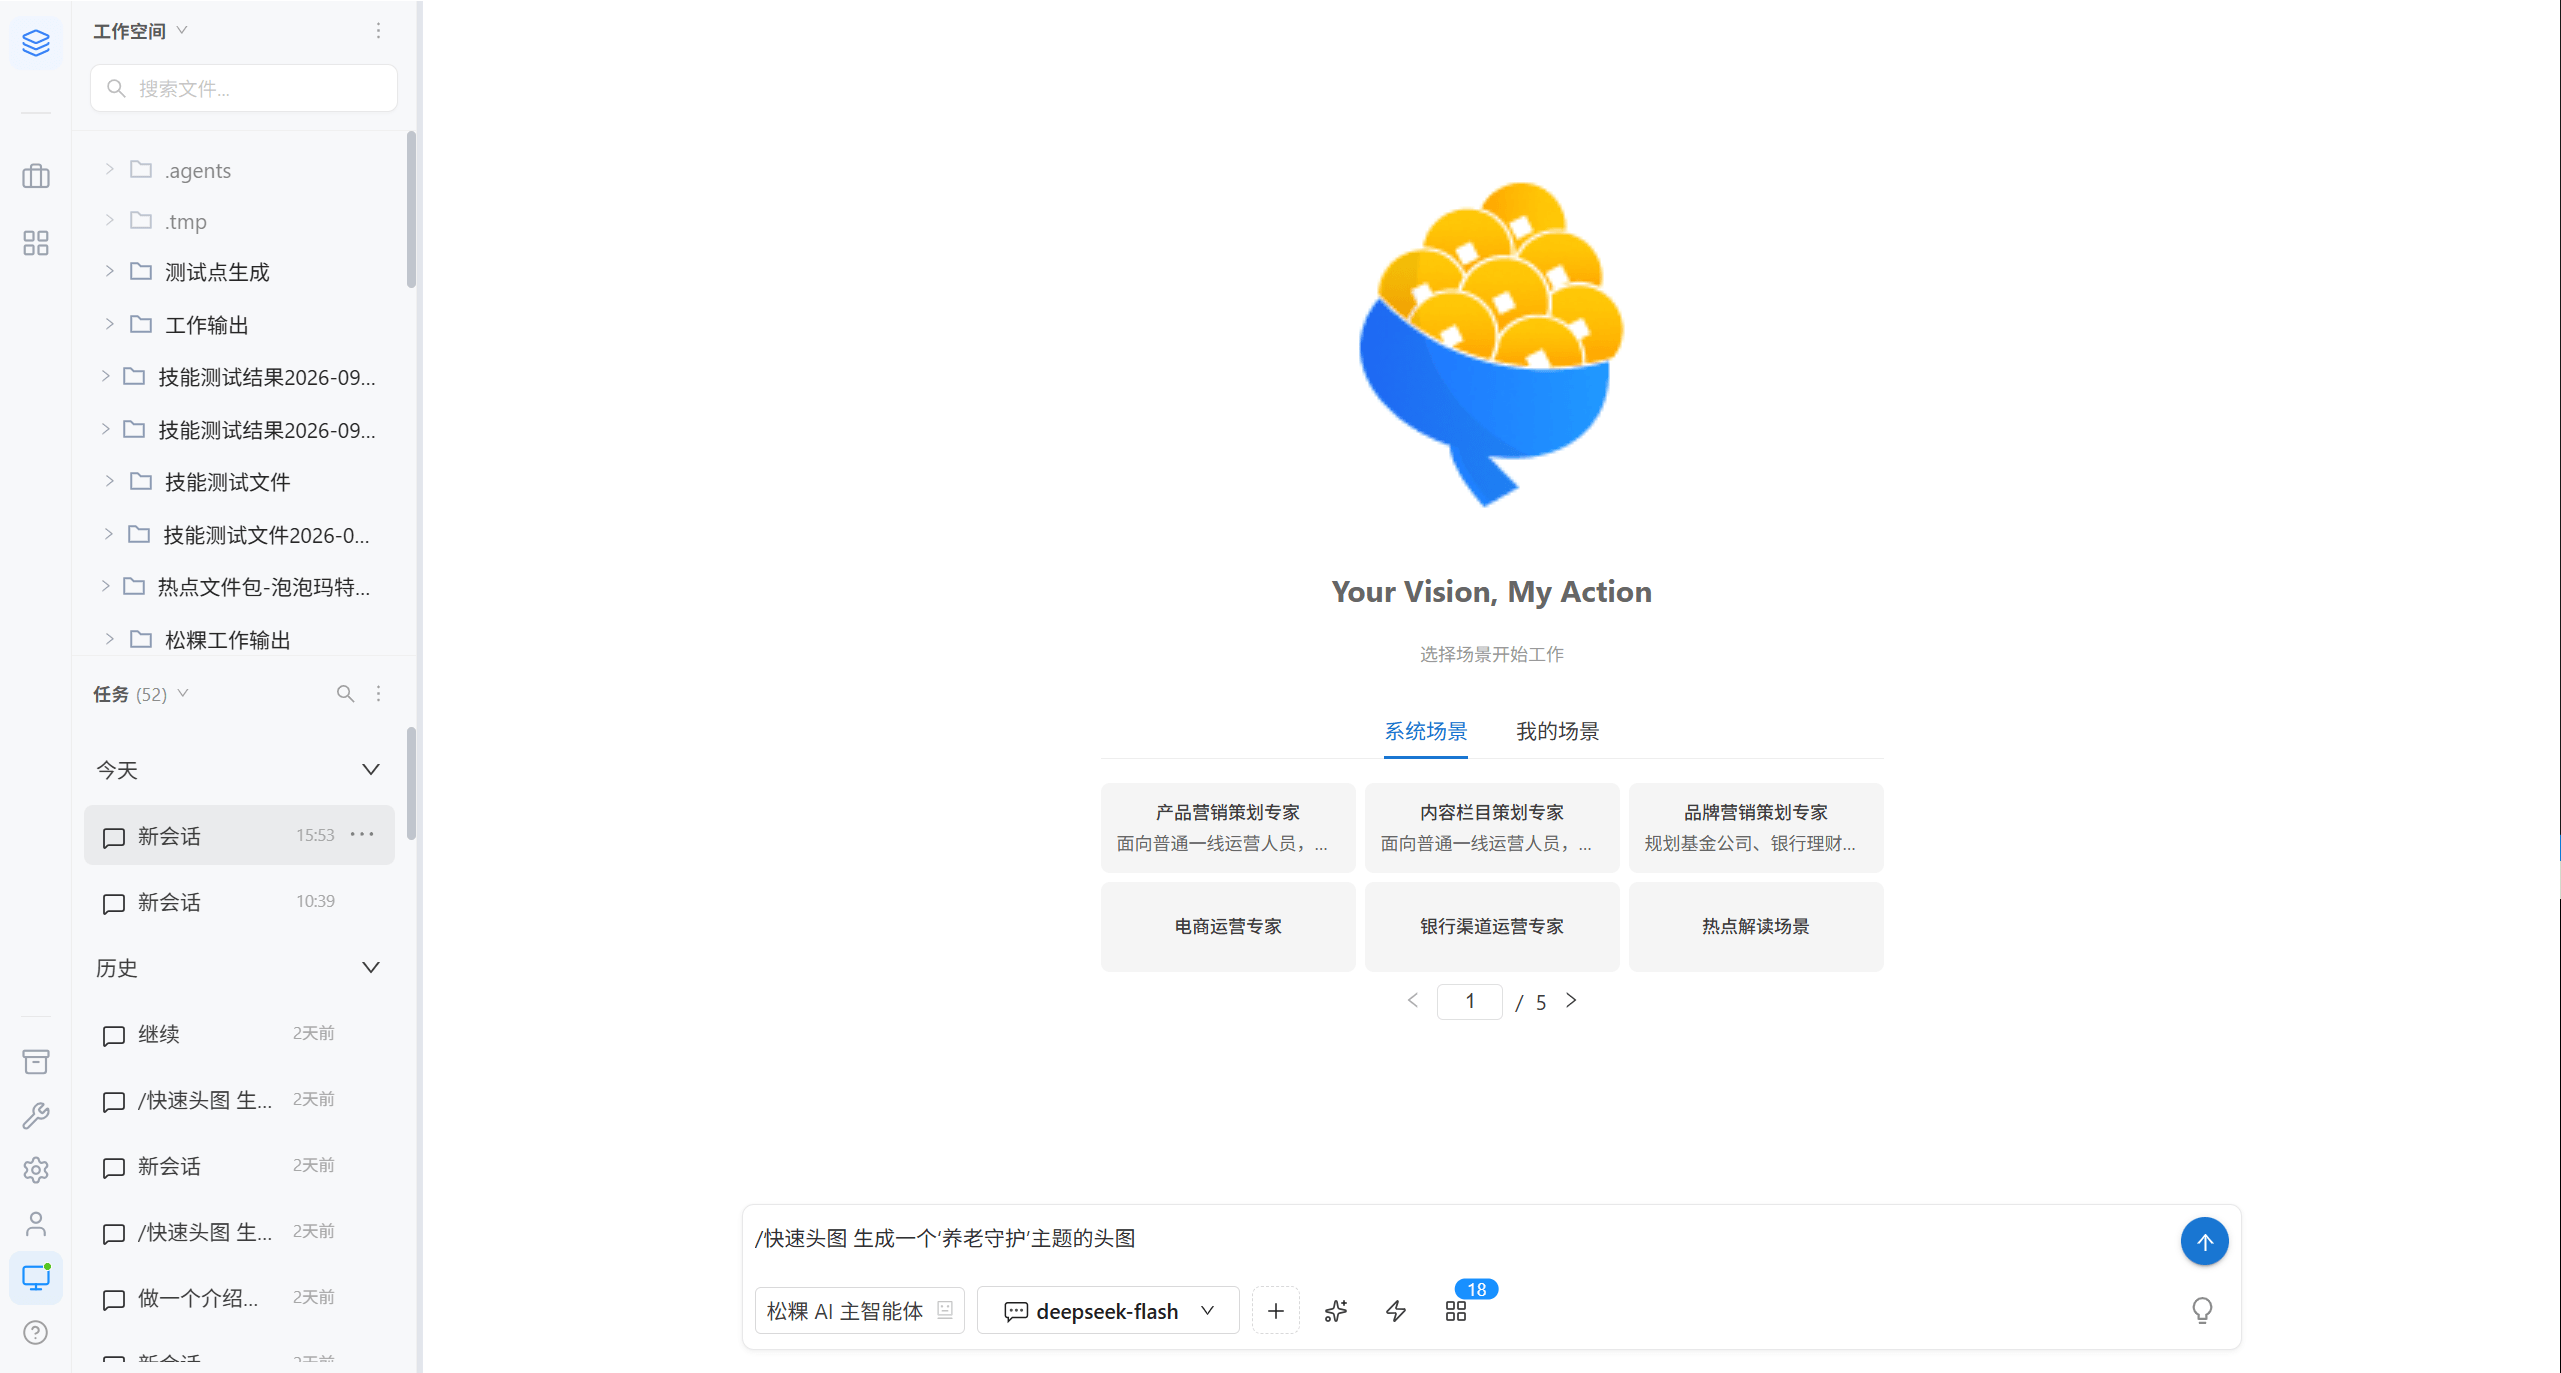
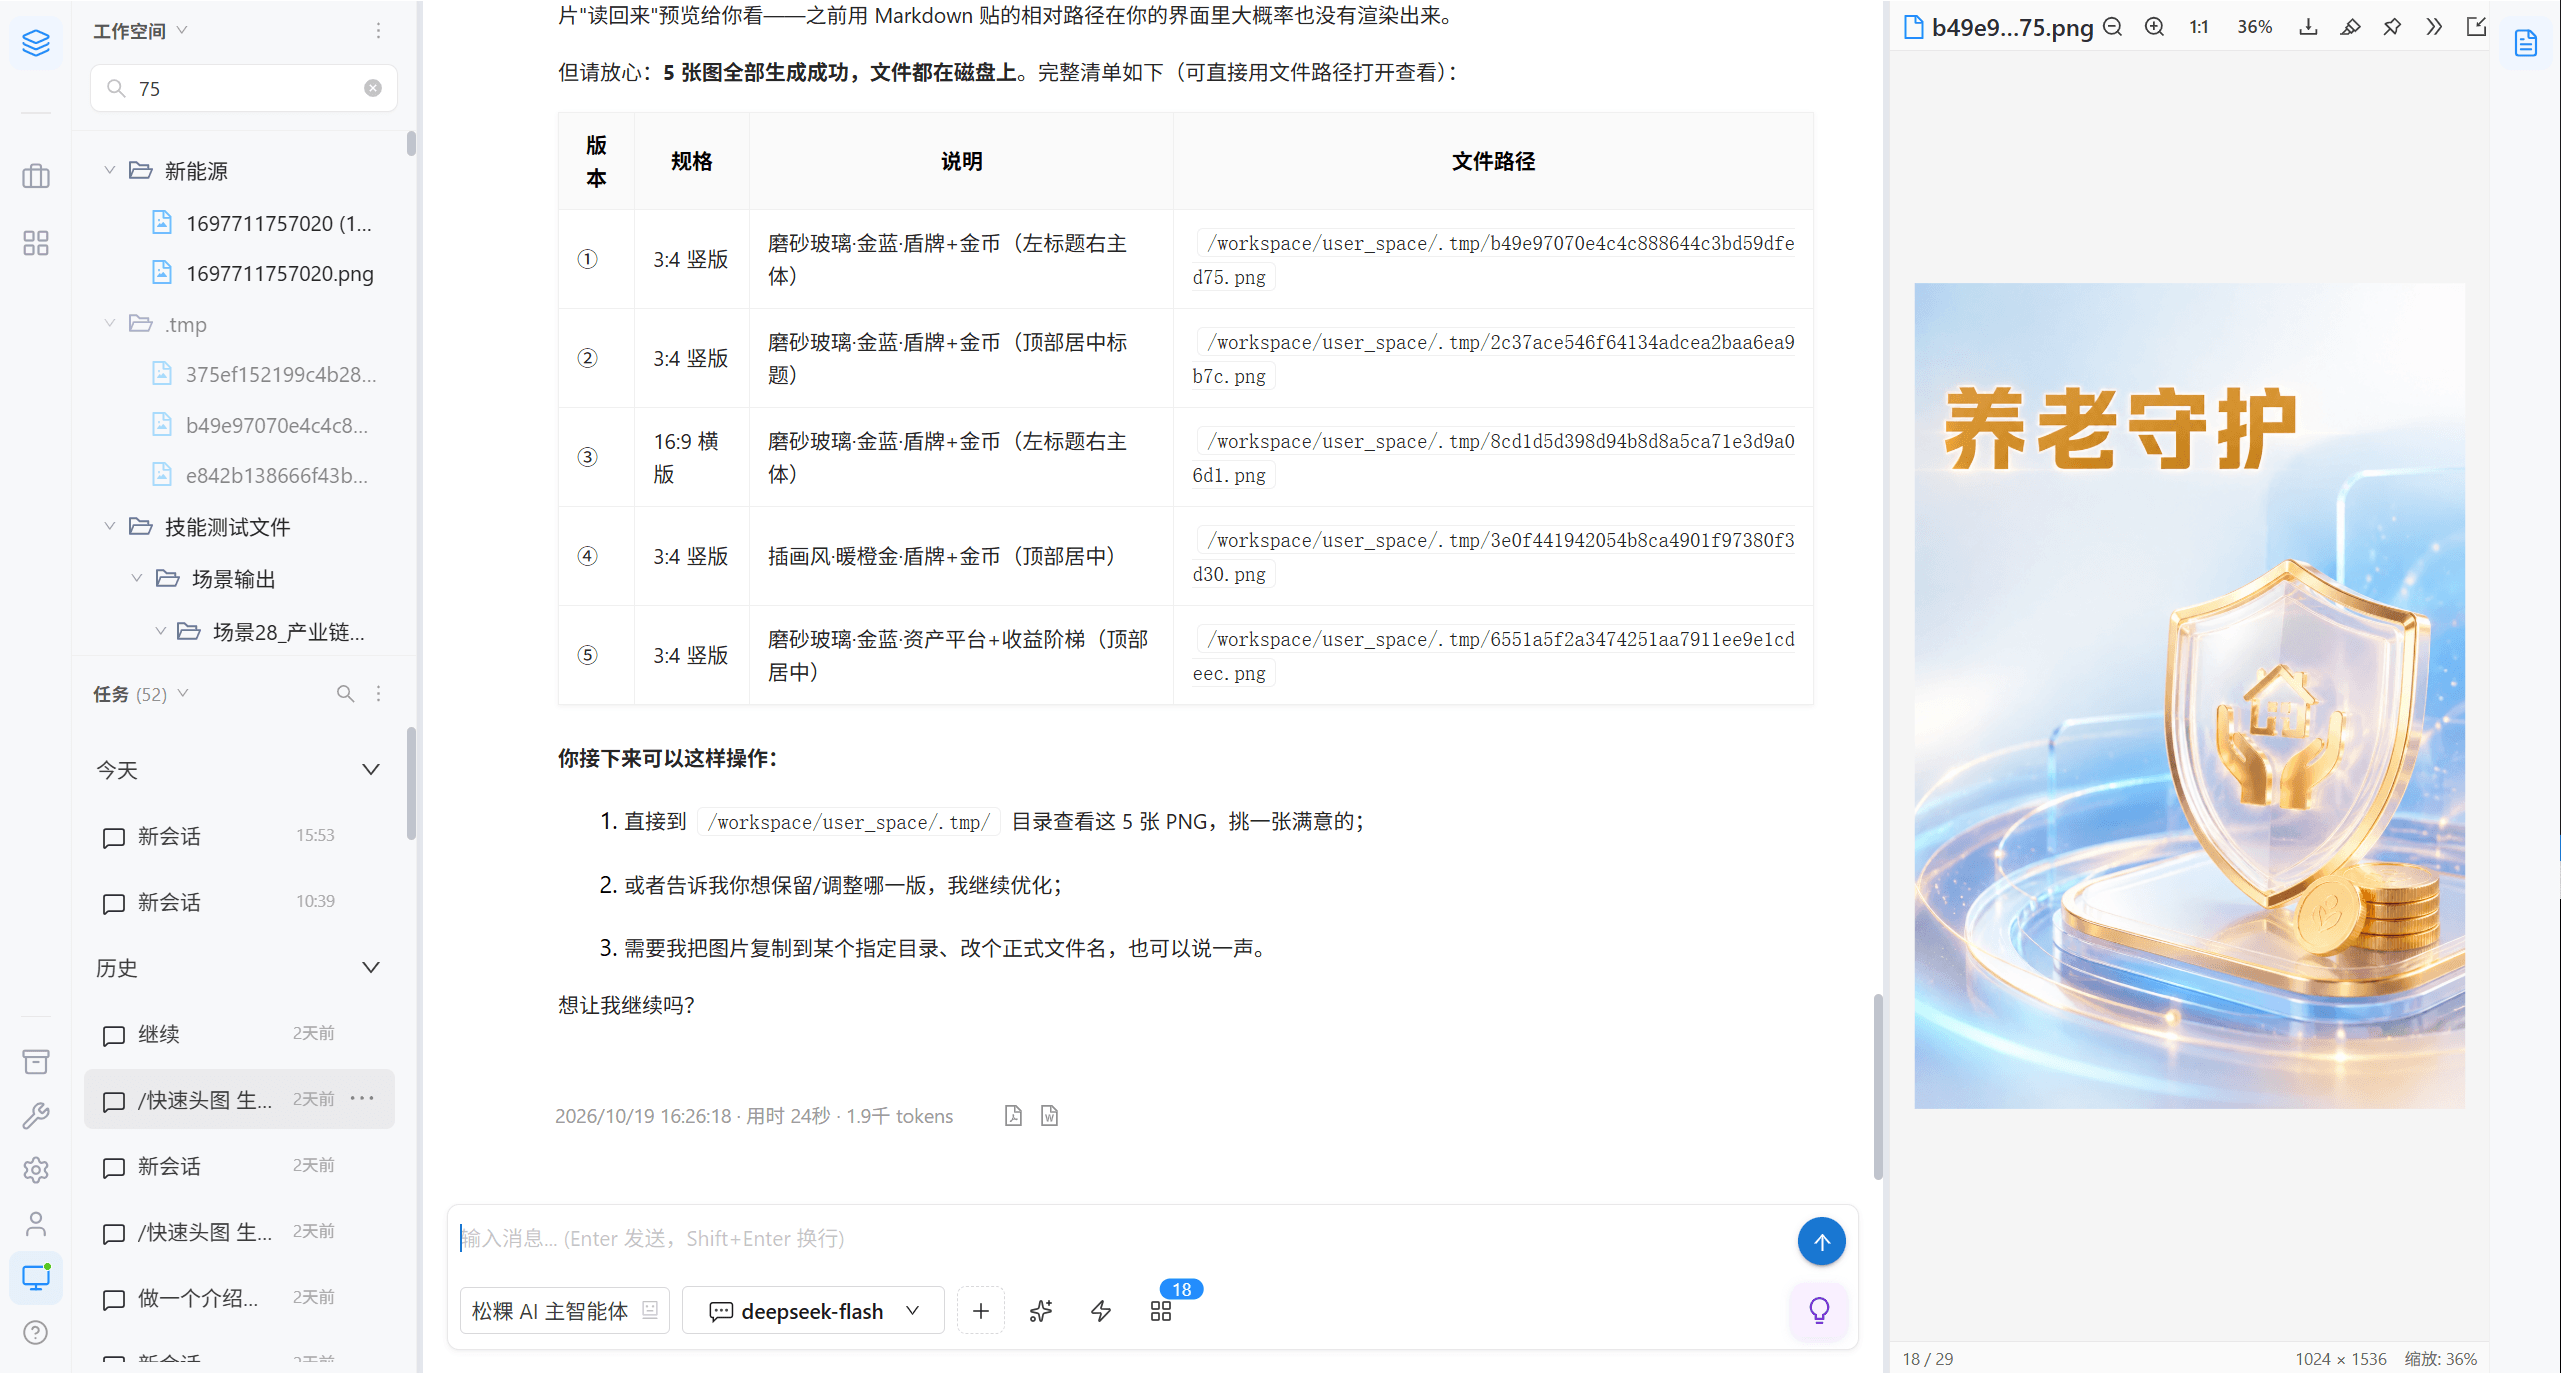
Select Scene
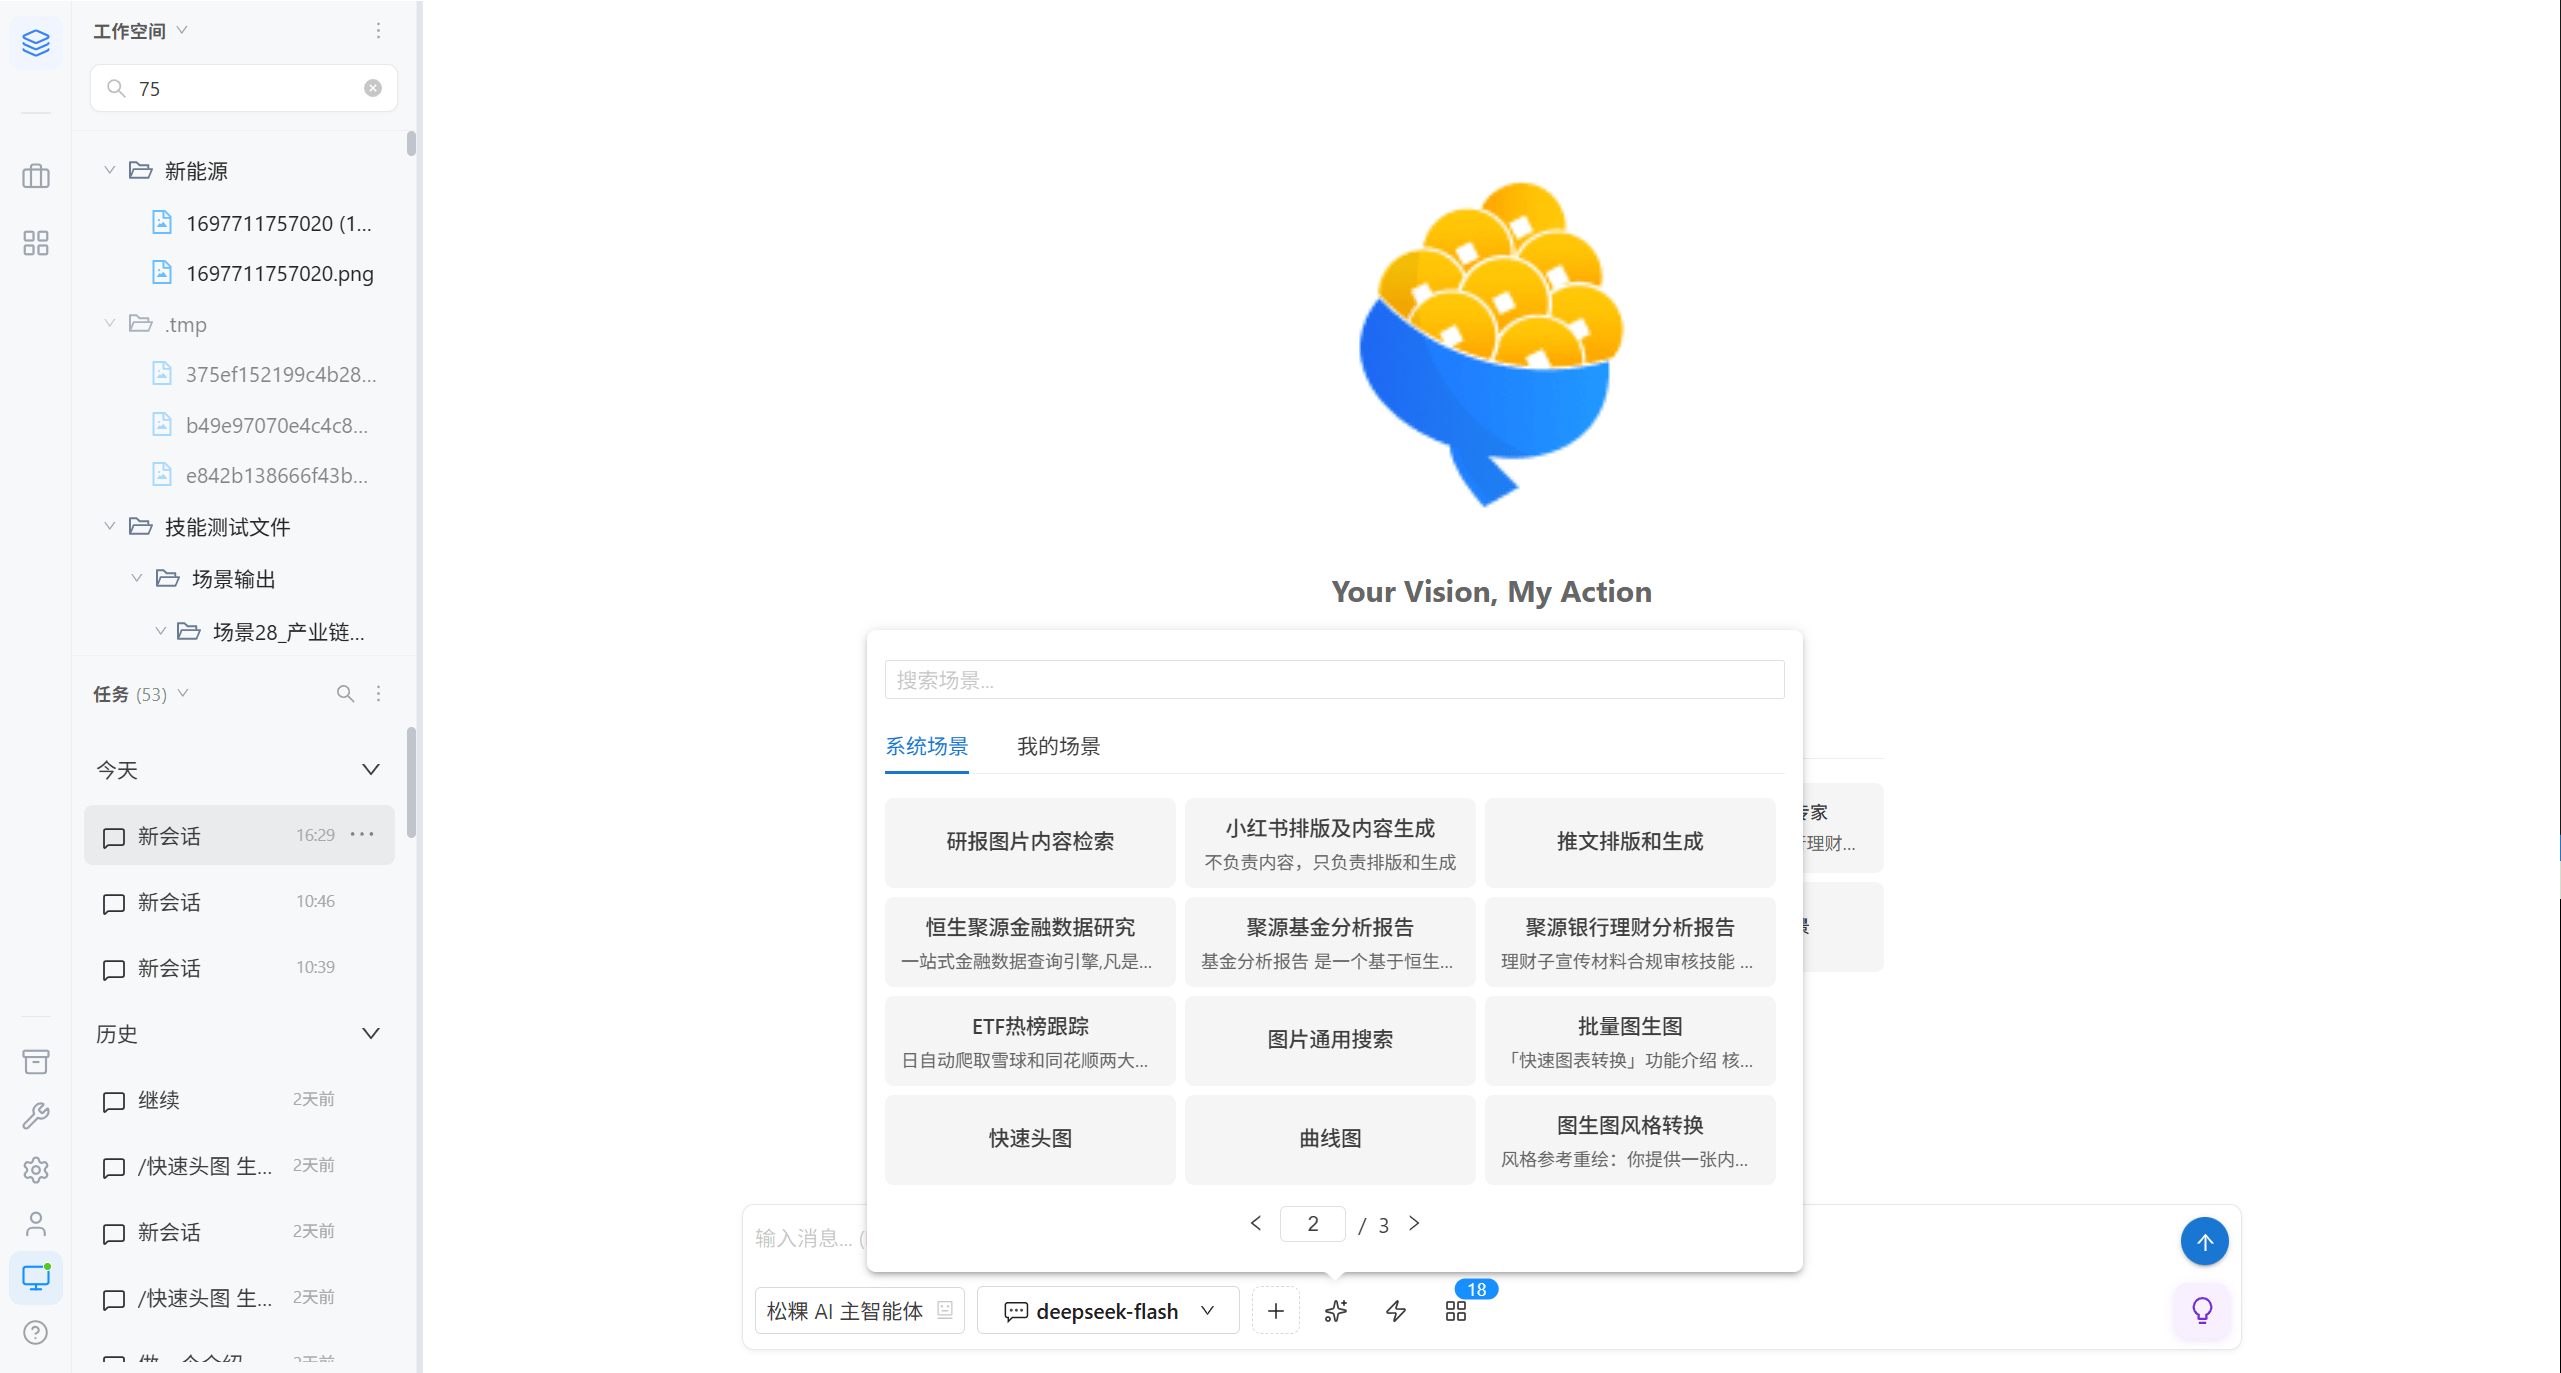
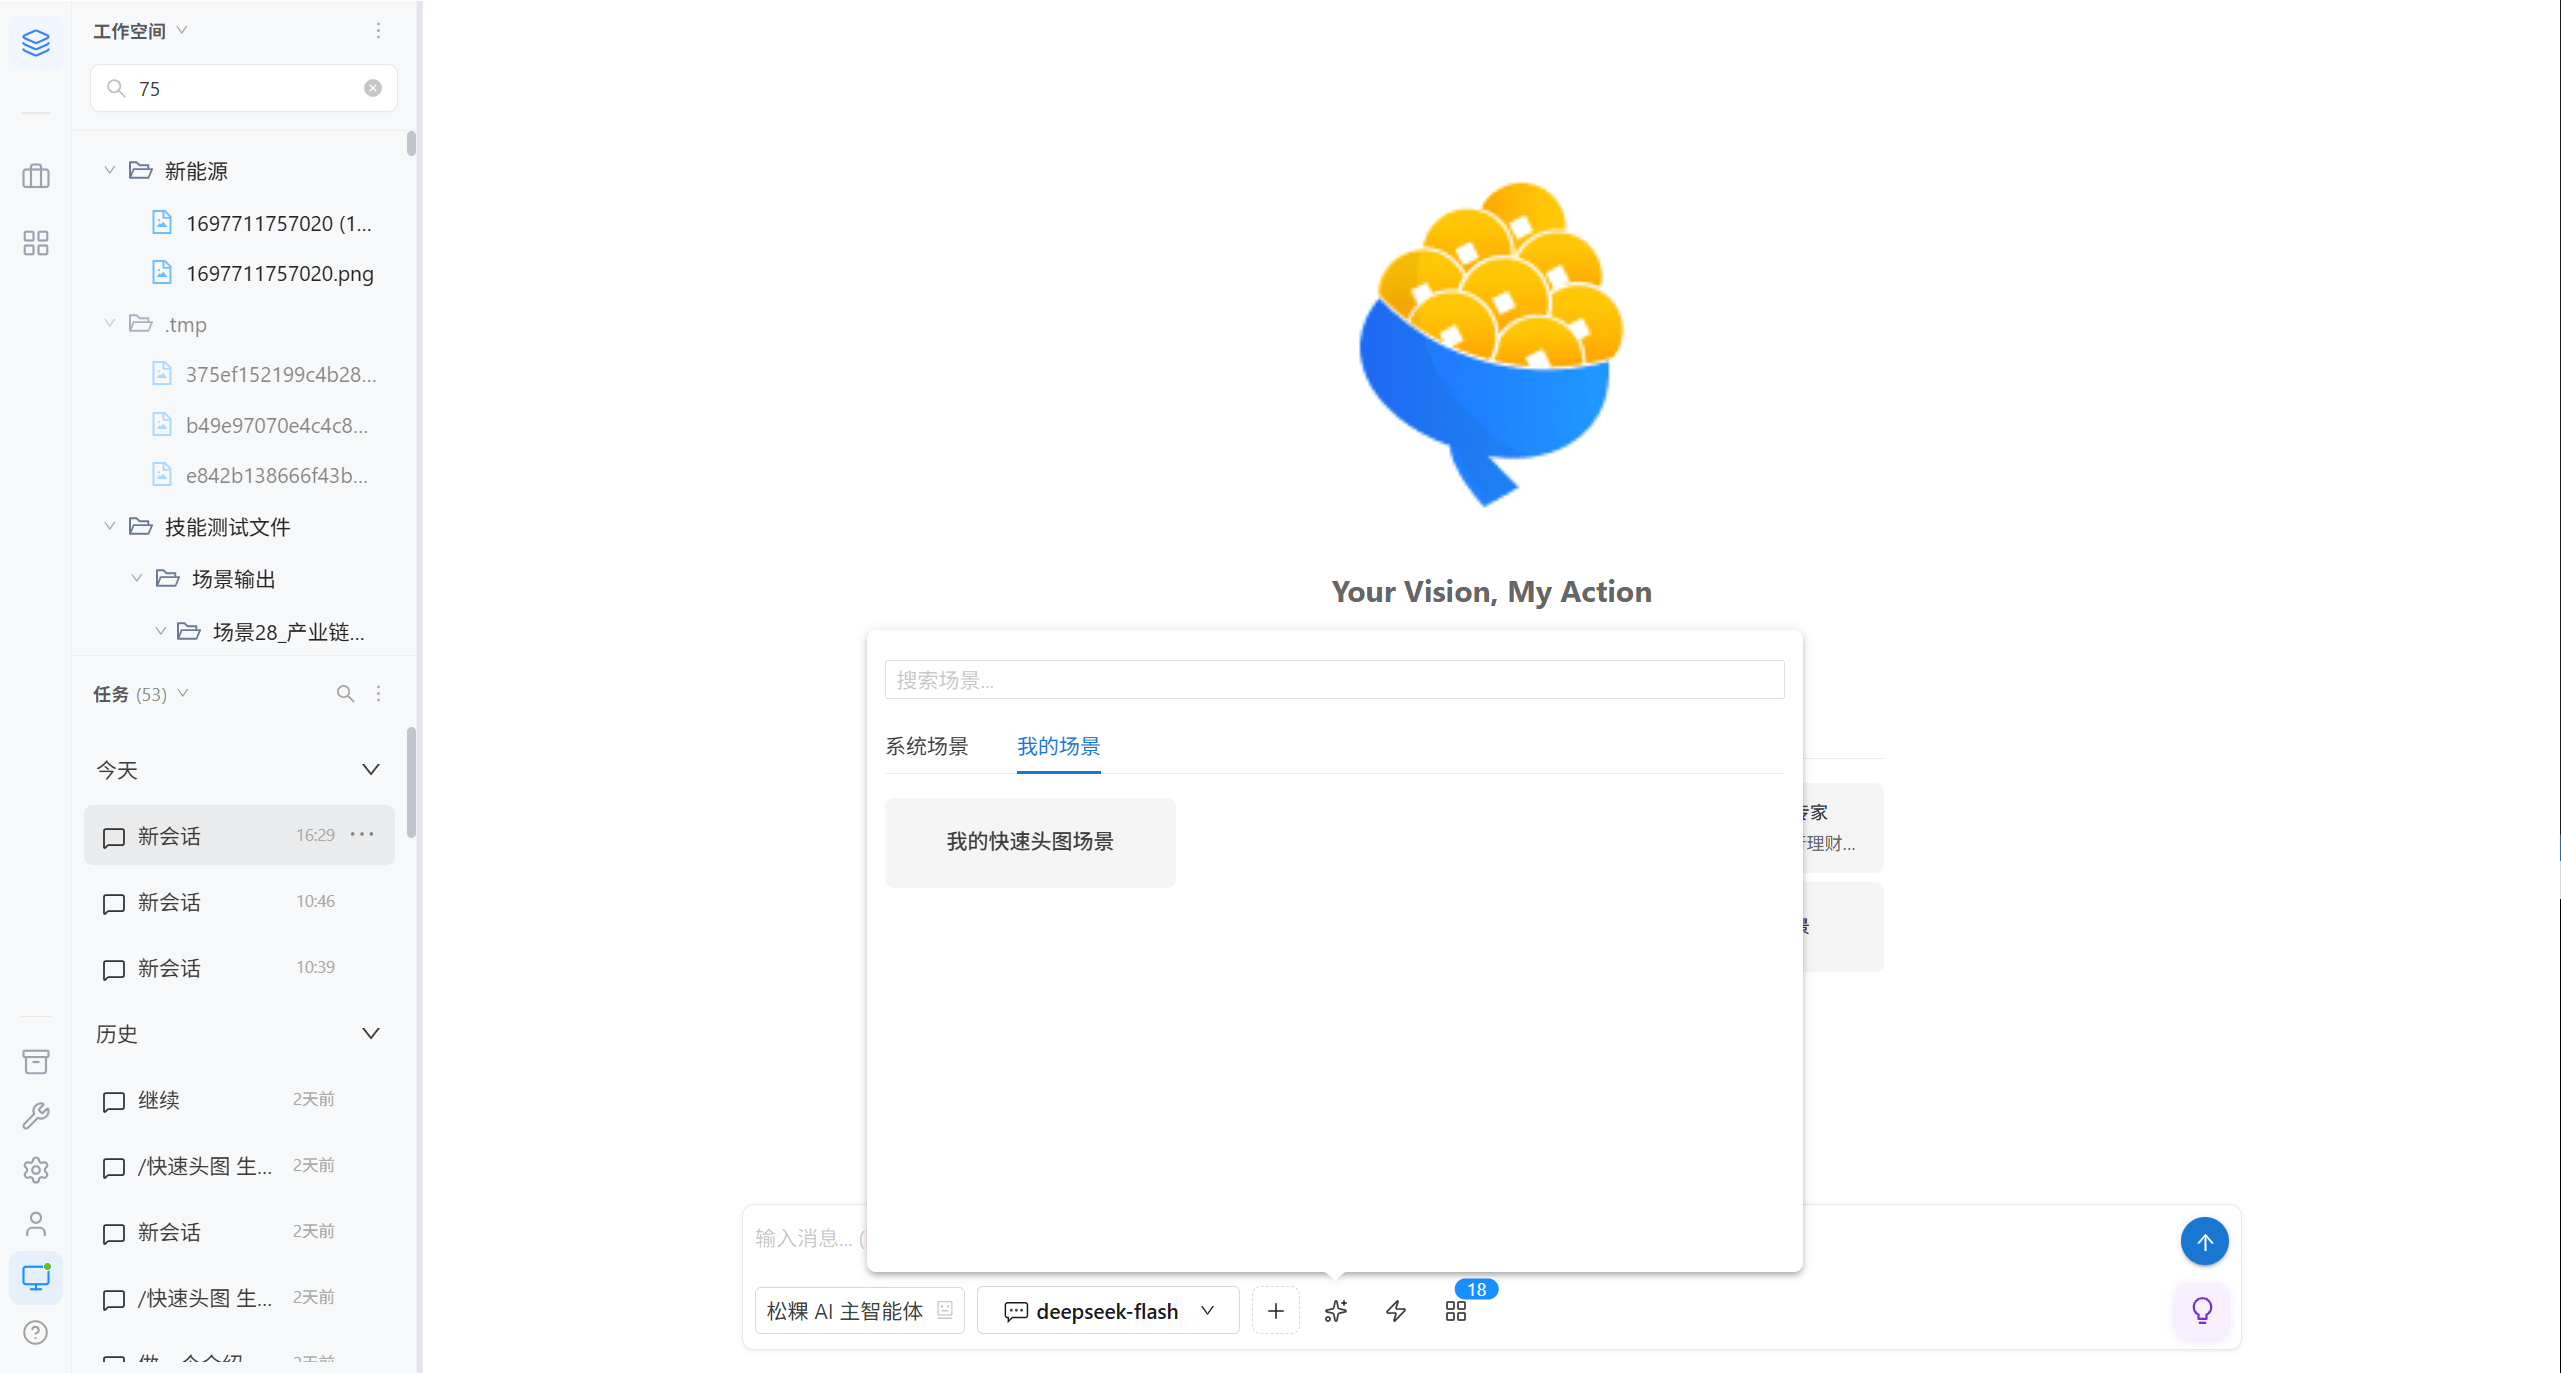
| Tab | Content |
|---|---|
| System scenes | Scenes configured by administrators, usually bound to a group |
| My scenes | Scenes you created yourself |
A scene is a preset combination of "prompt + tools + permissions". Once activated, you no longer have to repeat the background each time.
| Scene attribute | Purpose |
|---|---|
| Scene prompt | Injected as an additional system instruction |
| Scene tip | Explanatory text shown to the user on activation (Markdown) |
| Start a new session | Opens a new session automatically when the scene is activated, preventing context bleed |
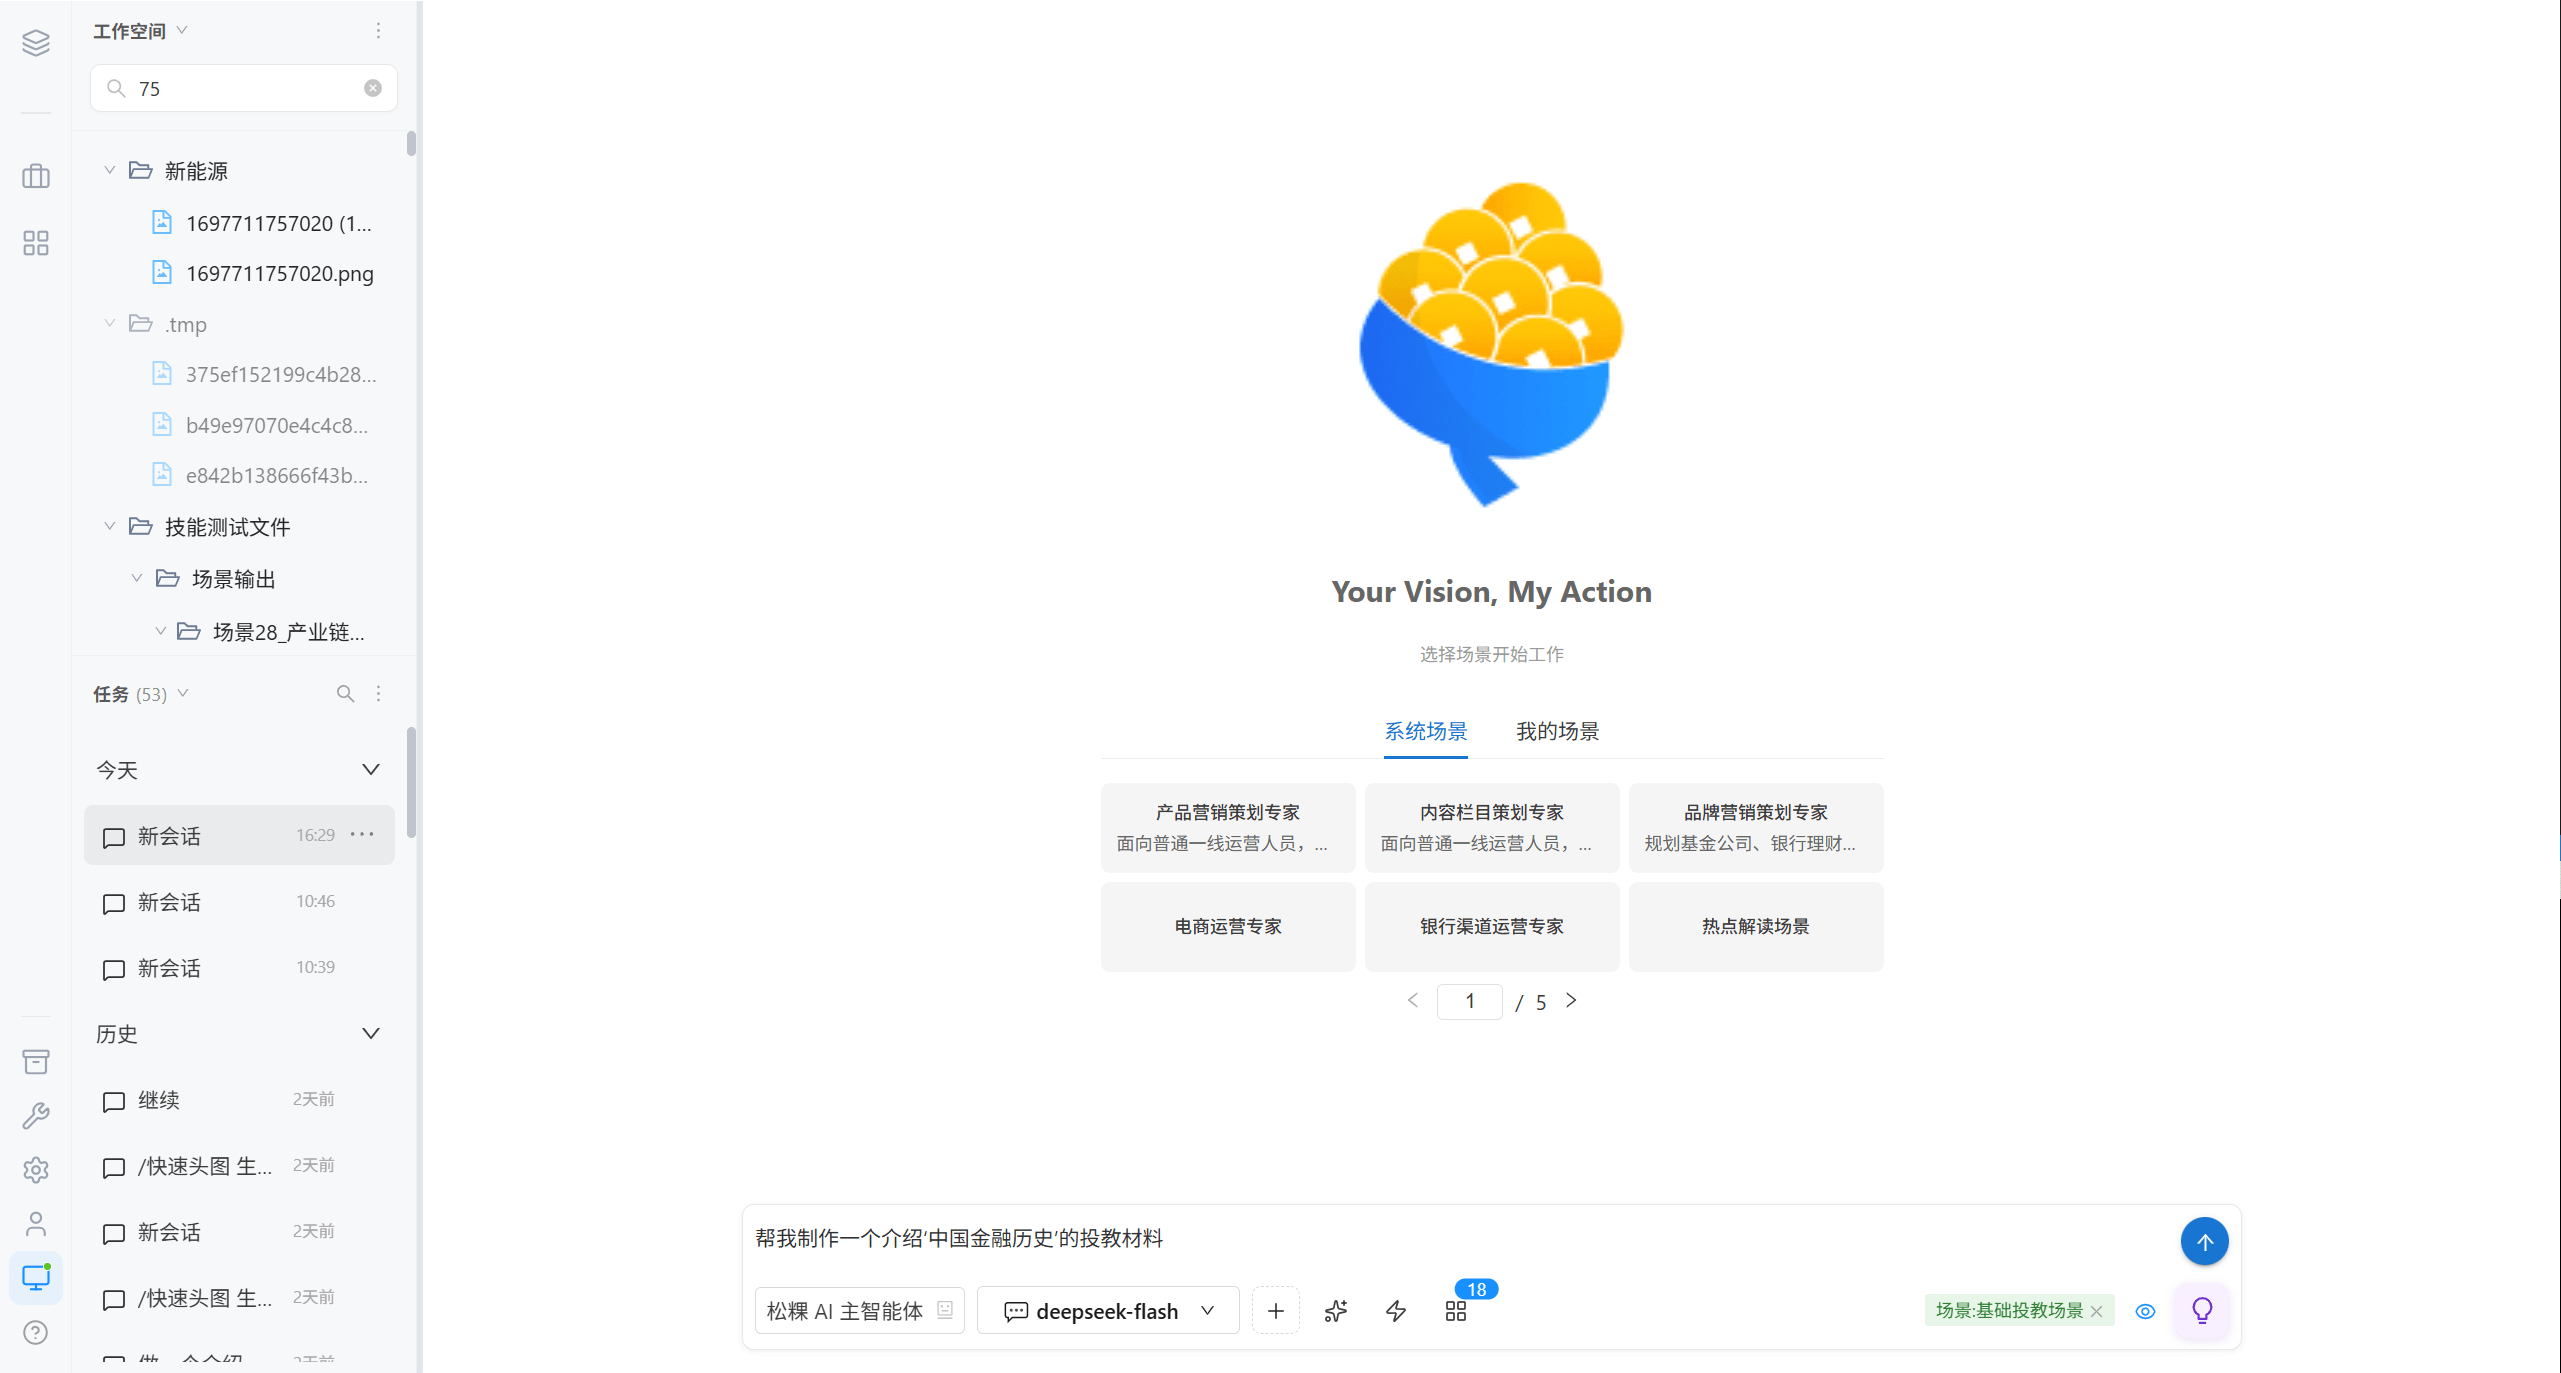
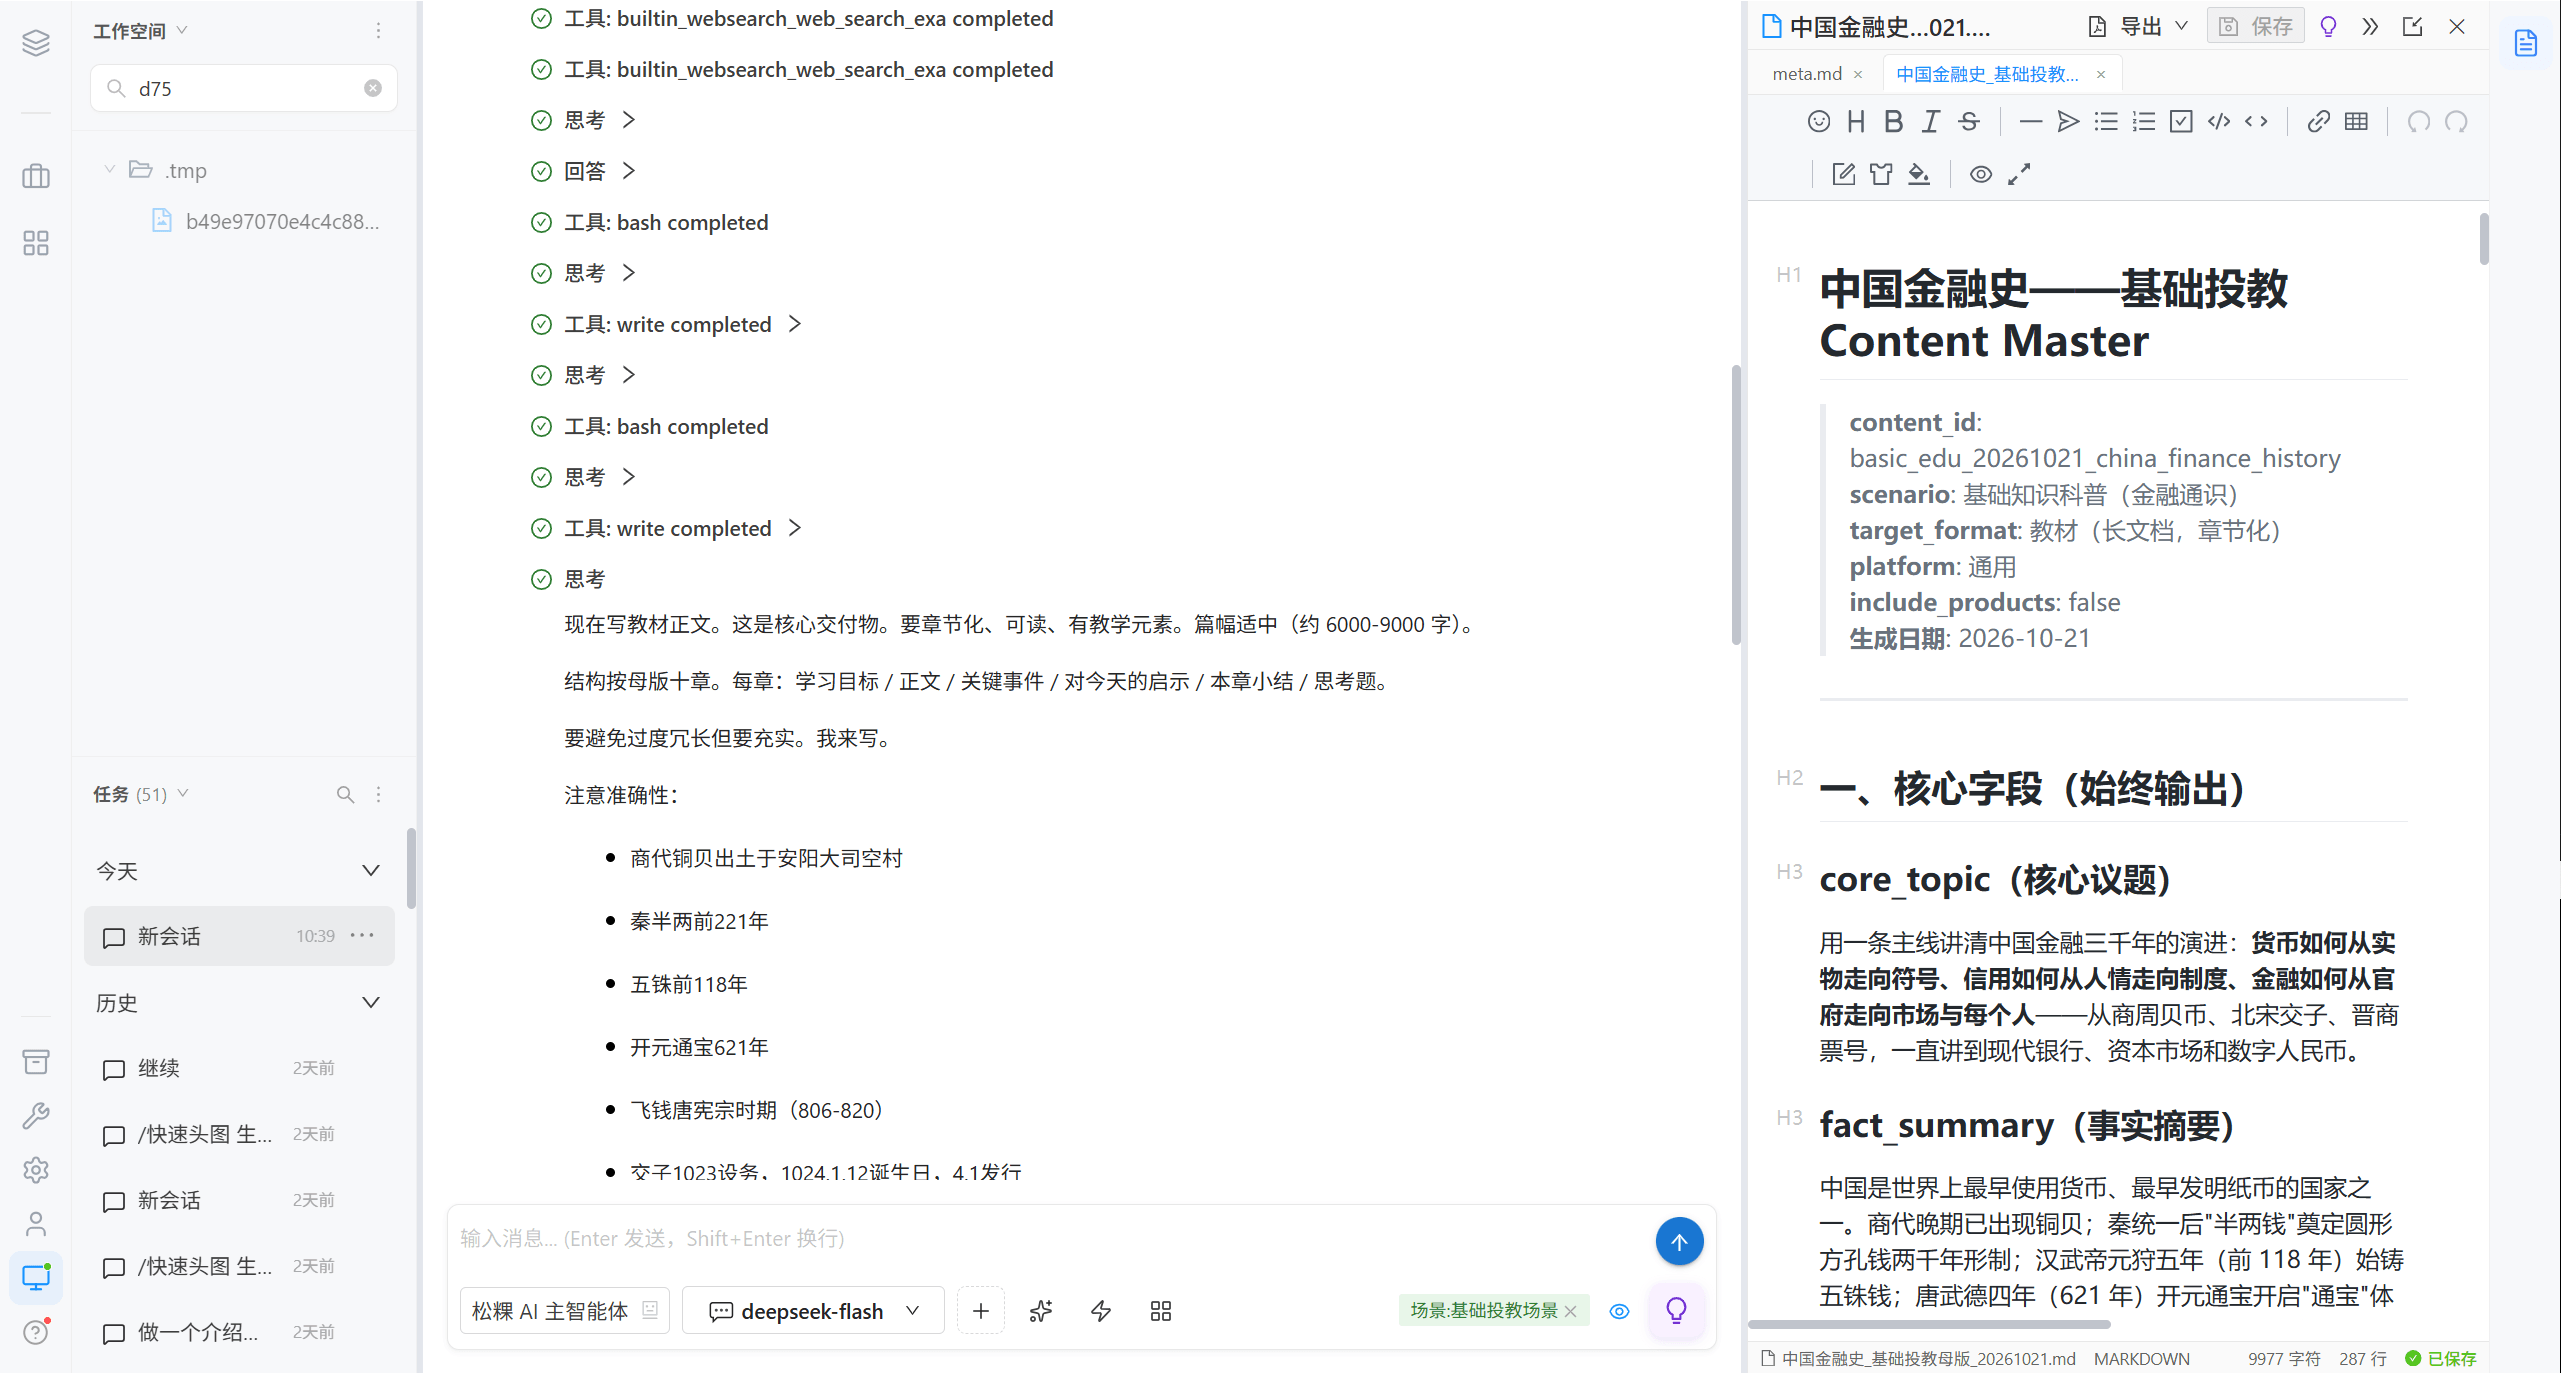
After activation, a scene label appears above the input box, and you can deactivate it at any time.
Connect MCP Tools
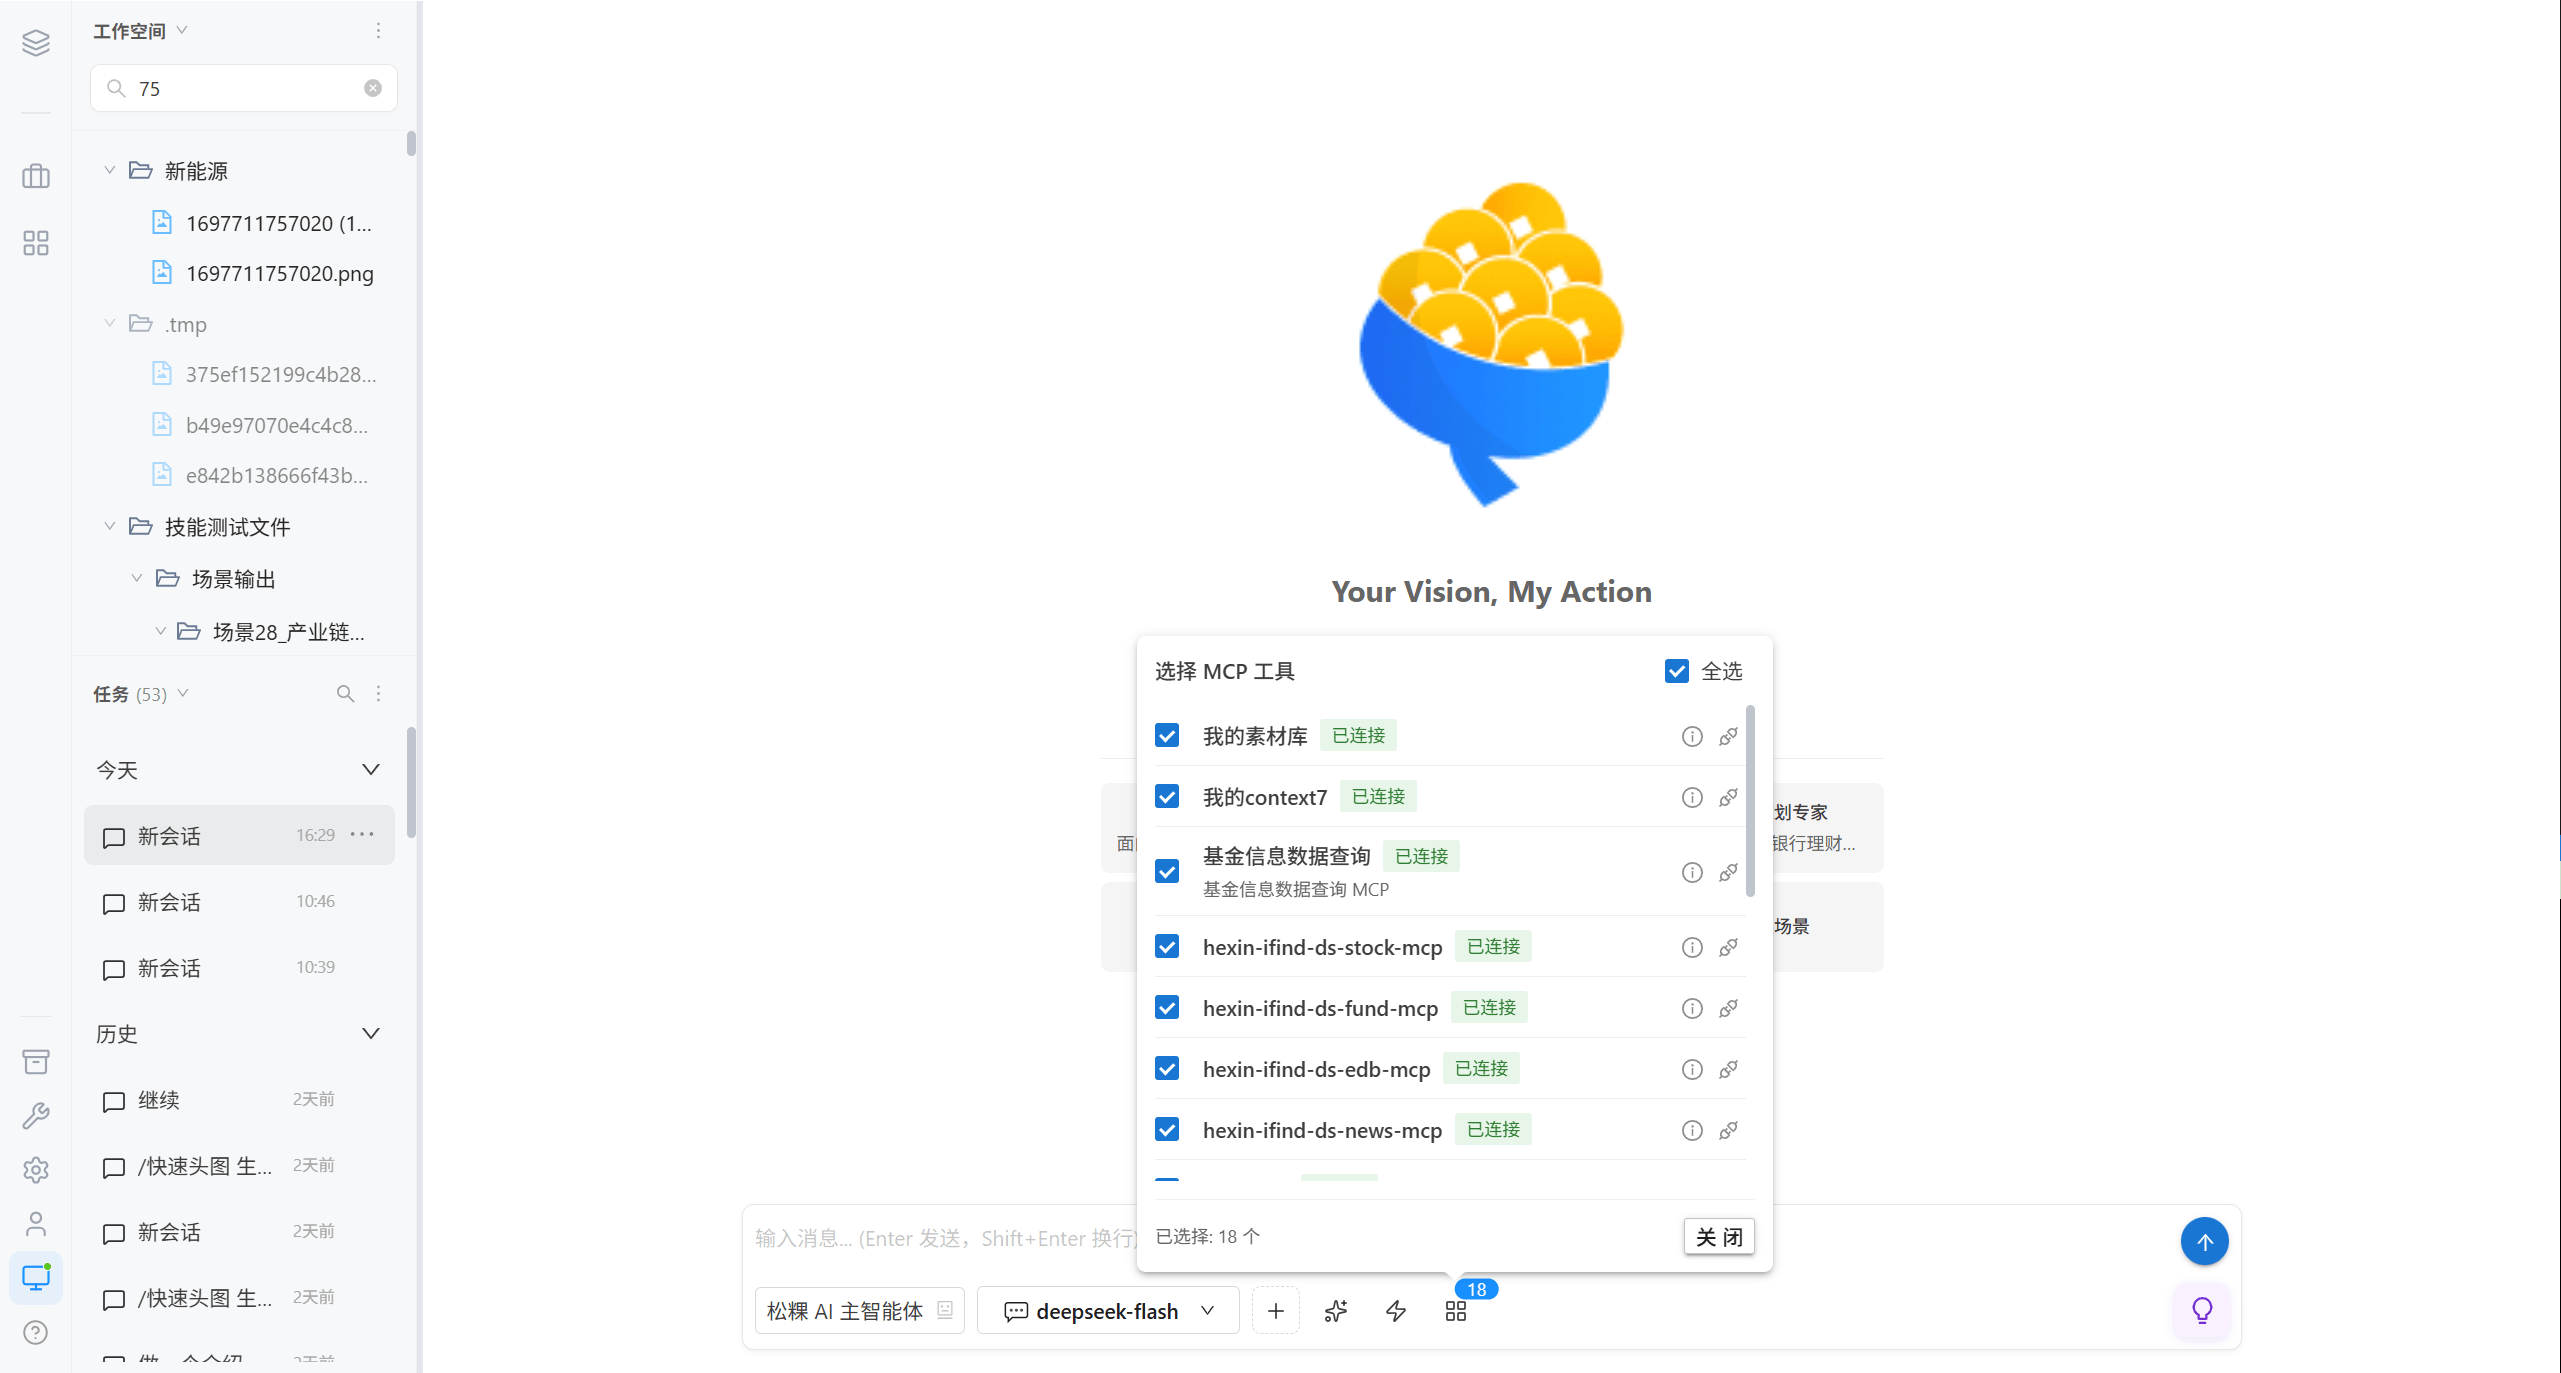
MCP (Model Context Protocol) is an industry-standard protocol for connecting external tools and data sources.
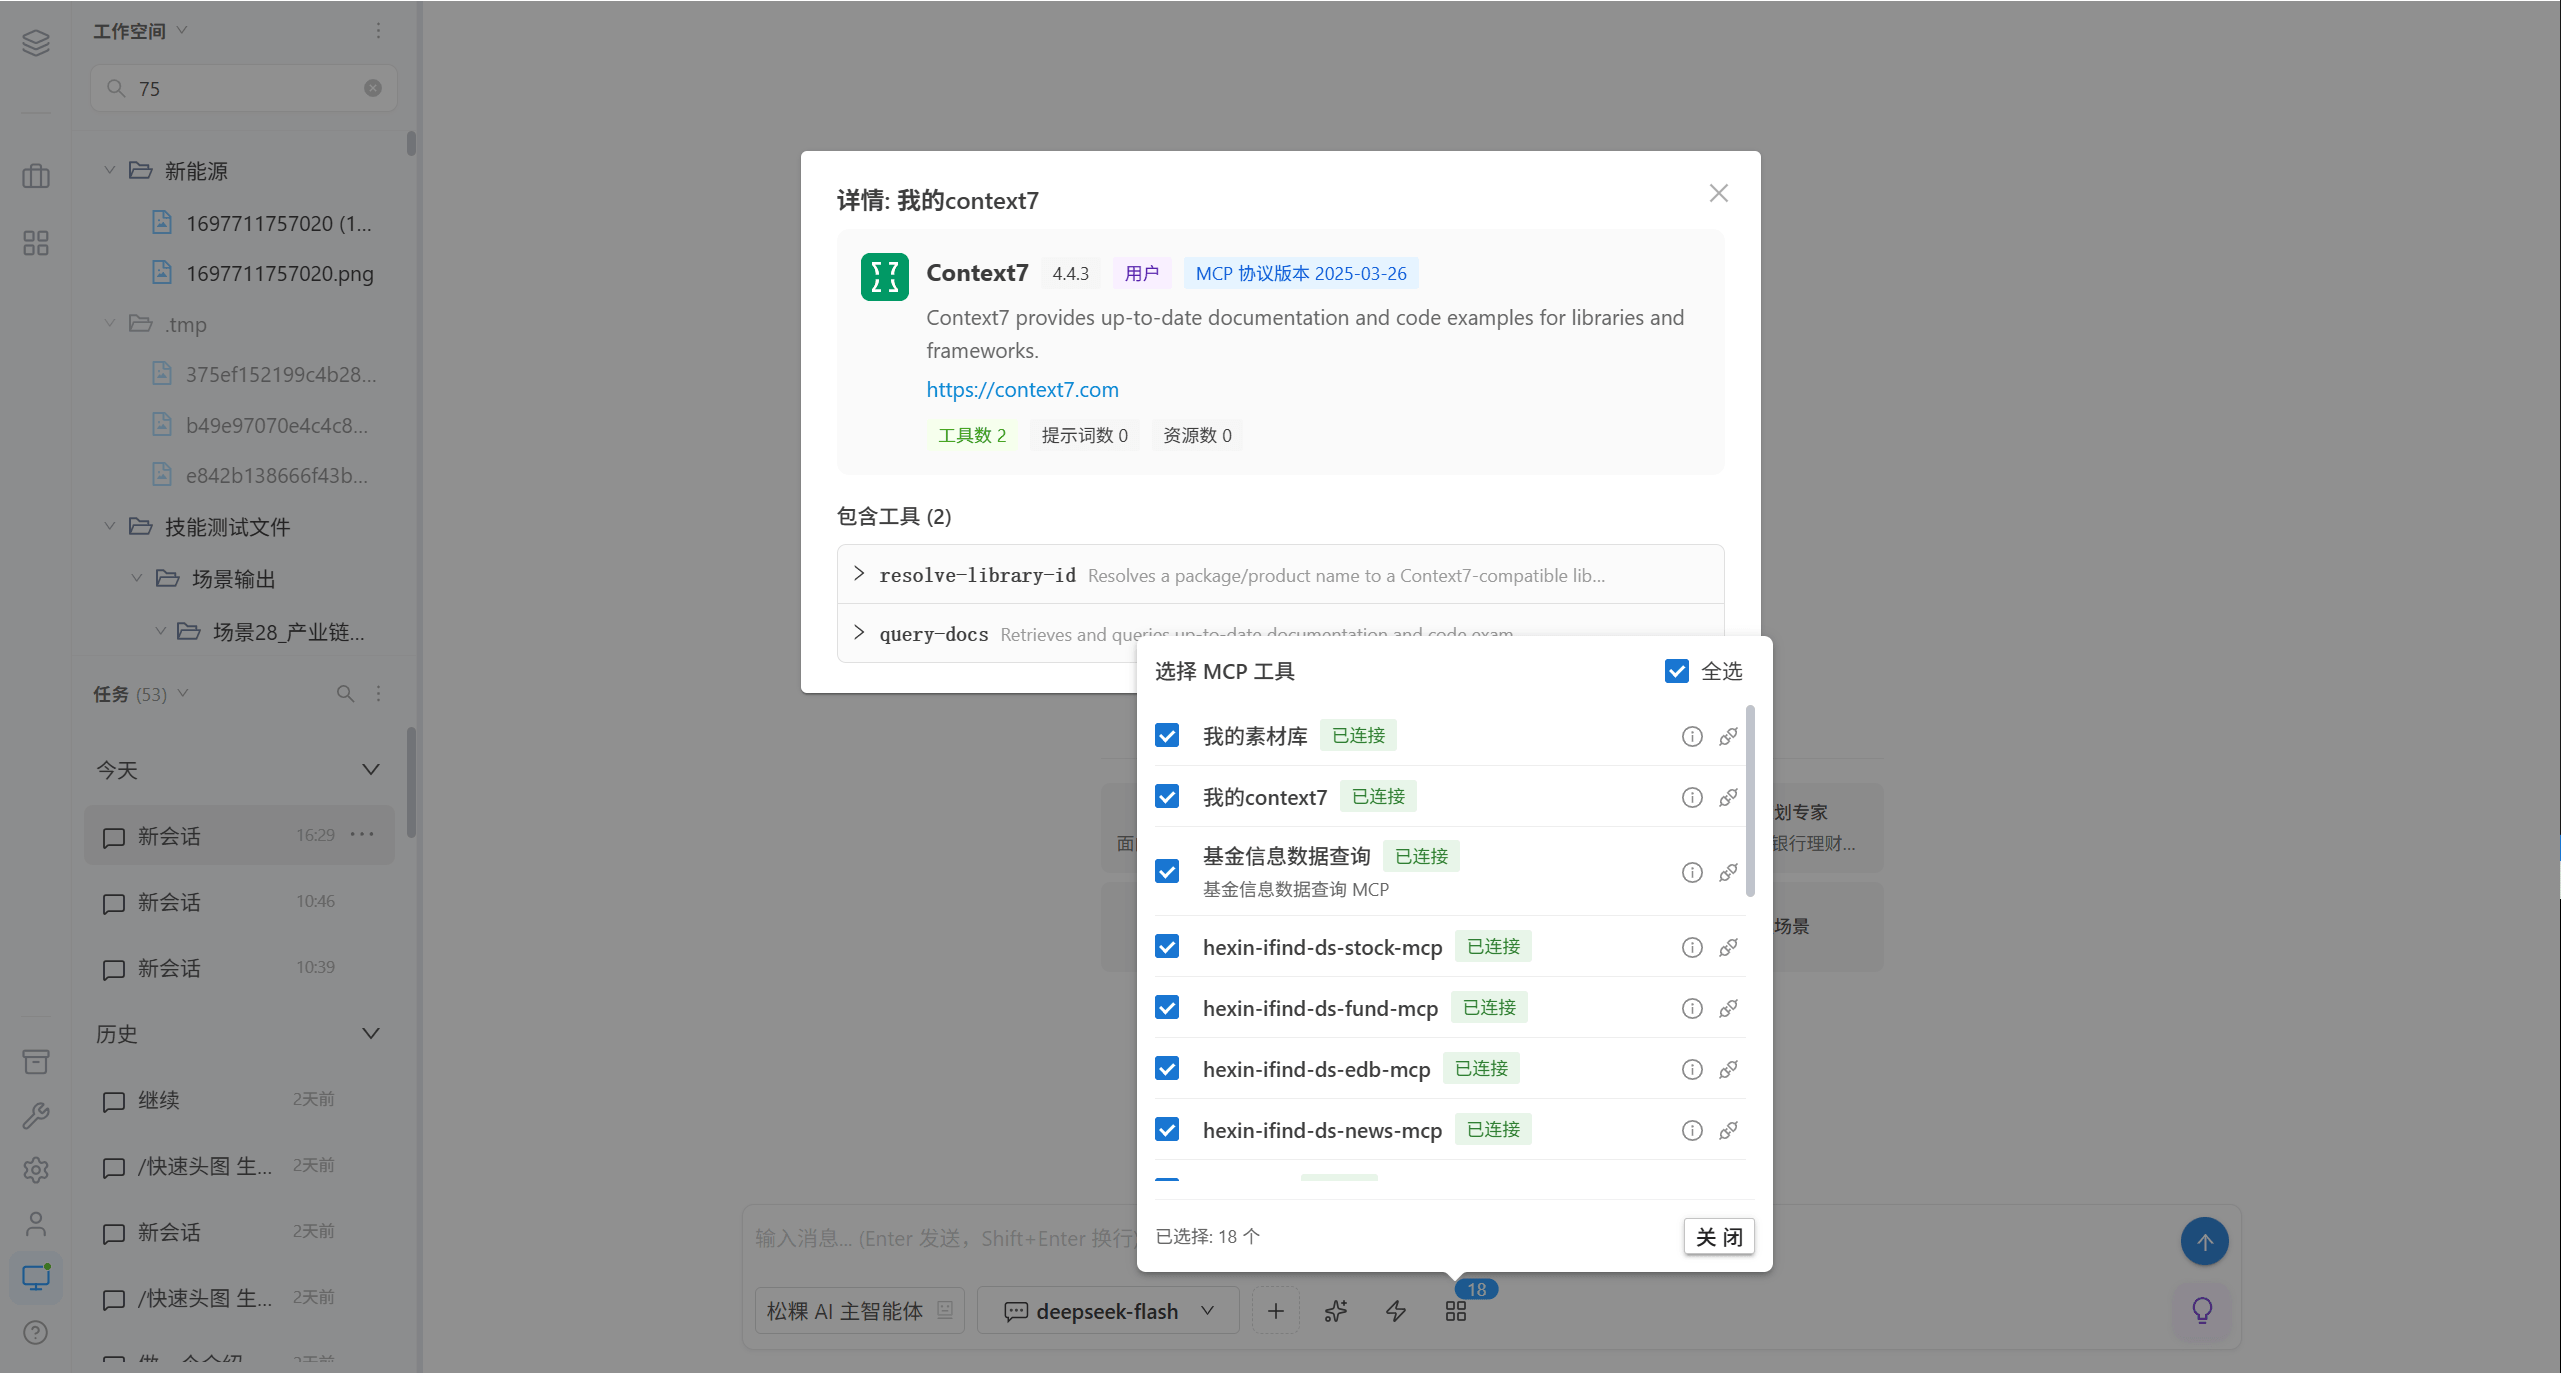
| Action | Description |
|---|---|
| Details | Fetches the tool list provided by that MCP in real time; the first fetch is relatively slow |
| Reconnect | Manually reconnect when the connection fails |
| Select all | Check all tools in the current list at once |
| MCP source | Who can configure it | Who can use it |
|---|---|---|
| Built-in | Administrators | All users |
| System | Administrators | All users |
| User | The user themselves | Only that user |
Upload Files
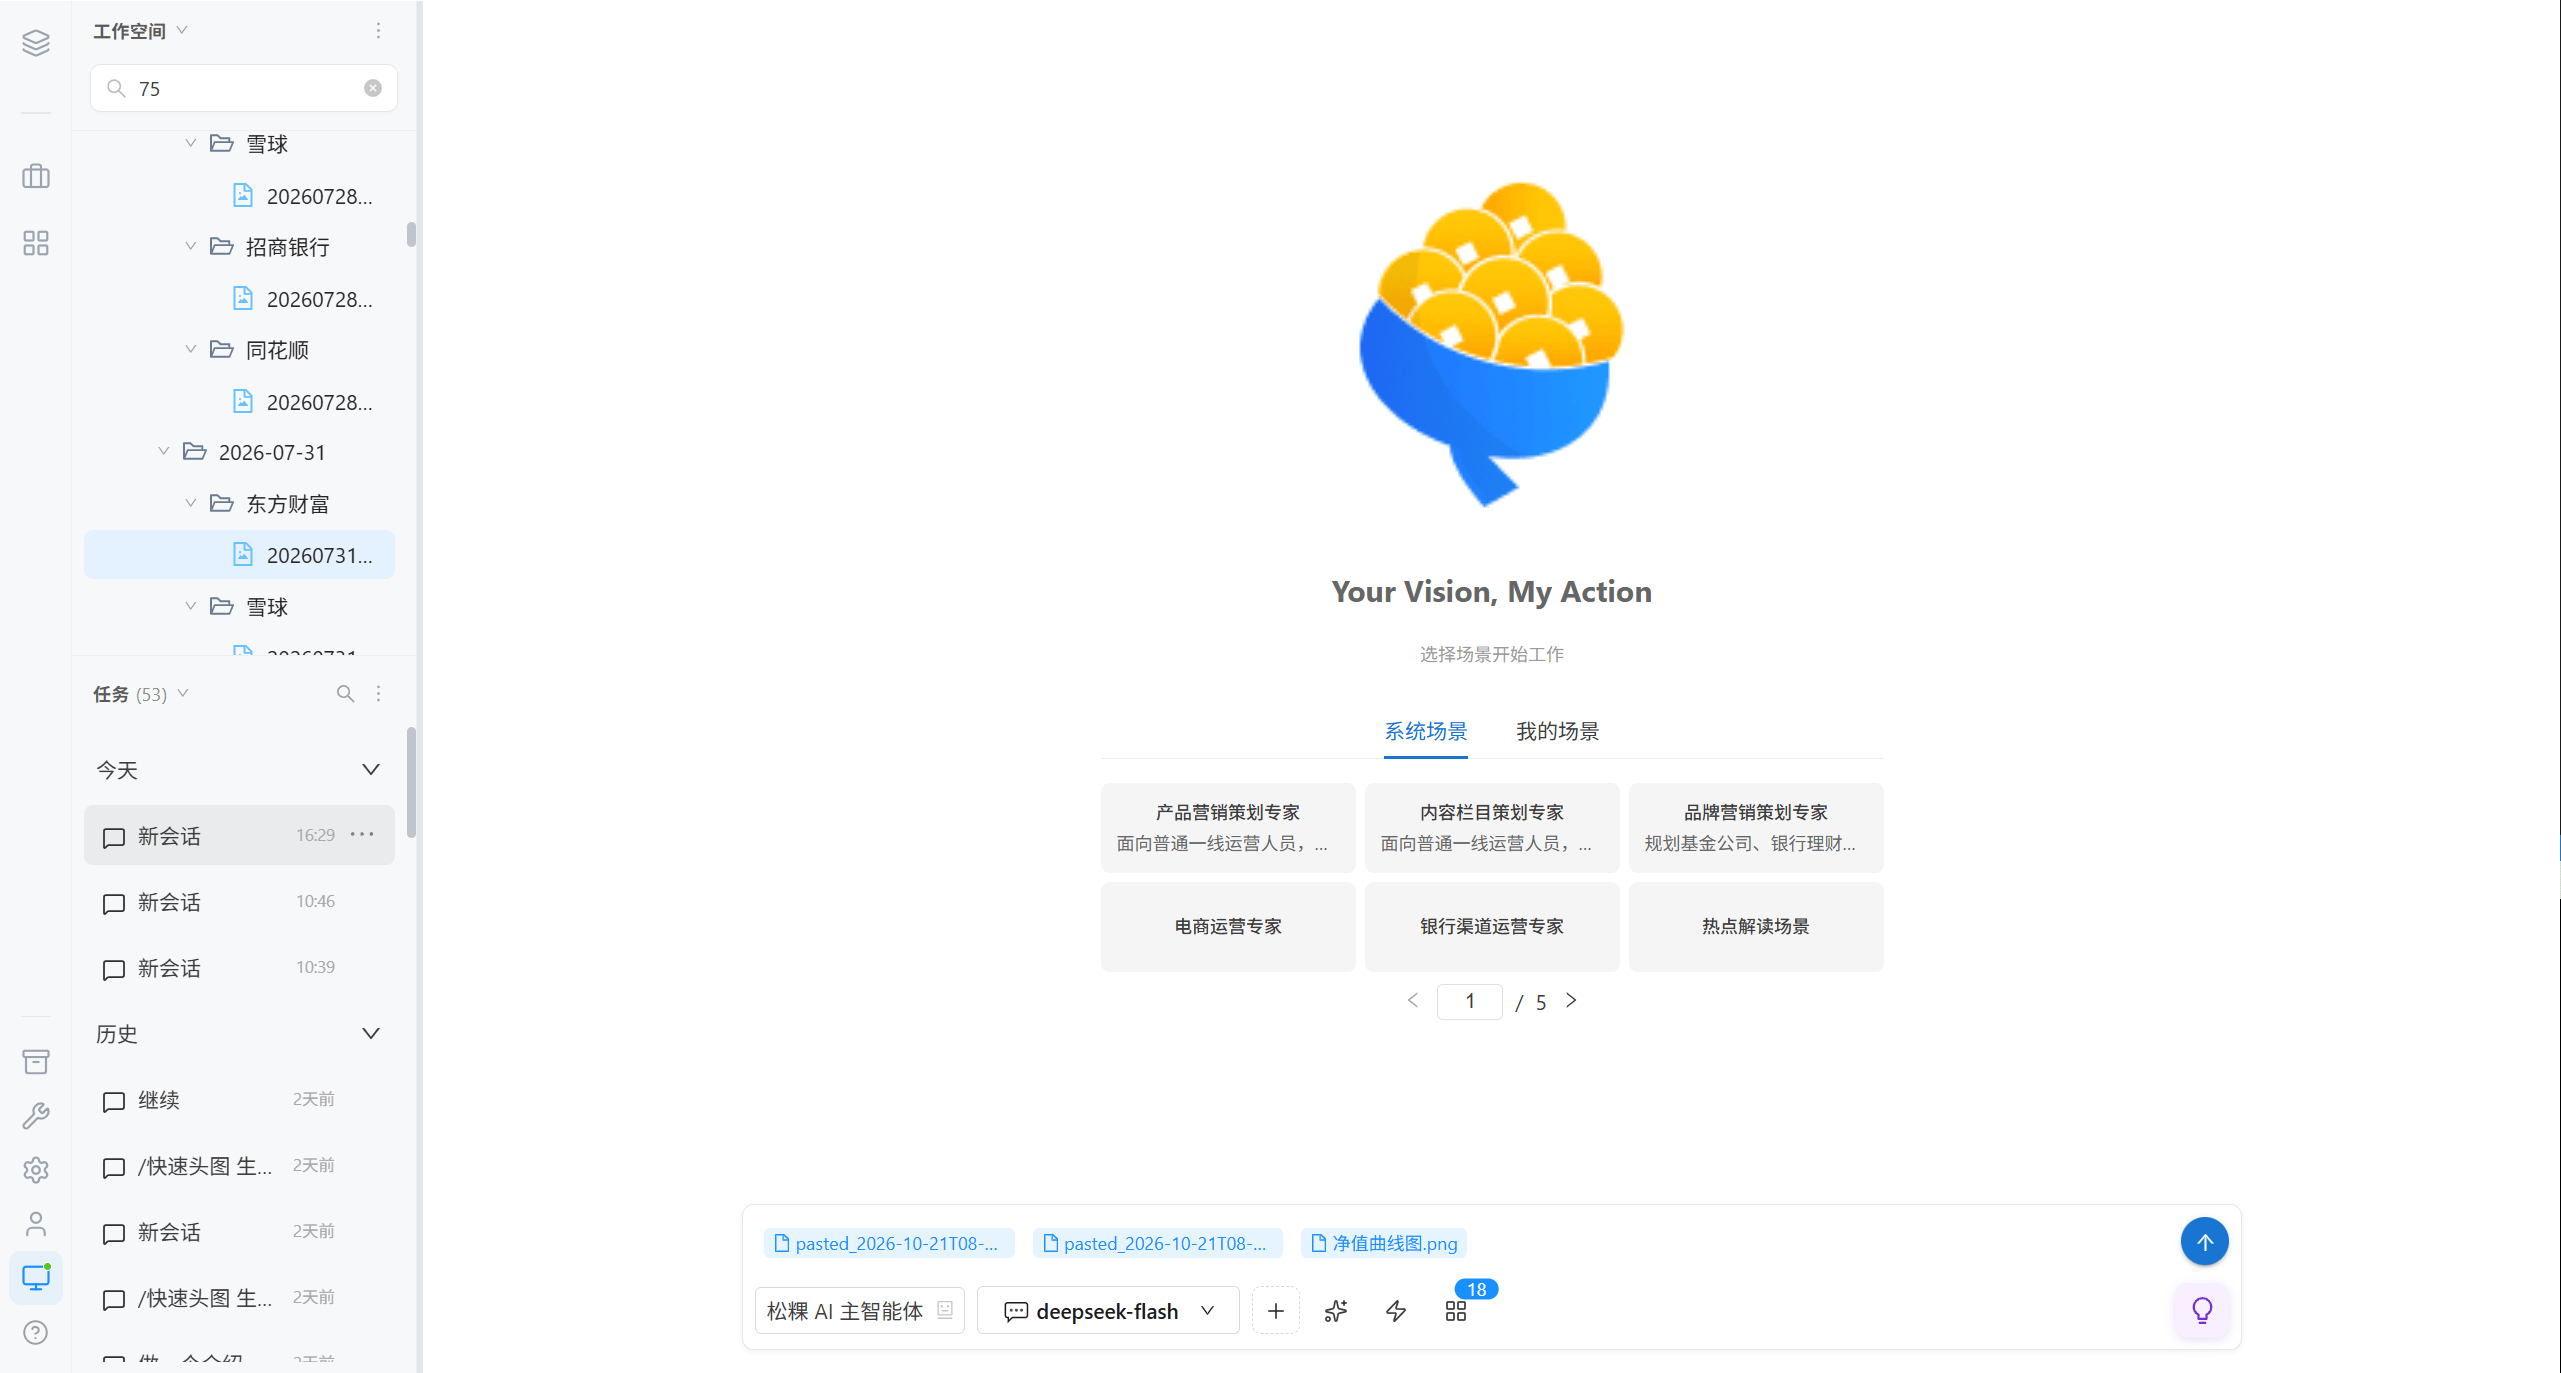
Files uploaded directly in the input box are carried into the message as "file tokens", and the AI will read them proactively. Press Backspace to delete a selected file token.
Enable Smart Edit
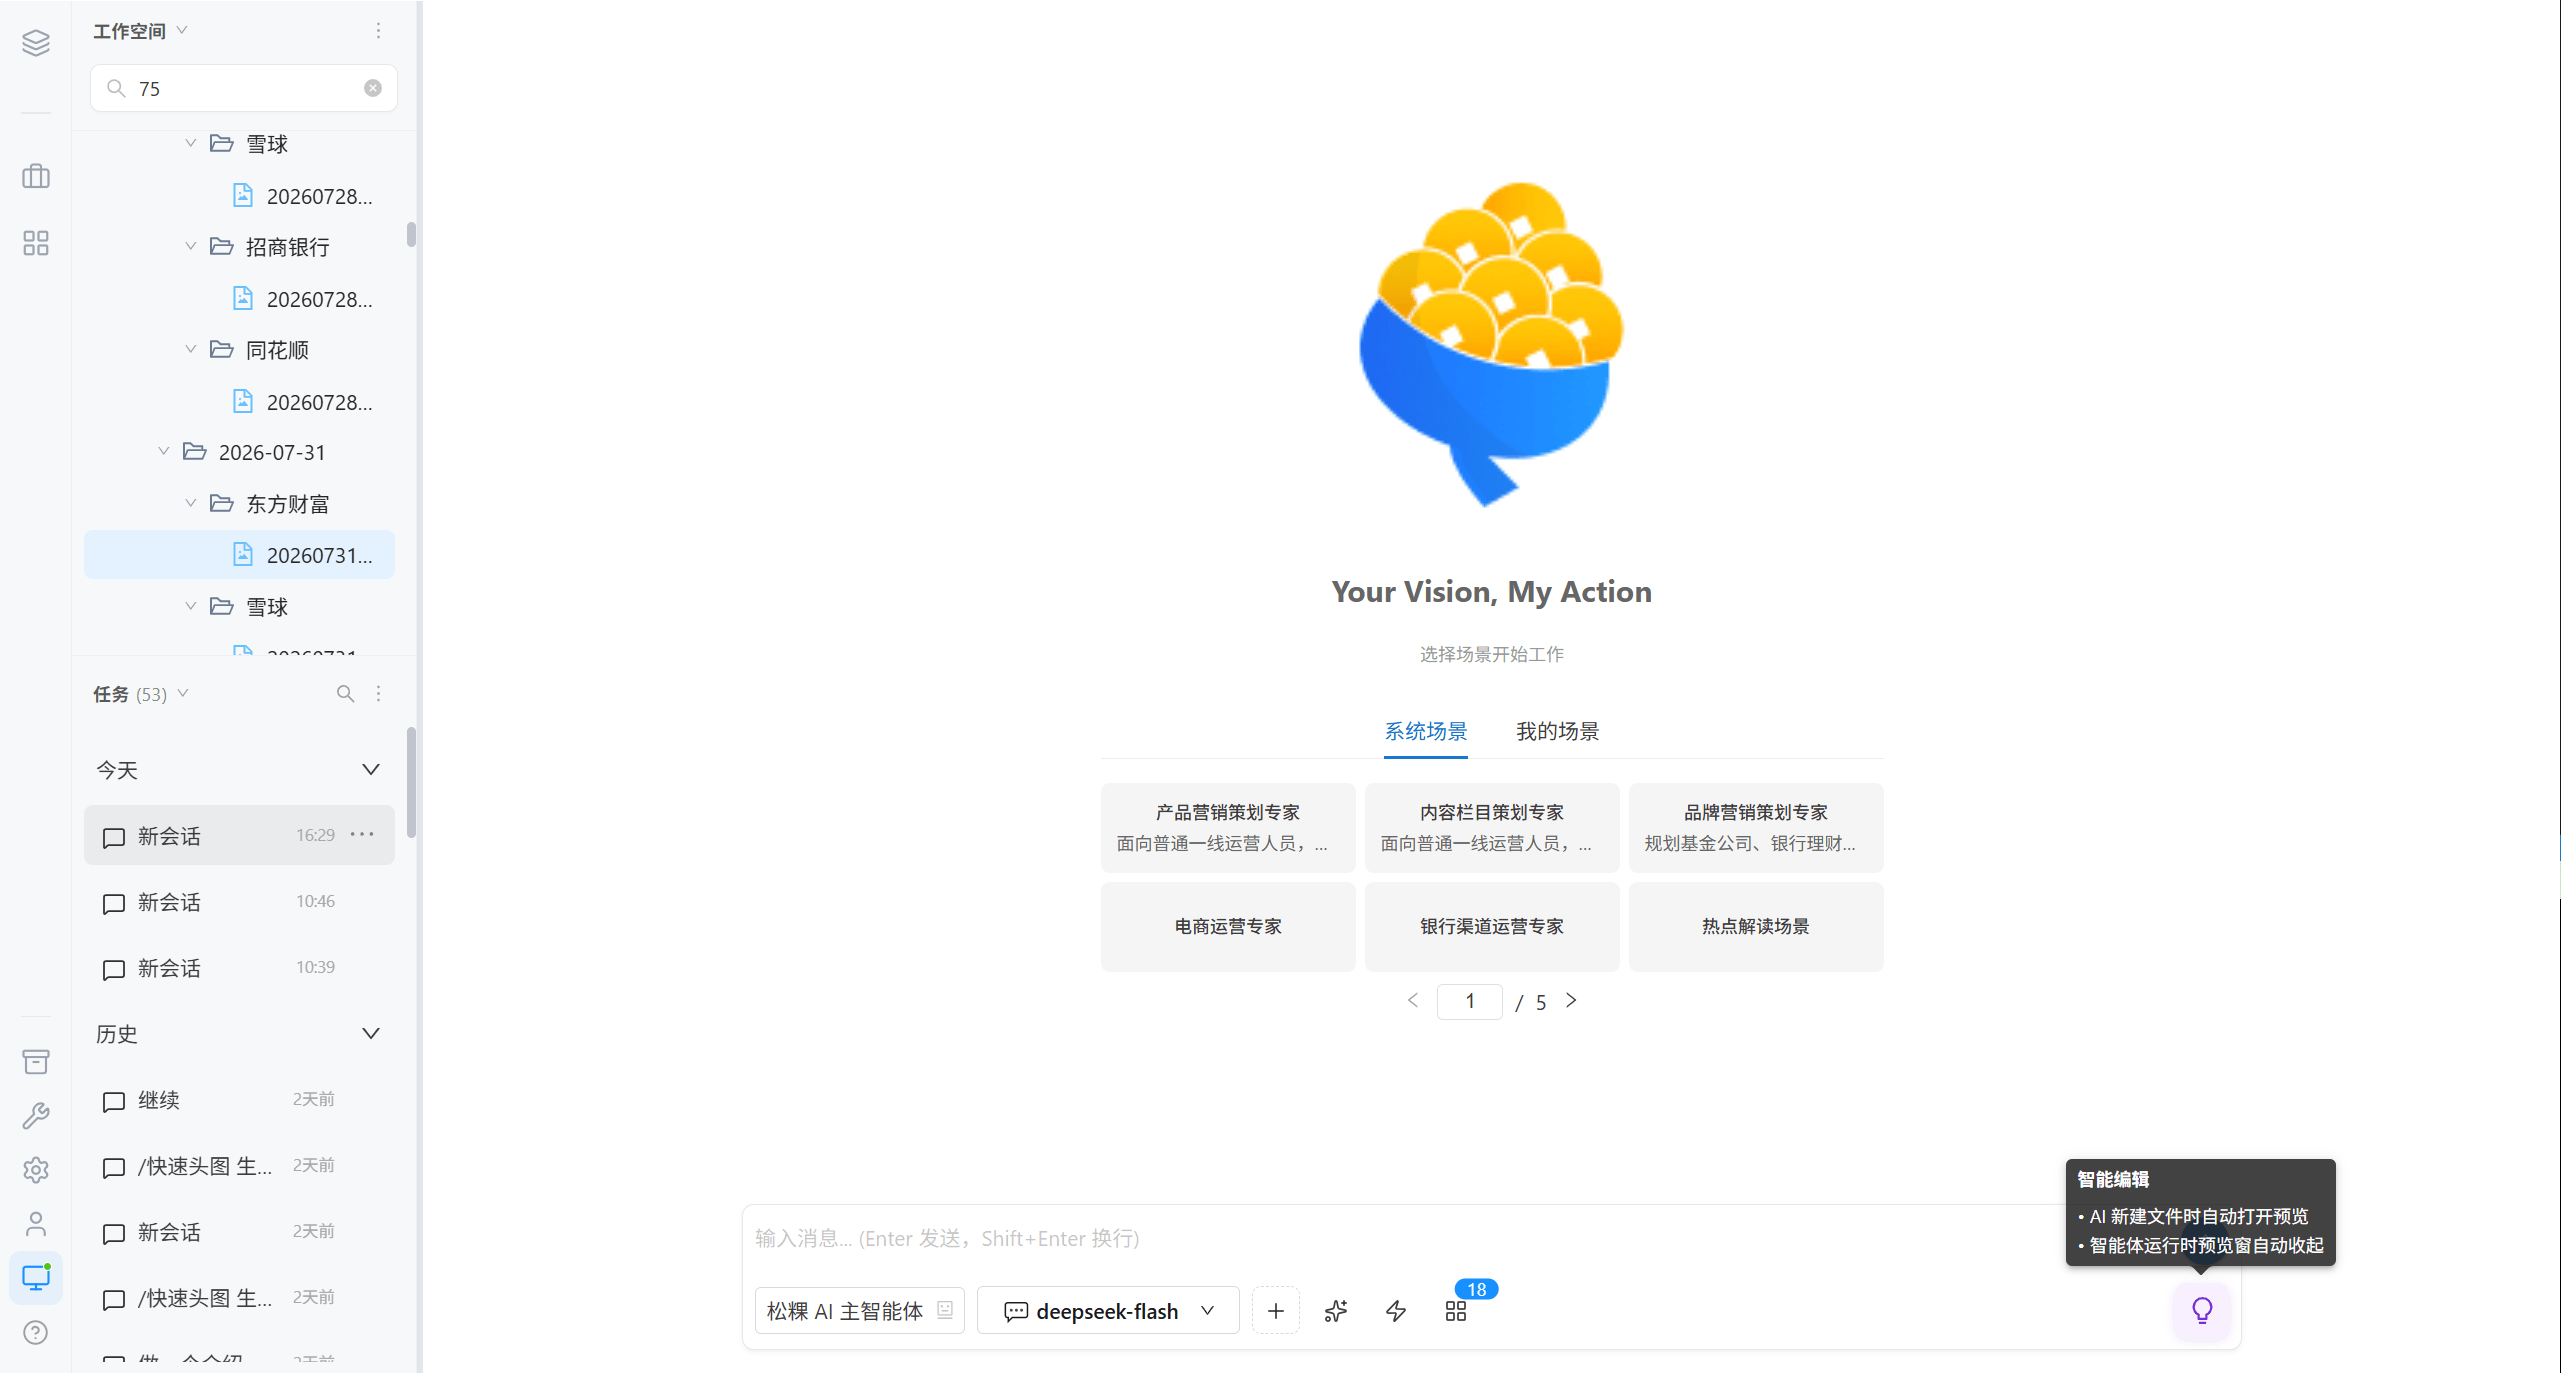
| When enabled | When disabled |
|---|---|
| When the AI creates or edits a Markdown file, the preview expands automatically on the right | No automatic expansion |
| While the AI agent is running, the preview pane shrinks automatically to give room to the conversation area | The preview pane stays expanded |
Ideal for document collaboration where you want to review and edit at the same time.
Select and Refine
On an image generation result, drag to select a local region and redraw it, which makes a local modification instead of regenerating the whole image.
| Item | Value |
|---|---|
| Prerequisite | Requires an image generation model that supports inpainting (e.g., Wanxiang 2.7) |
| Operation | Drag on the image to select a region → the selection is inserted into the input box automatically |
2.3 AI Will Ask for Your Confirmation
The AI stops and asks for your consent before performing sensitive operations.
Permission Dialog
| Option | Effect |
|---|---|
| Allow once | Let this one through; you will be asked again next time |
| Always allow | Permanently allow this pattern, with no further prompts |
| Deny | Deny this time; you can attach a reason that is fed back to the AI |
| Dialog type | Trigger |
|---|---|
| Read file | Reading a file outside the workspace |
| Write file / Edit file | Creating or modifying a file |
| Execute command | Running a shell command |
| Fetch webpage / Search the web | Accessing the external network |
| Access external directory | Reading or writing a directory outside the workspace |
| Subtask | Dispatching a sub-agent |
| Ask the user | The AI asks you a question in return |
| Tool failure loop | The same tool keeps failing |
Tip · Read the matching rule carefully before choosing "Always allow". An overly broad rule lets the AI keep accessing ranges you did not intend to open.
Question Dialog
When the AI needs you to make a choice, it pops up a dialog that supports single-select, multi-select, and confirmation.
| Type | Interface |
|---|---|
| Single select | Several options, pick one and submit |
| Multi select | Several options, check several of them and then submit |
| Confirm | Two buttons, Yes / No |
Besides the options, you can also "enter a custom answer".
2.4 Collect the Output
Files created or modified by the AI are recorded under right panel → Session-related files.
| Category | Meaning |
|---|---|
| Created this time | Files newly created by the AI |
| Modified this time | Existing files changed by the AI |
Each record supports opening, downloading, removing from the list, and deleting the file.
Export the conversation: Below the AI's answer, you can export it as PDF or Word.
Note · "Remove from the list" only makes it disappear from the list; the file is still in the workspace. "Delete file" actually deletes it and cannot be undone.
3. Workspace Files
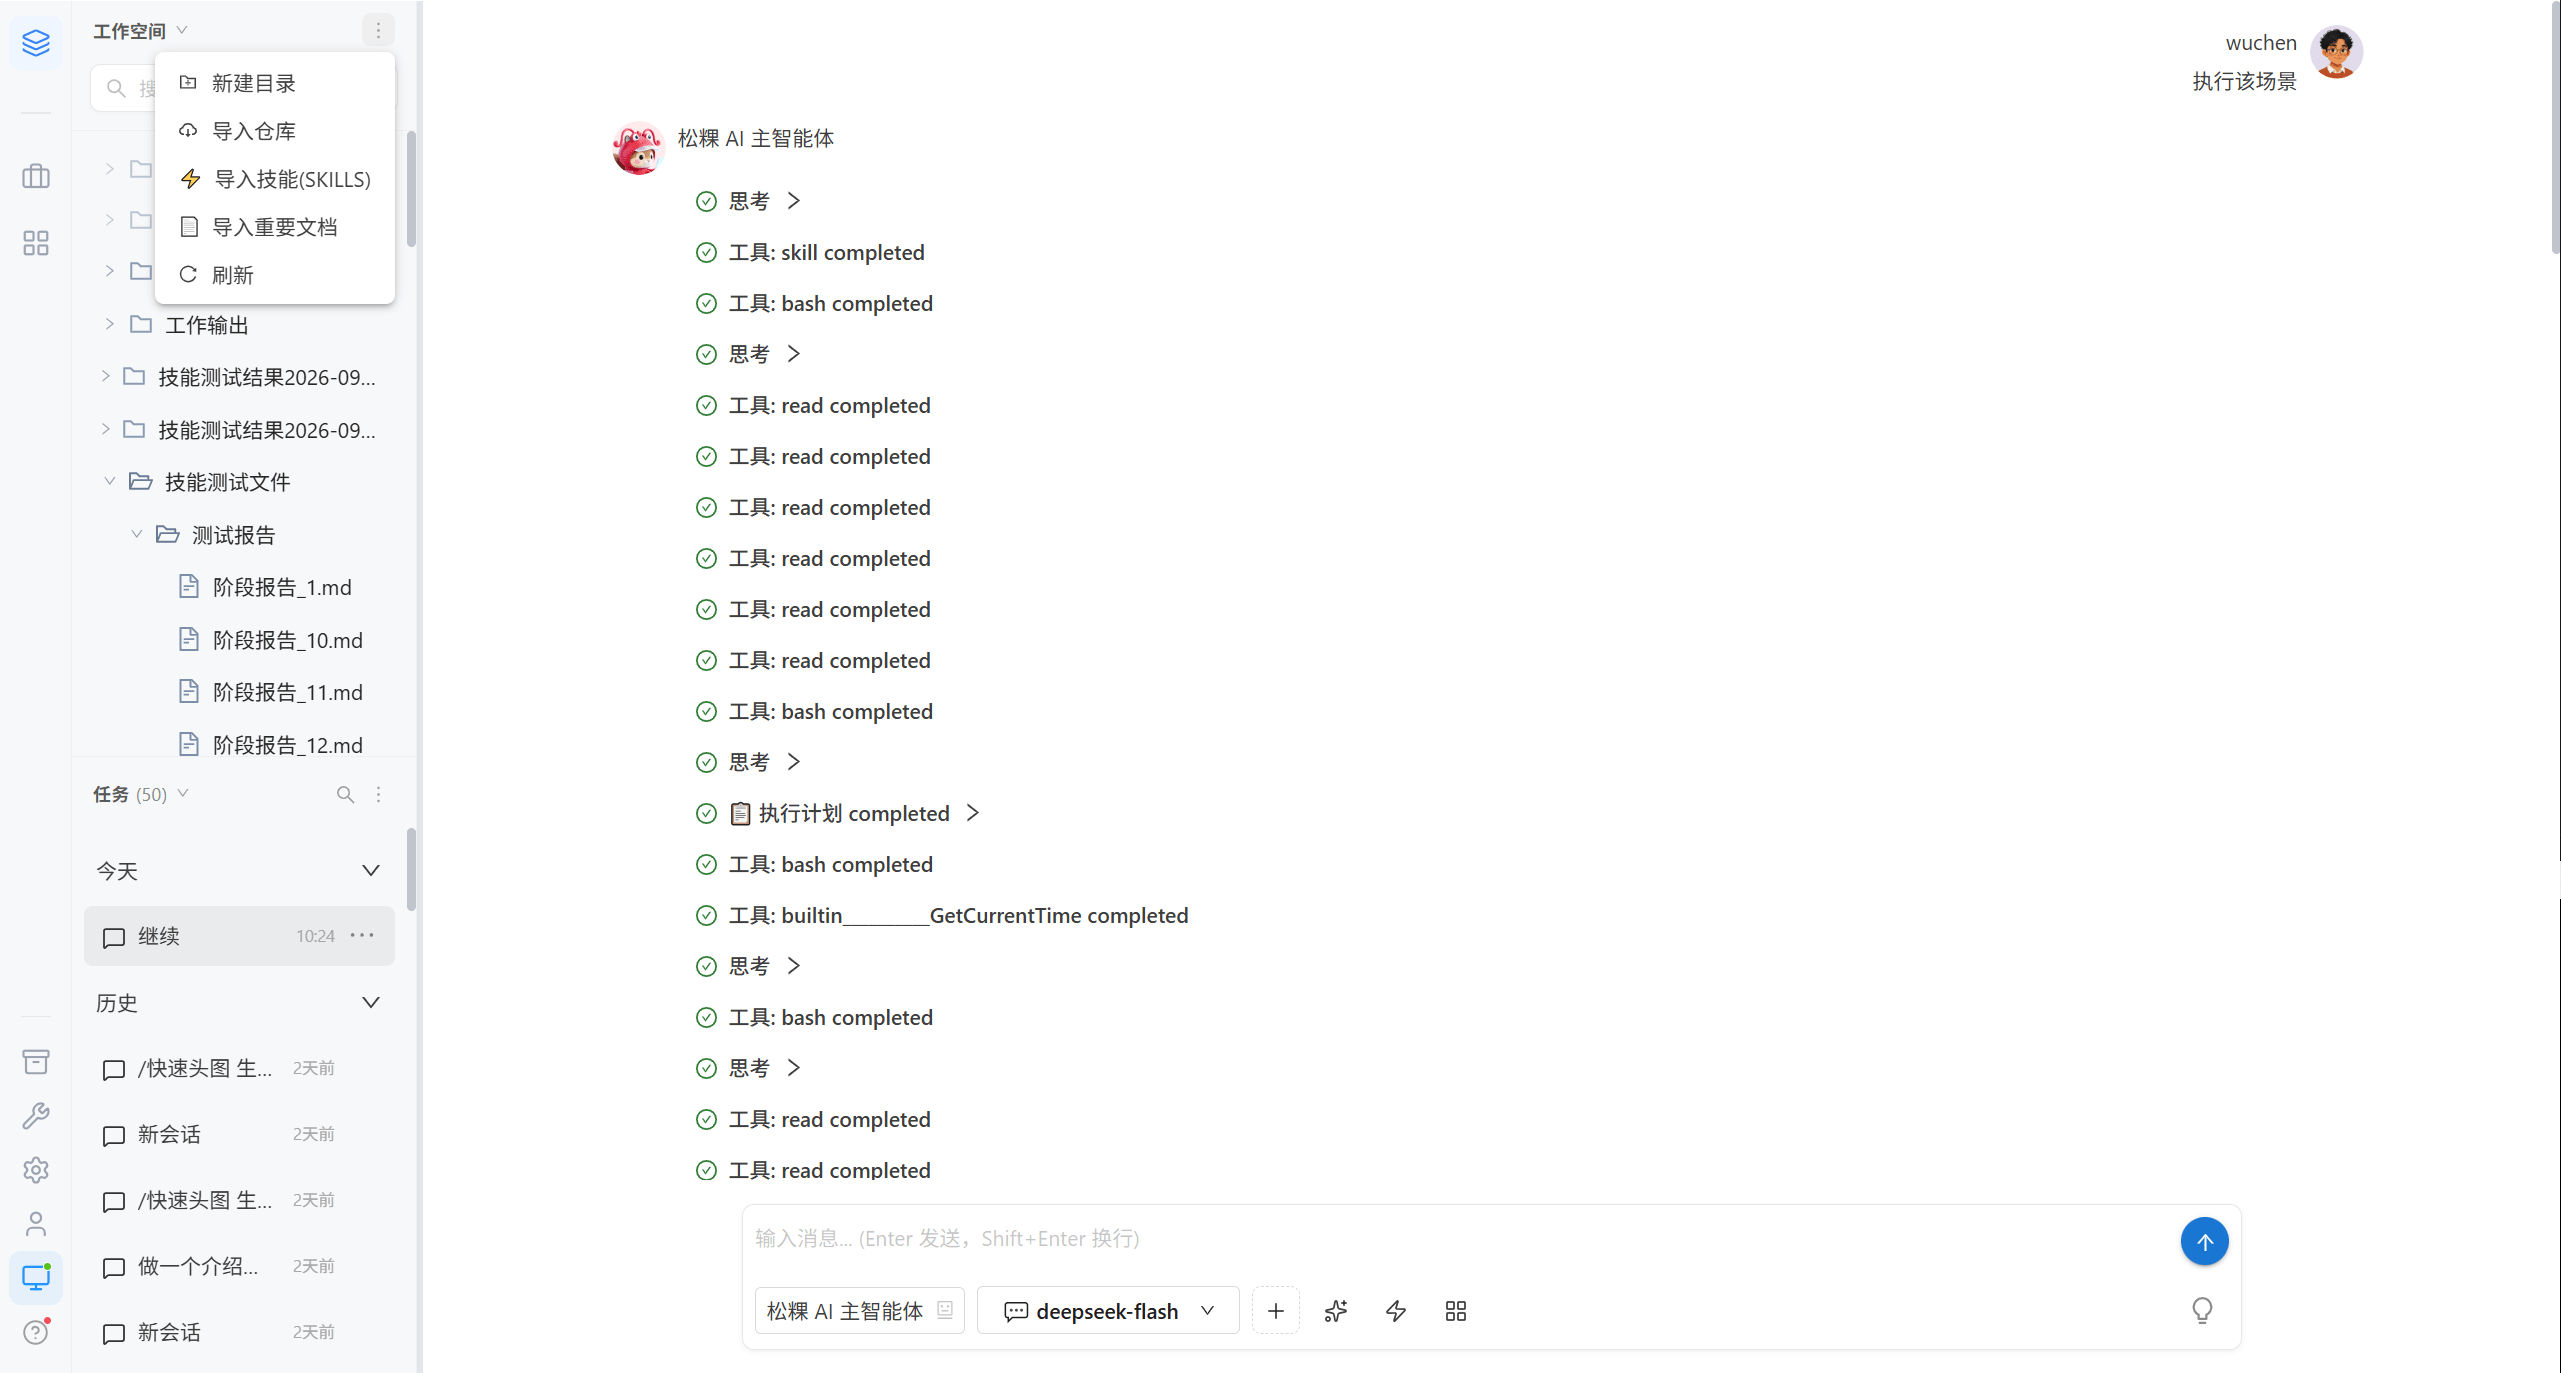
The workspace is a file directory exclusive to you, physically stored on your node's disk and fully isolated from other users.
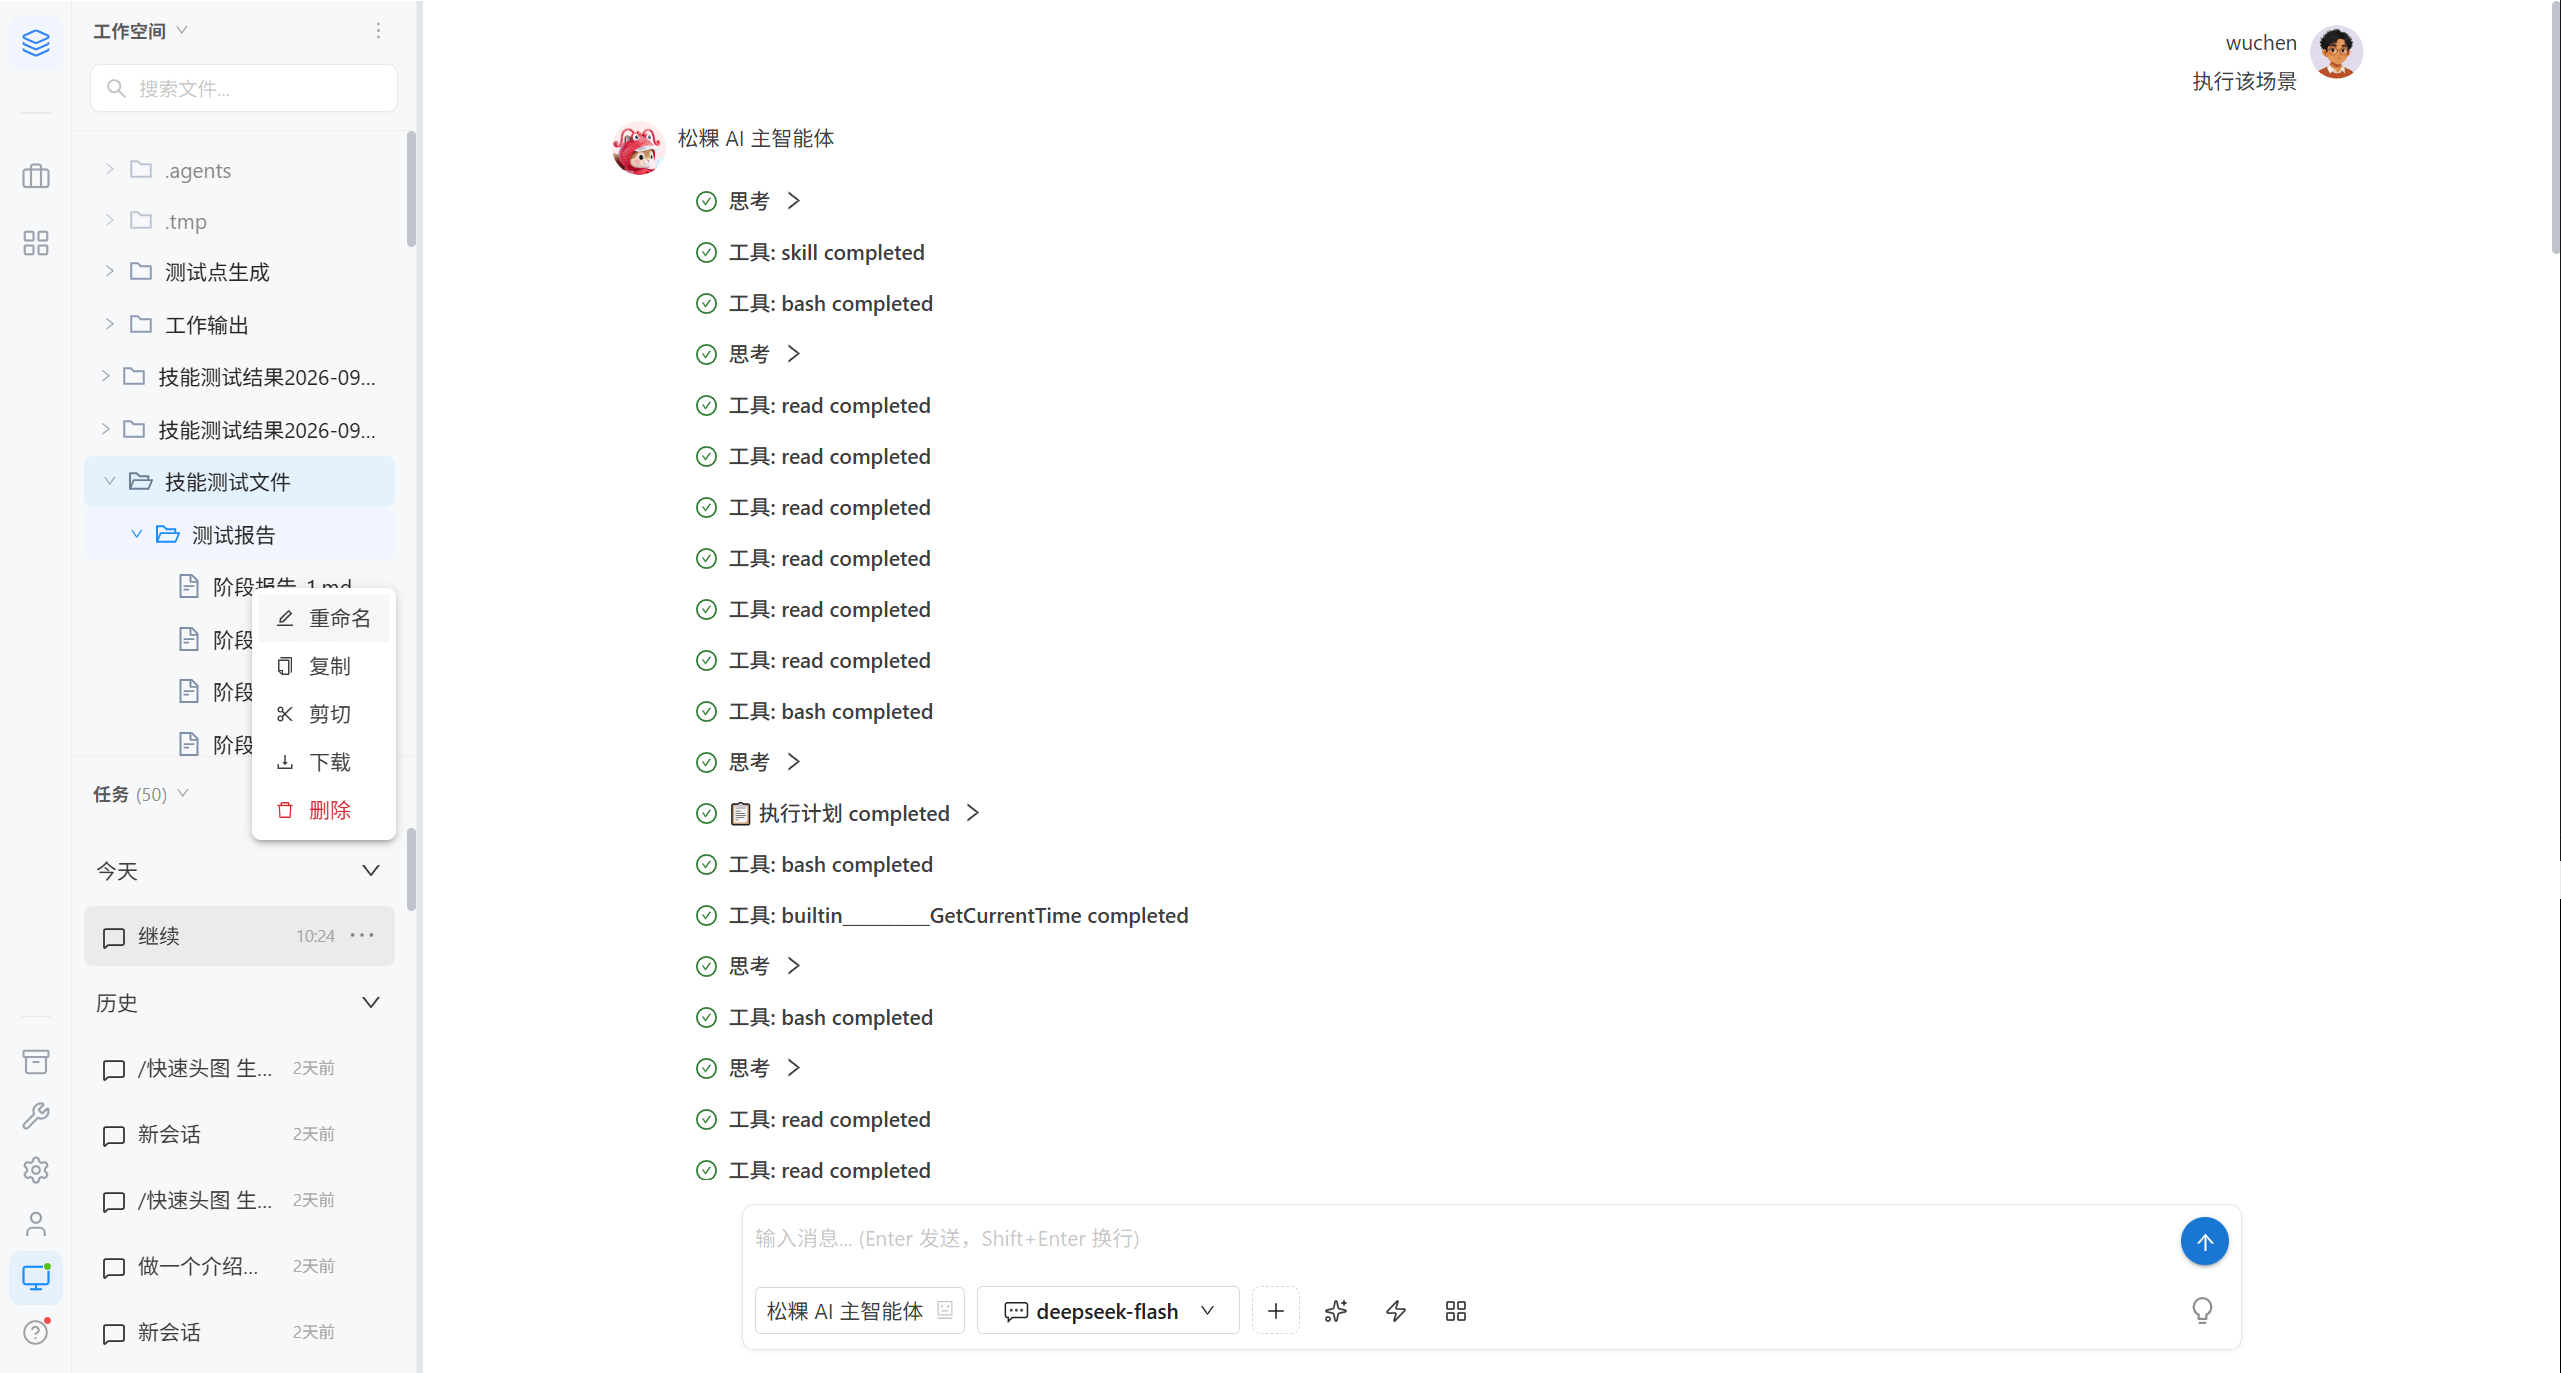
| Capability | Description |
|---|---|
| Browse | Click a directory to expand it level by level; searching for files is supported |
| New folder | Right-click in the tree → "New directory" |
| Rename | Right-click in the tree → "Rename" |
| Delete | Right-click in the tree → "Delete", cannot be undone |
| Copy / Cut / Paste | Context menu; pasting into the root directory is supported |
| Download | Right-click → "Download" (directories do not support download for now) |
| Refresh | "⋯" at the top of the tree → "Refresh" |
3.1 New Folder
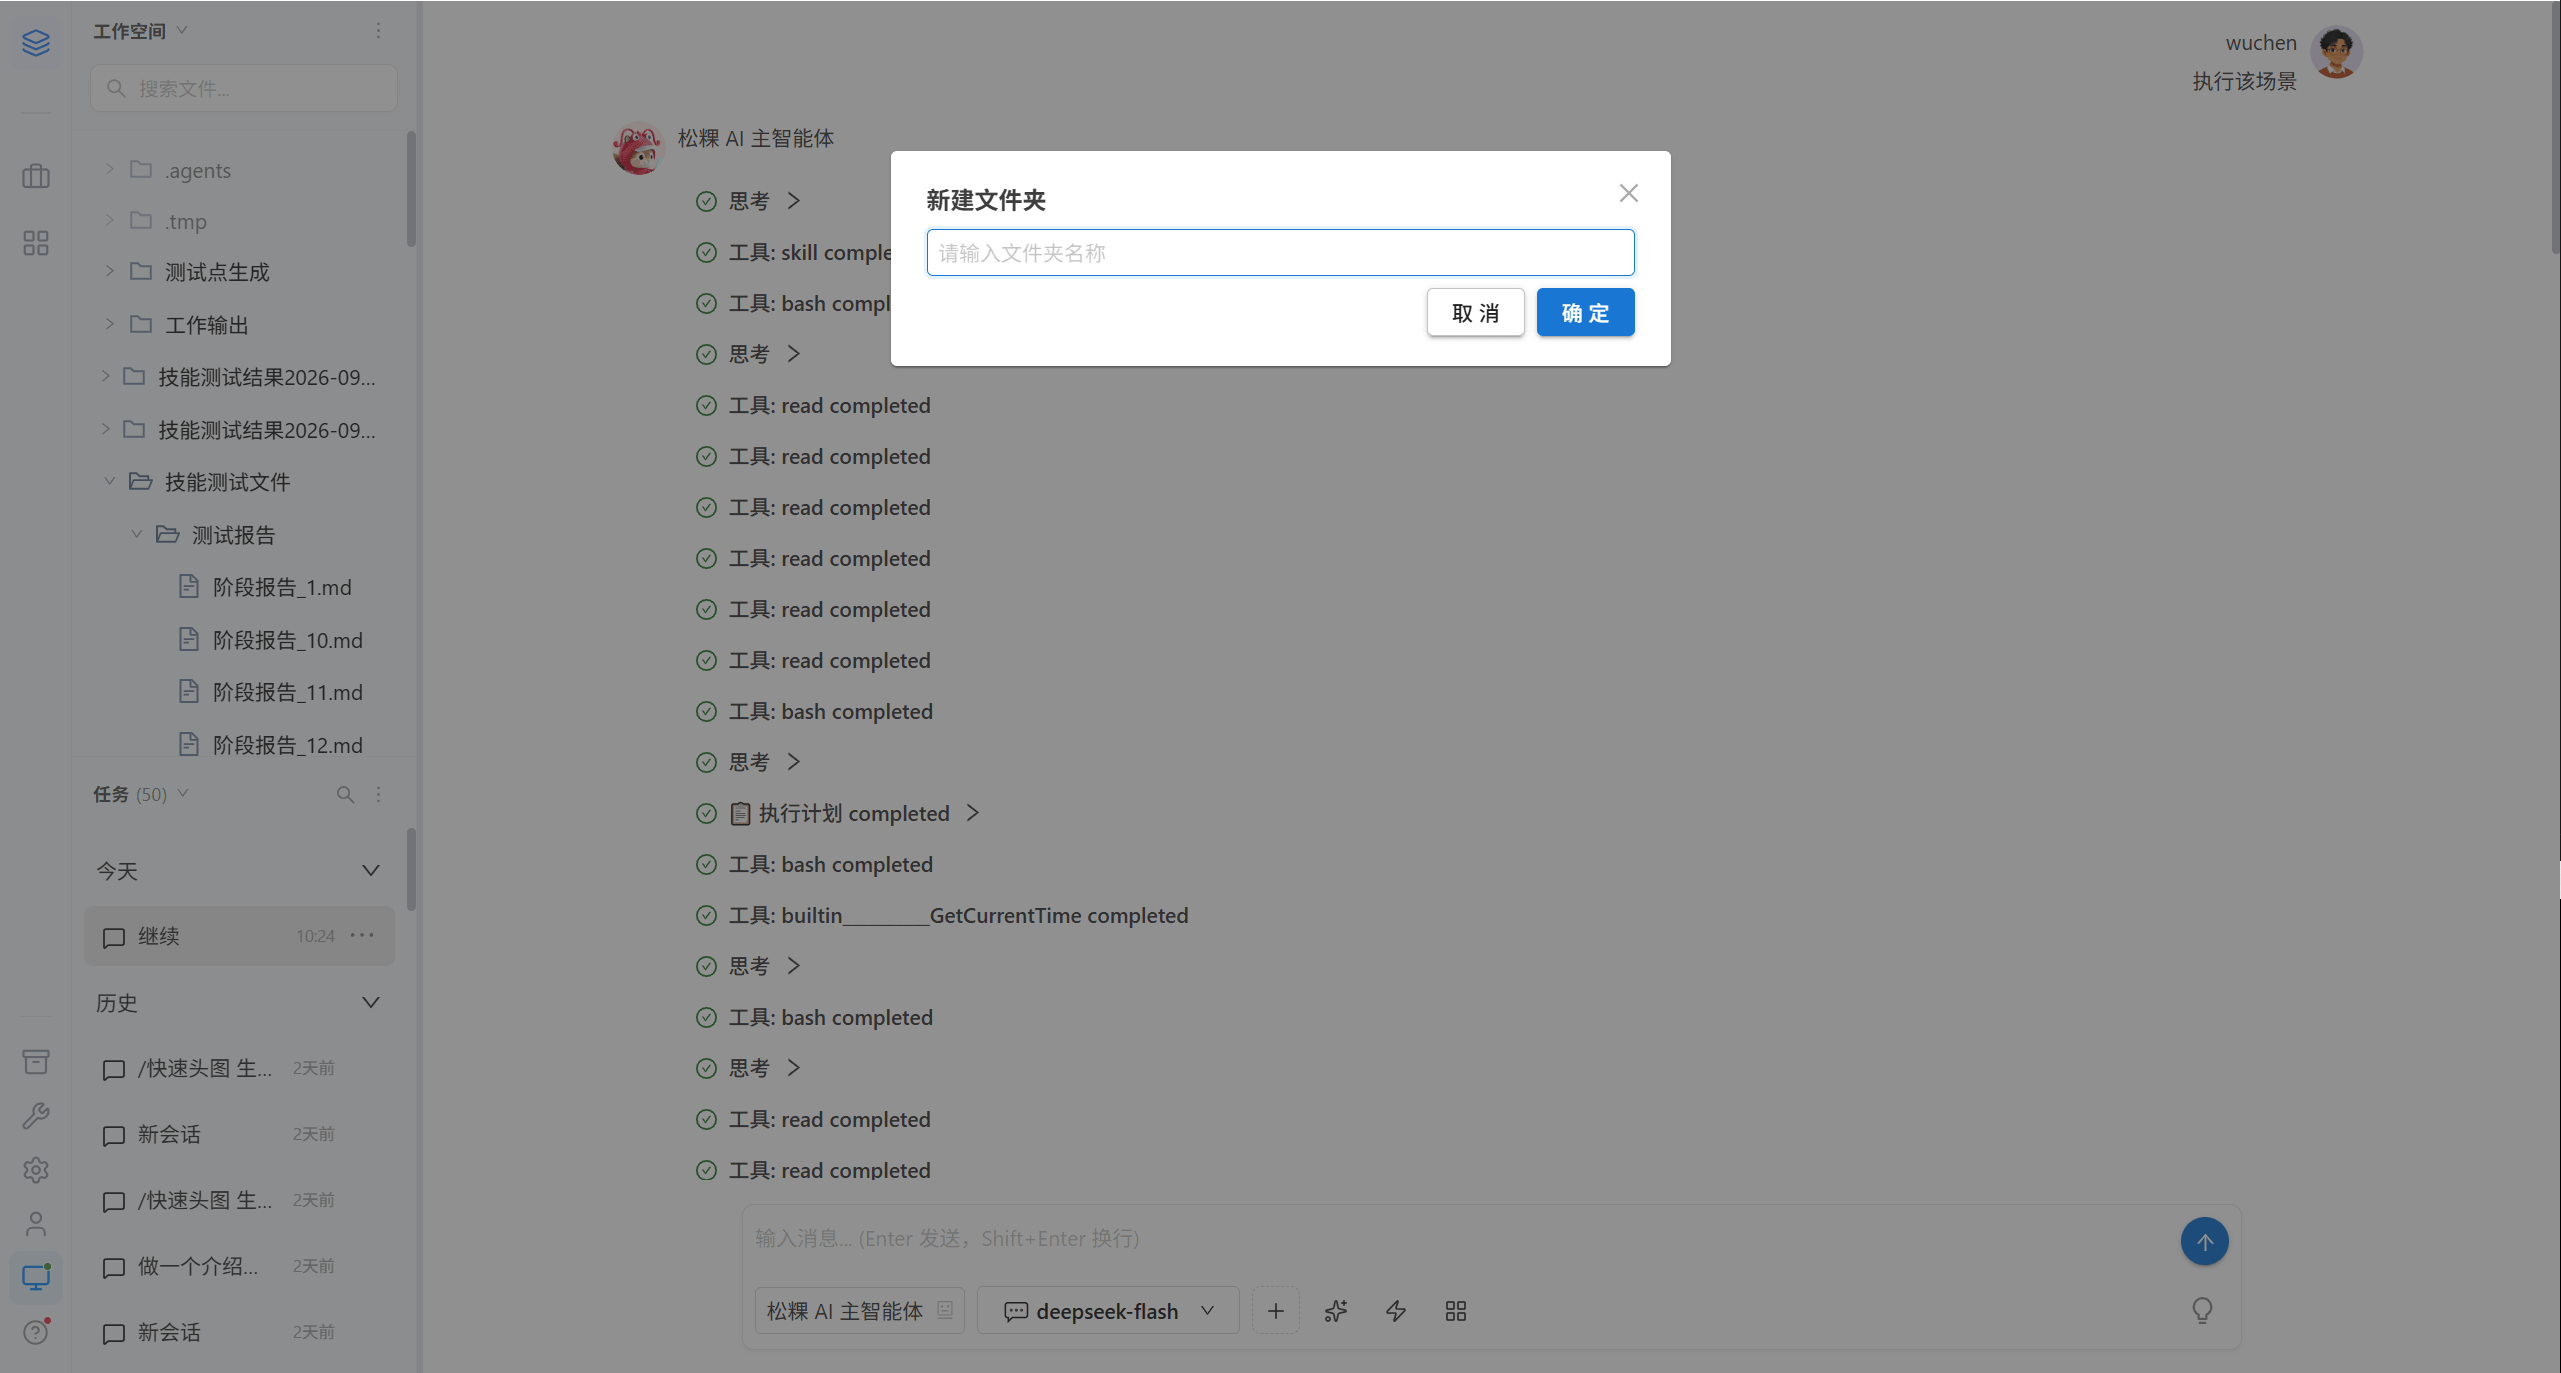
3.2 Rename a File
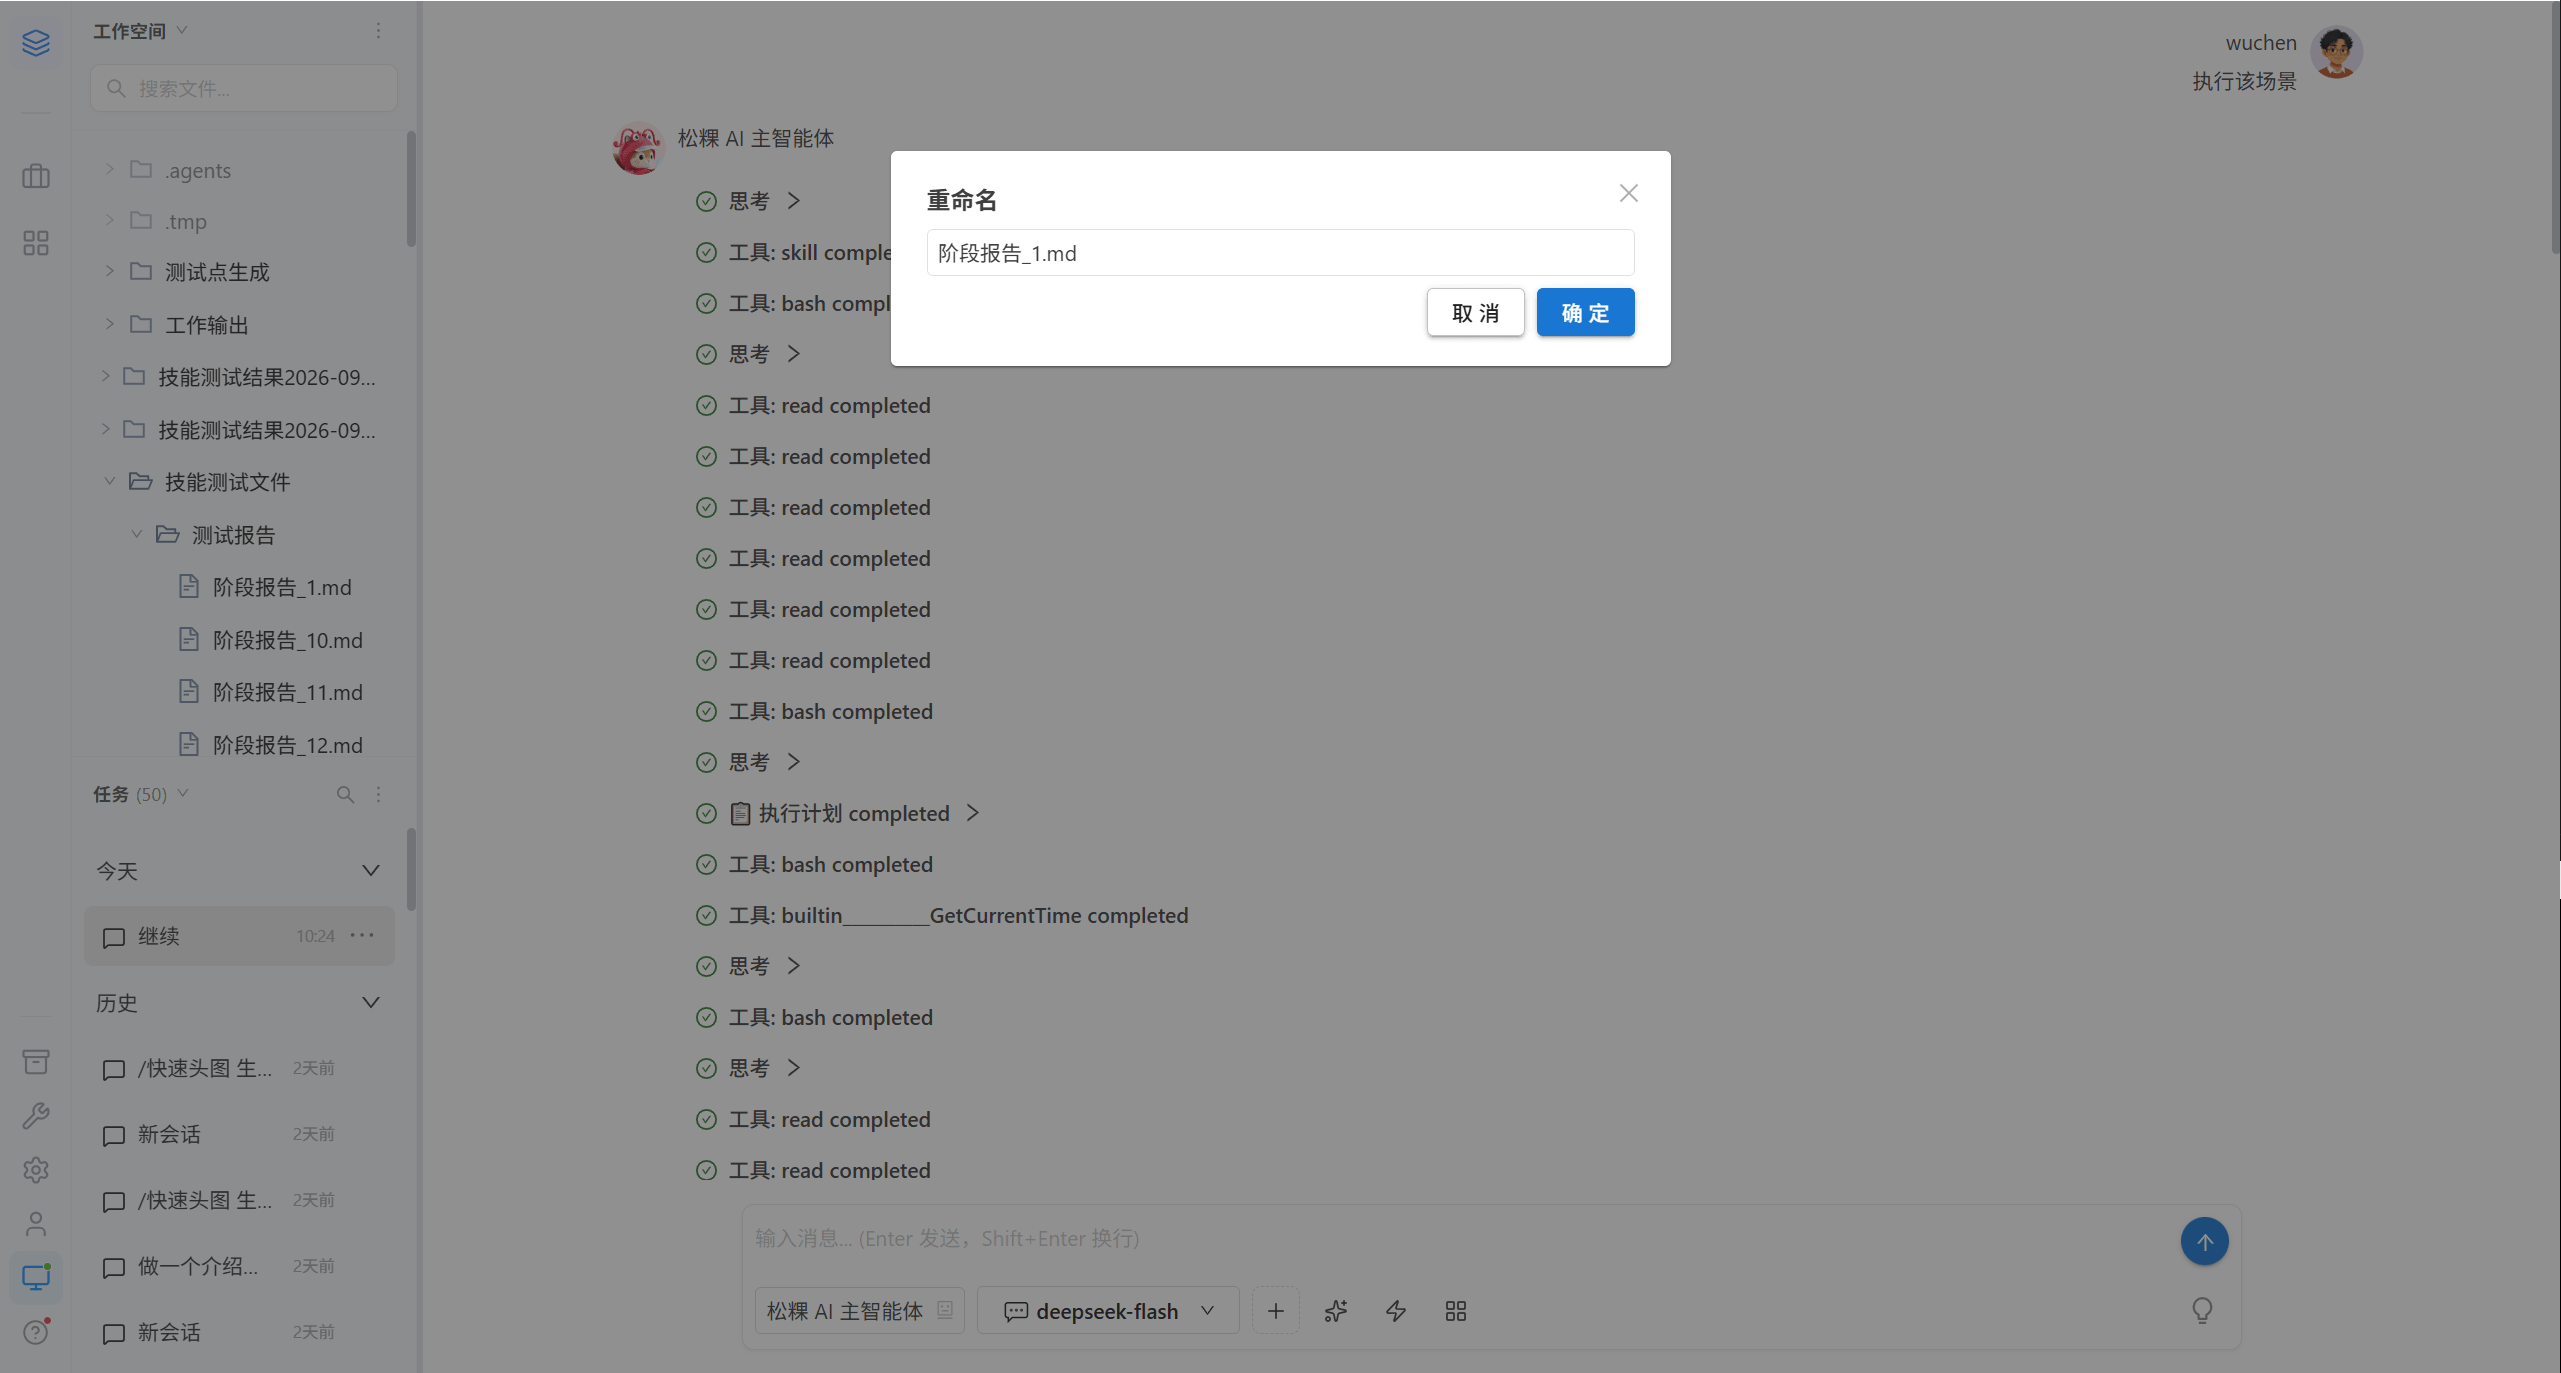
3.3 Upload Files
Drag and drop Drag directly from a local folder into the workspace area, and after a short wait an upload-in-progress dialog pops up 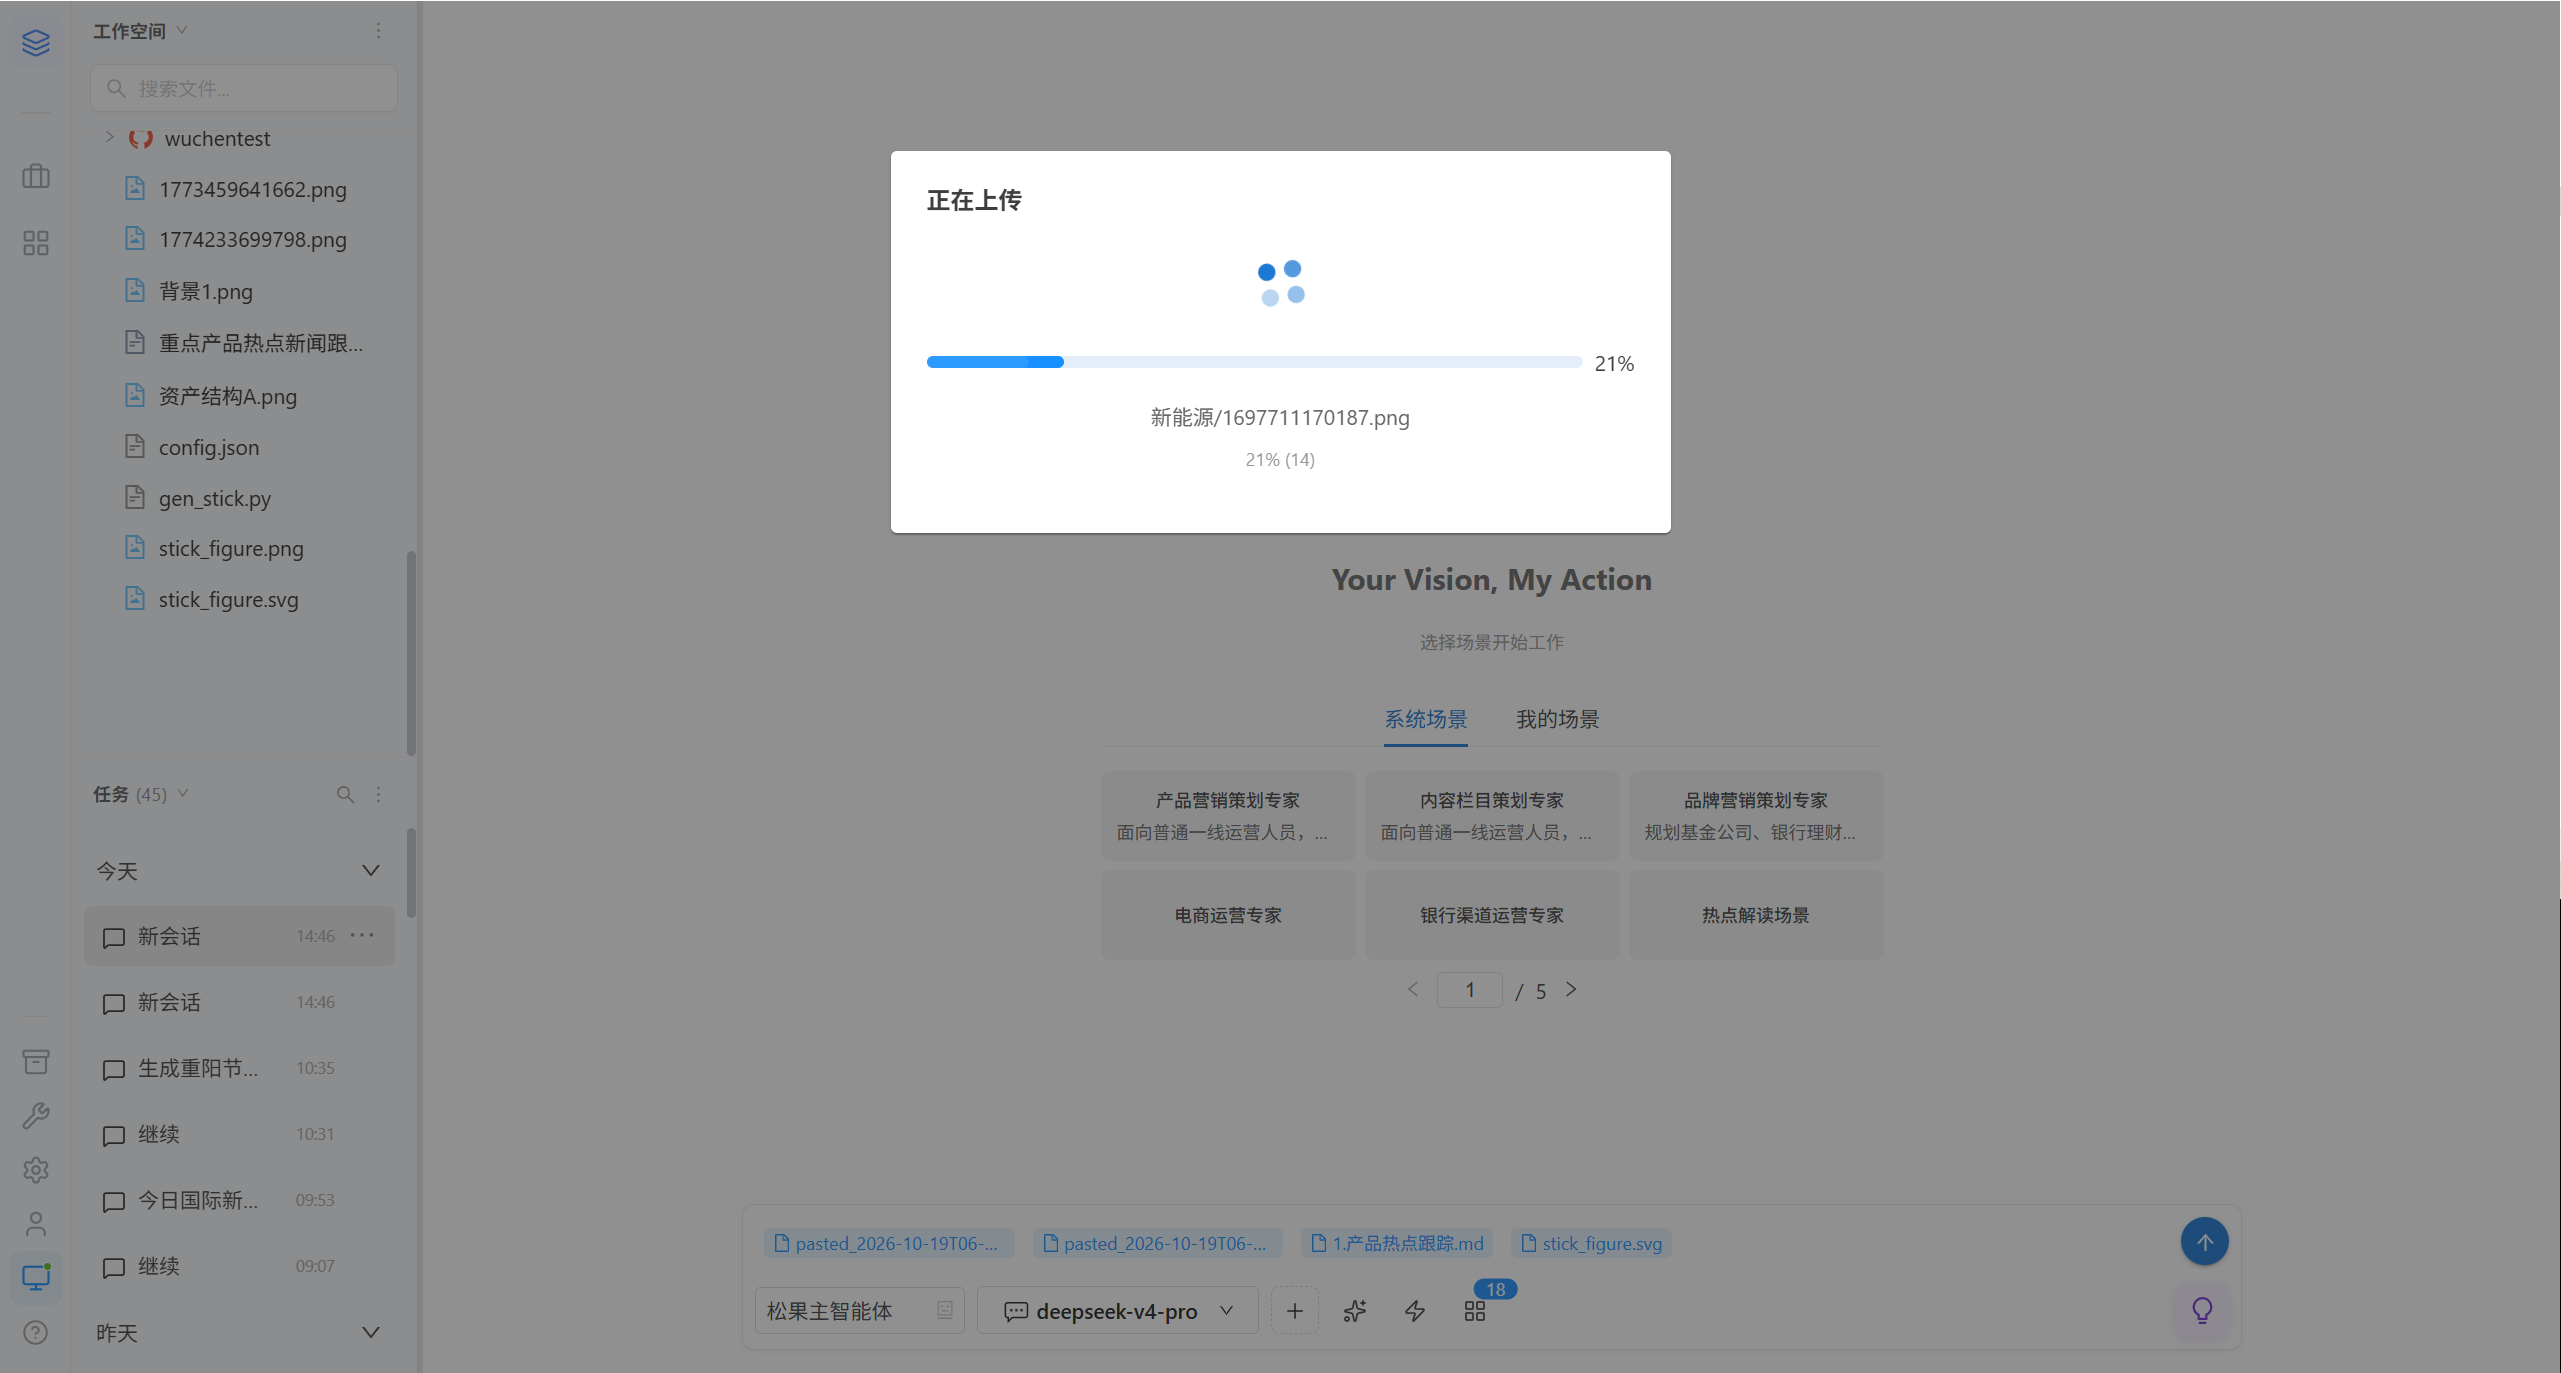
Tip · You can drag in a single file or an entire folder. During the upload, a progress bar and success/skip counters are shown; if a file with the same name already exists, a conflict prompt appears where you can choose to overwrite or skip.
3.4 Import Skills and Important Documents
Besides uploading, you can also import content from the company Git repository into the workspace.
Import a Repository
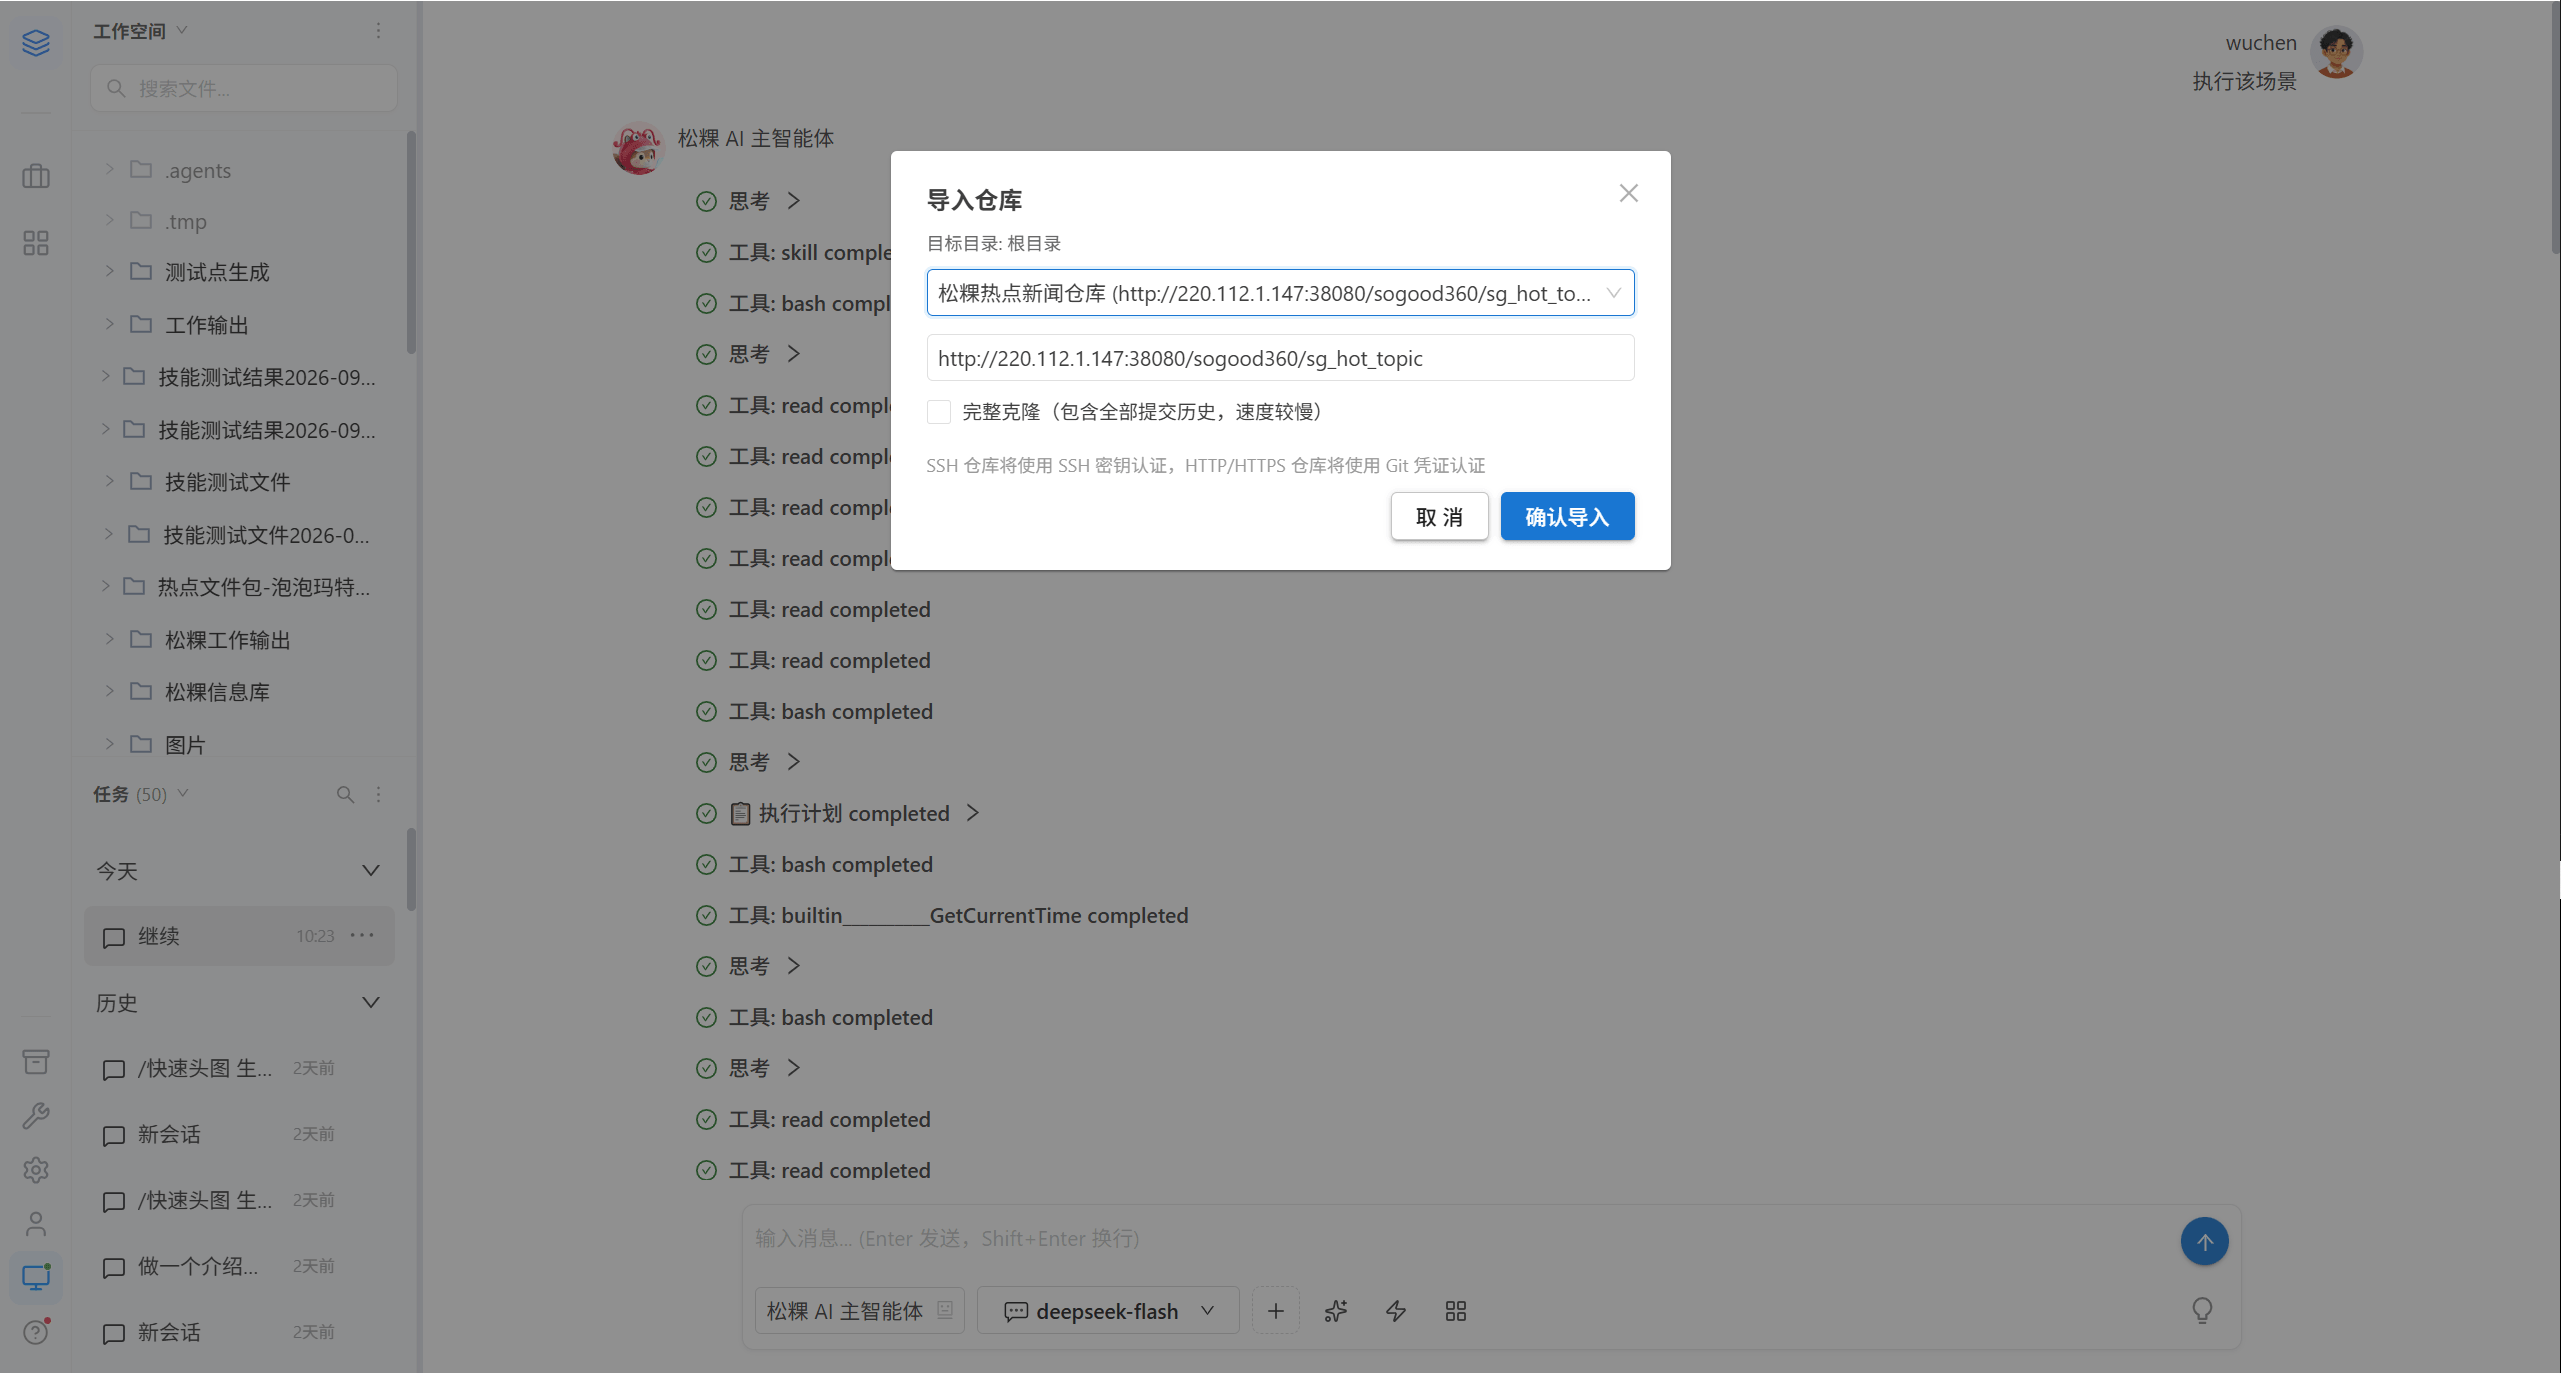
| Step | Description |
|---|---|
| 1 | "⋯" in the top-right of the tree → "Import repository" |
| 2 | Enter the repository address, or select a repository preset by the administrator |
| 3 | Choose the target directory (the root directory by default) |
| 4 | Confirm the import and wait for the clone to finish |
| Repository address form | Credentials used |
|---|---|
git@gitlab.com:group/repo.git | SSH key |
https://gitlab.com/group/repo | HTTP credentials |
The clone can be canceled at any time, and the partially downloaded content is cleaned up.
Note · If files with the same name already exist in the target directory, a conflict handler pops up: Overwrite / Skip / Overwrite All / Skip All.
Import a Skill
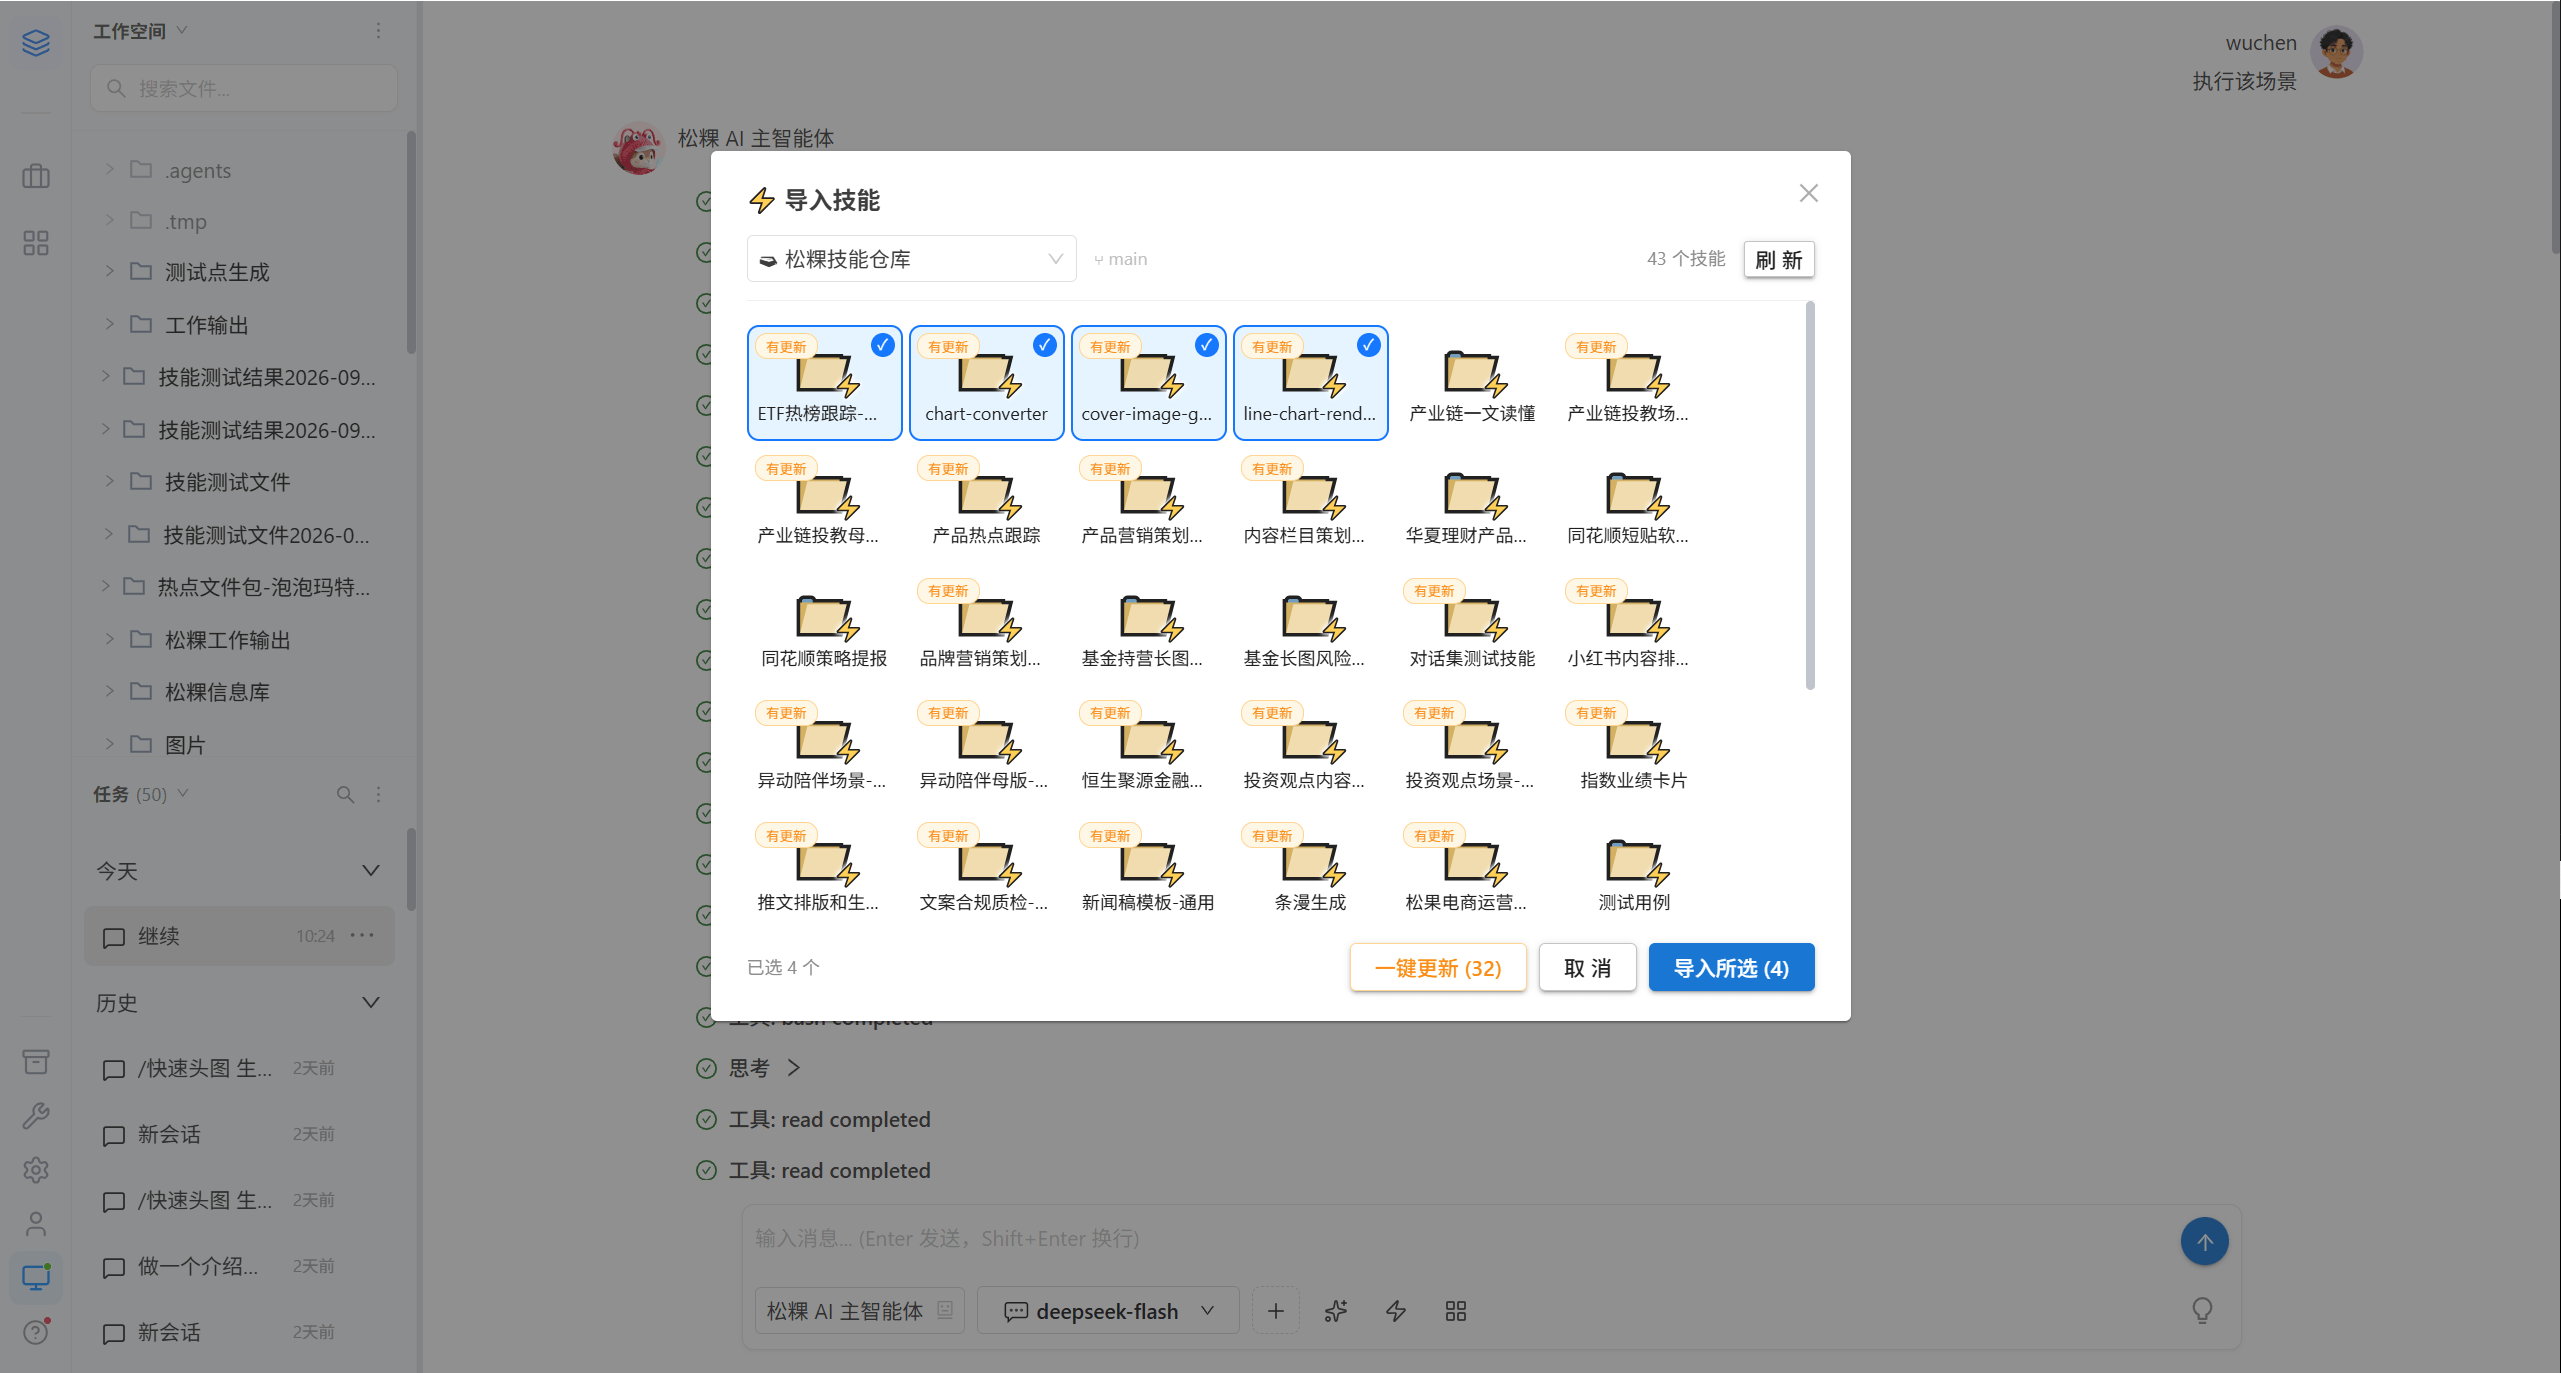
Pick what to import from the repositories that an administrator has configured as skill libraries in Assets.
| Status marker | Meaning |
|---|---|
| Imported | The skill already exists in the workspace |
| Update available | The version in the repository has been updated and can be updated with one click |
Import an Important Document
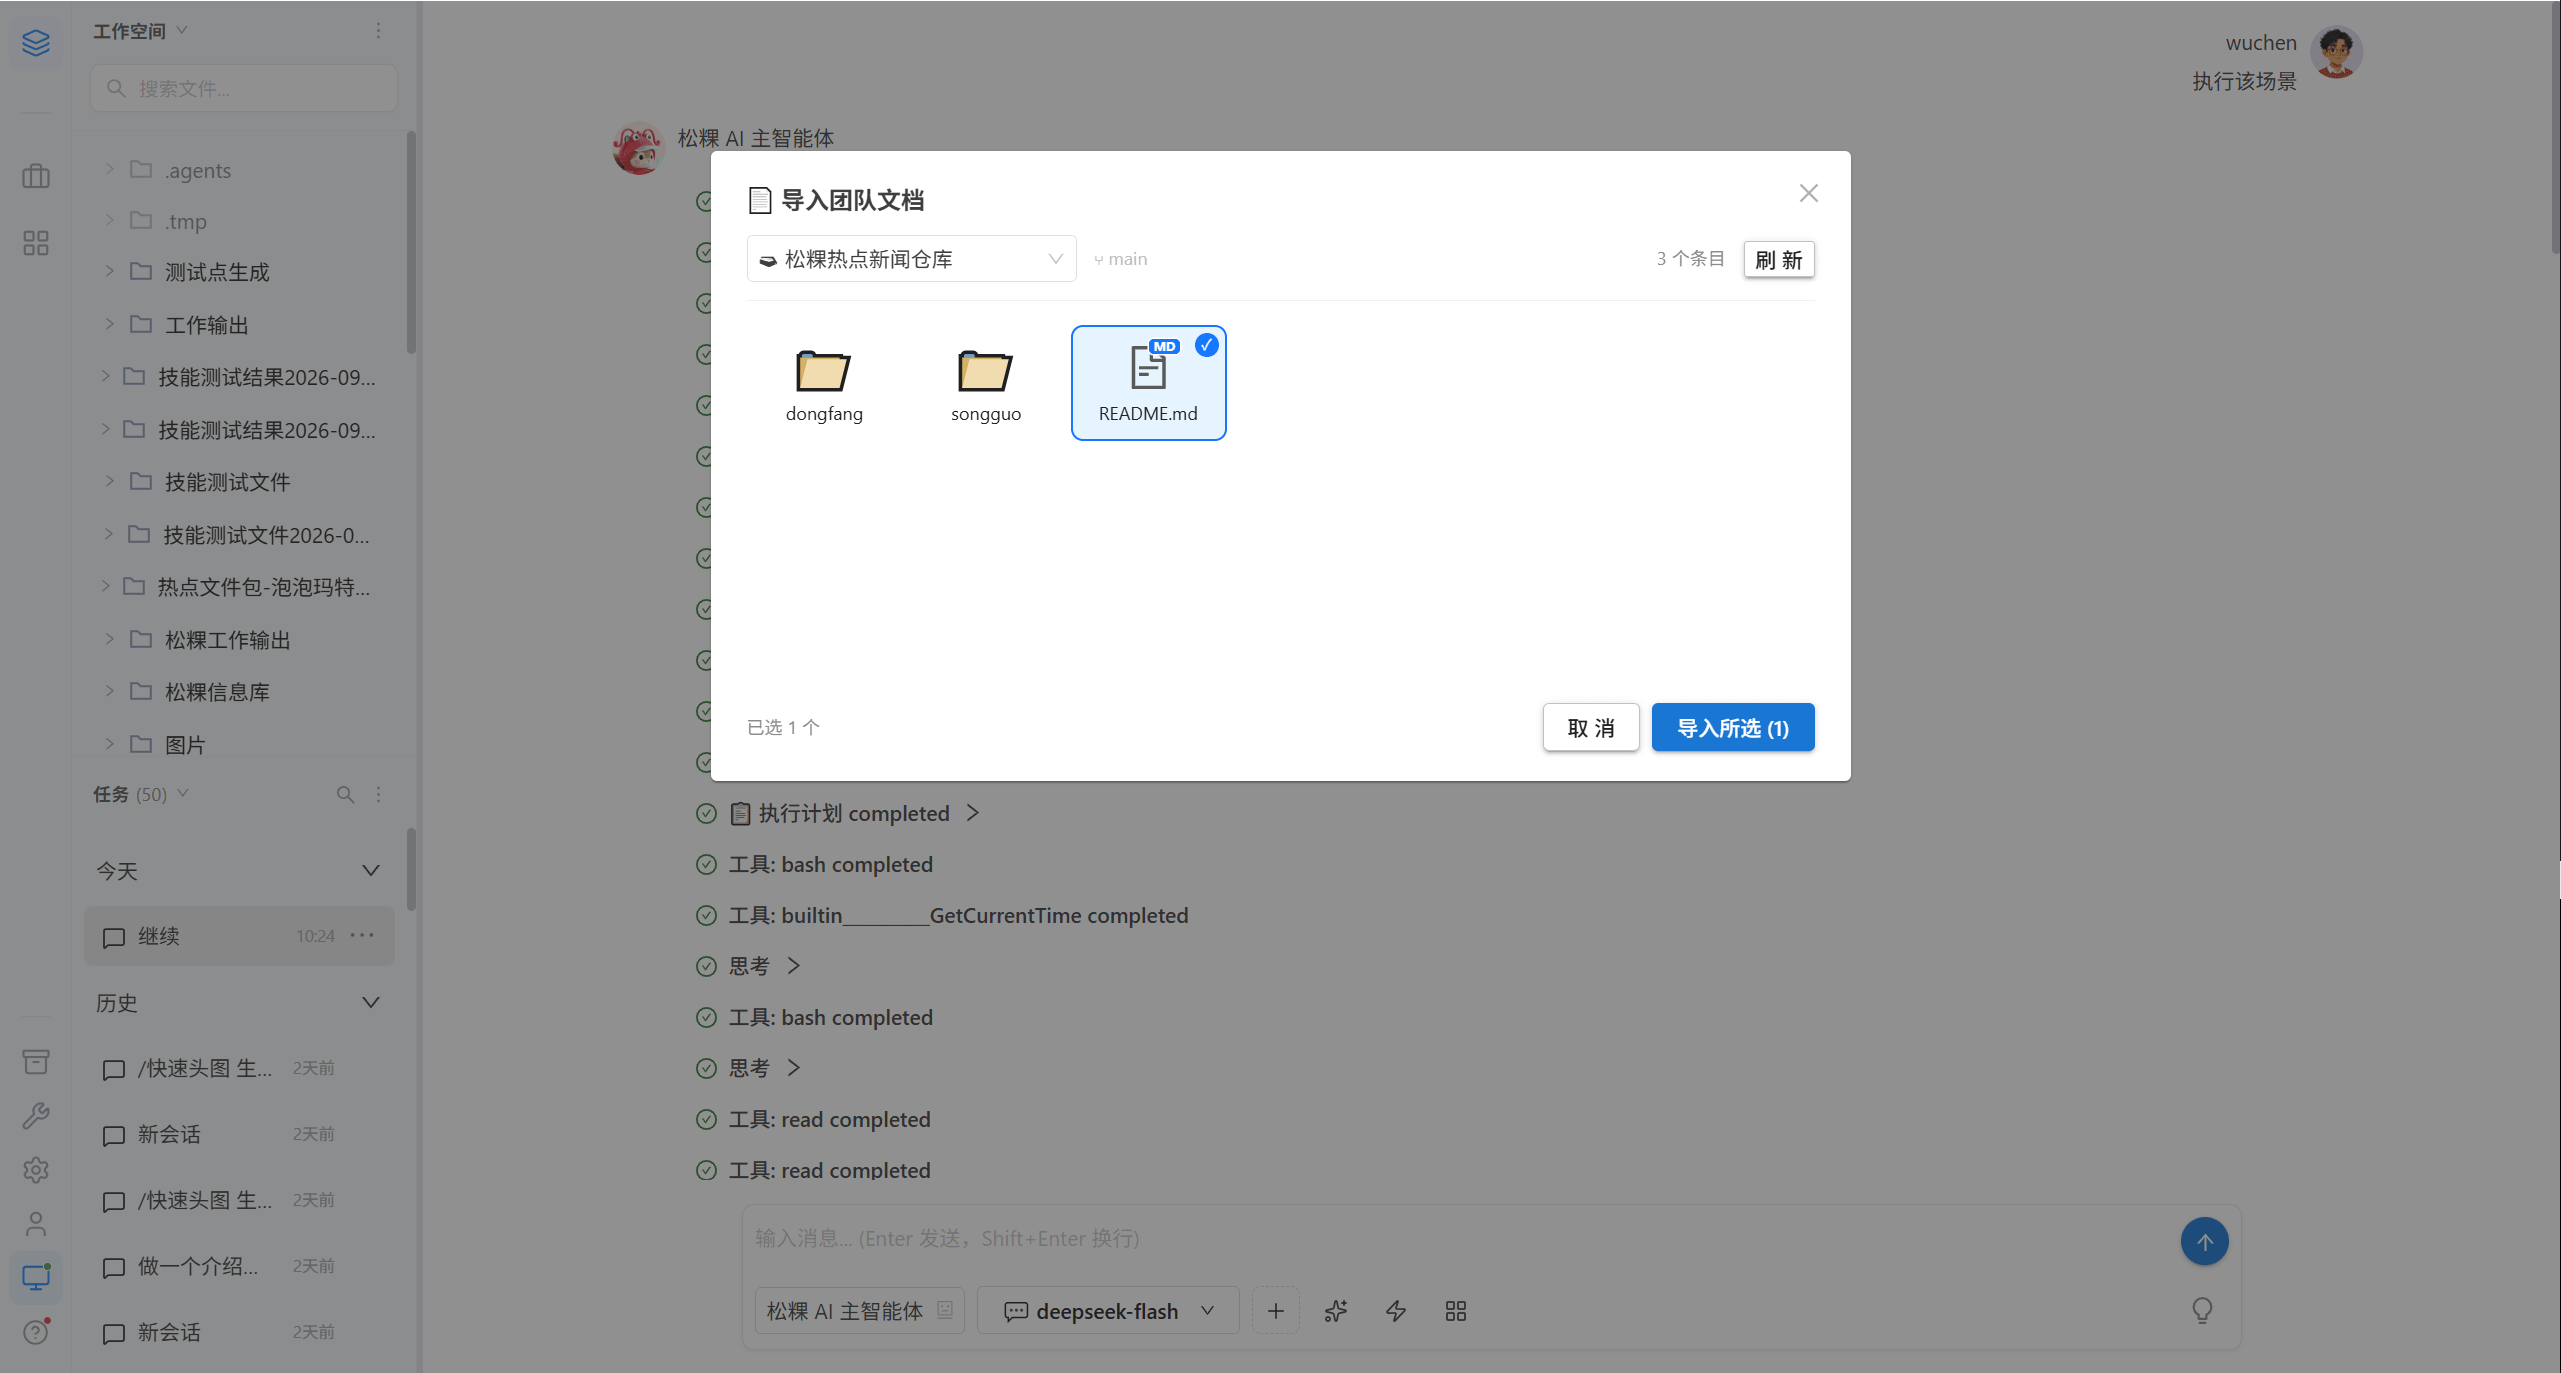
It comes from the same source as importing skills; the difference is that it imports document entries. You can double-click a folder to enter a subdirectory and pick items.
3.5 View Files
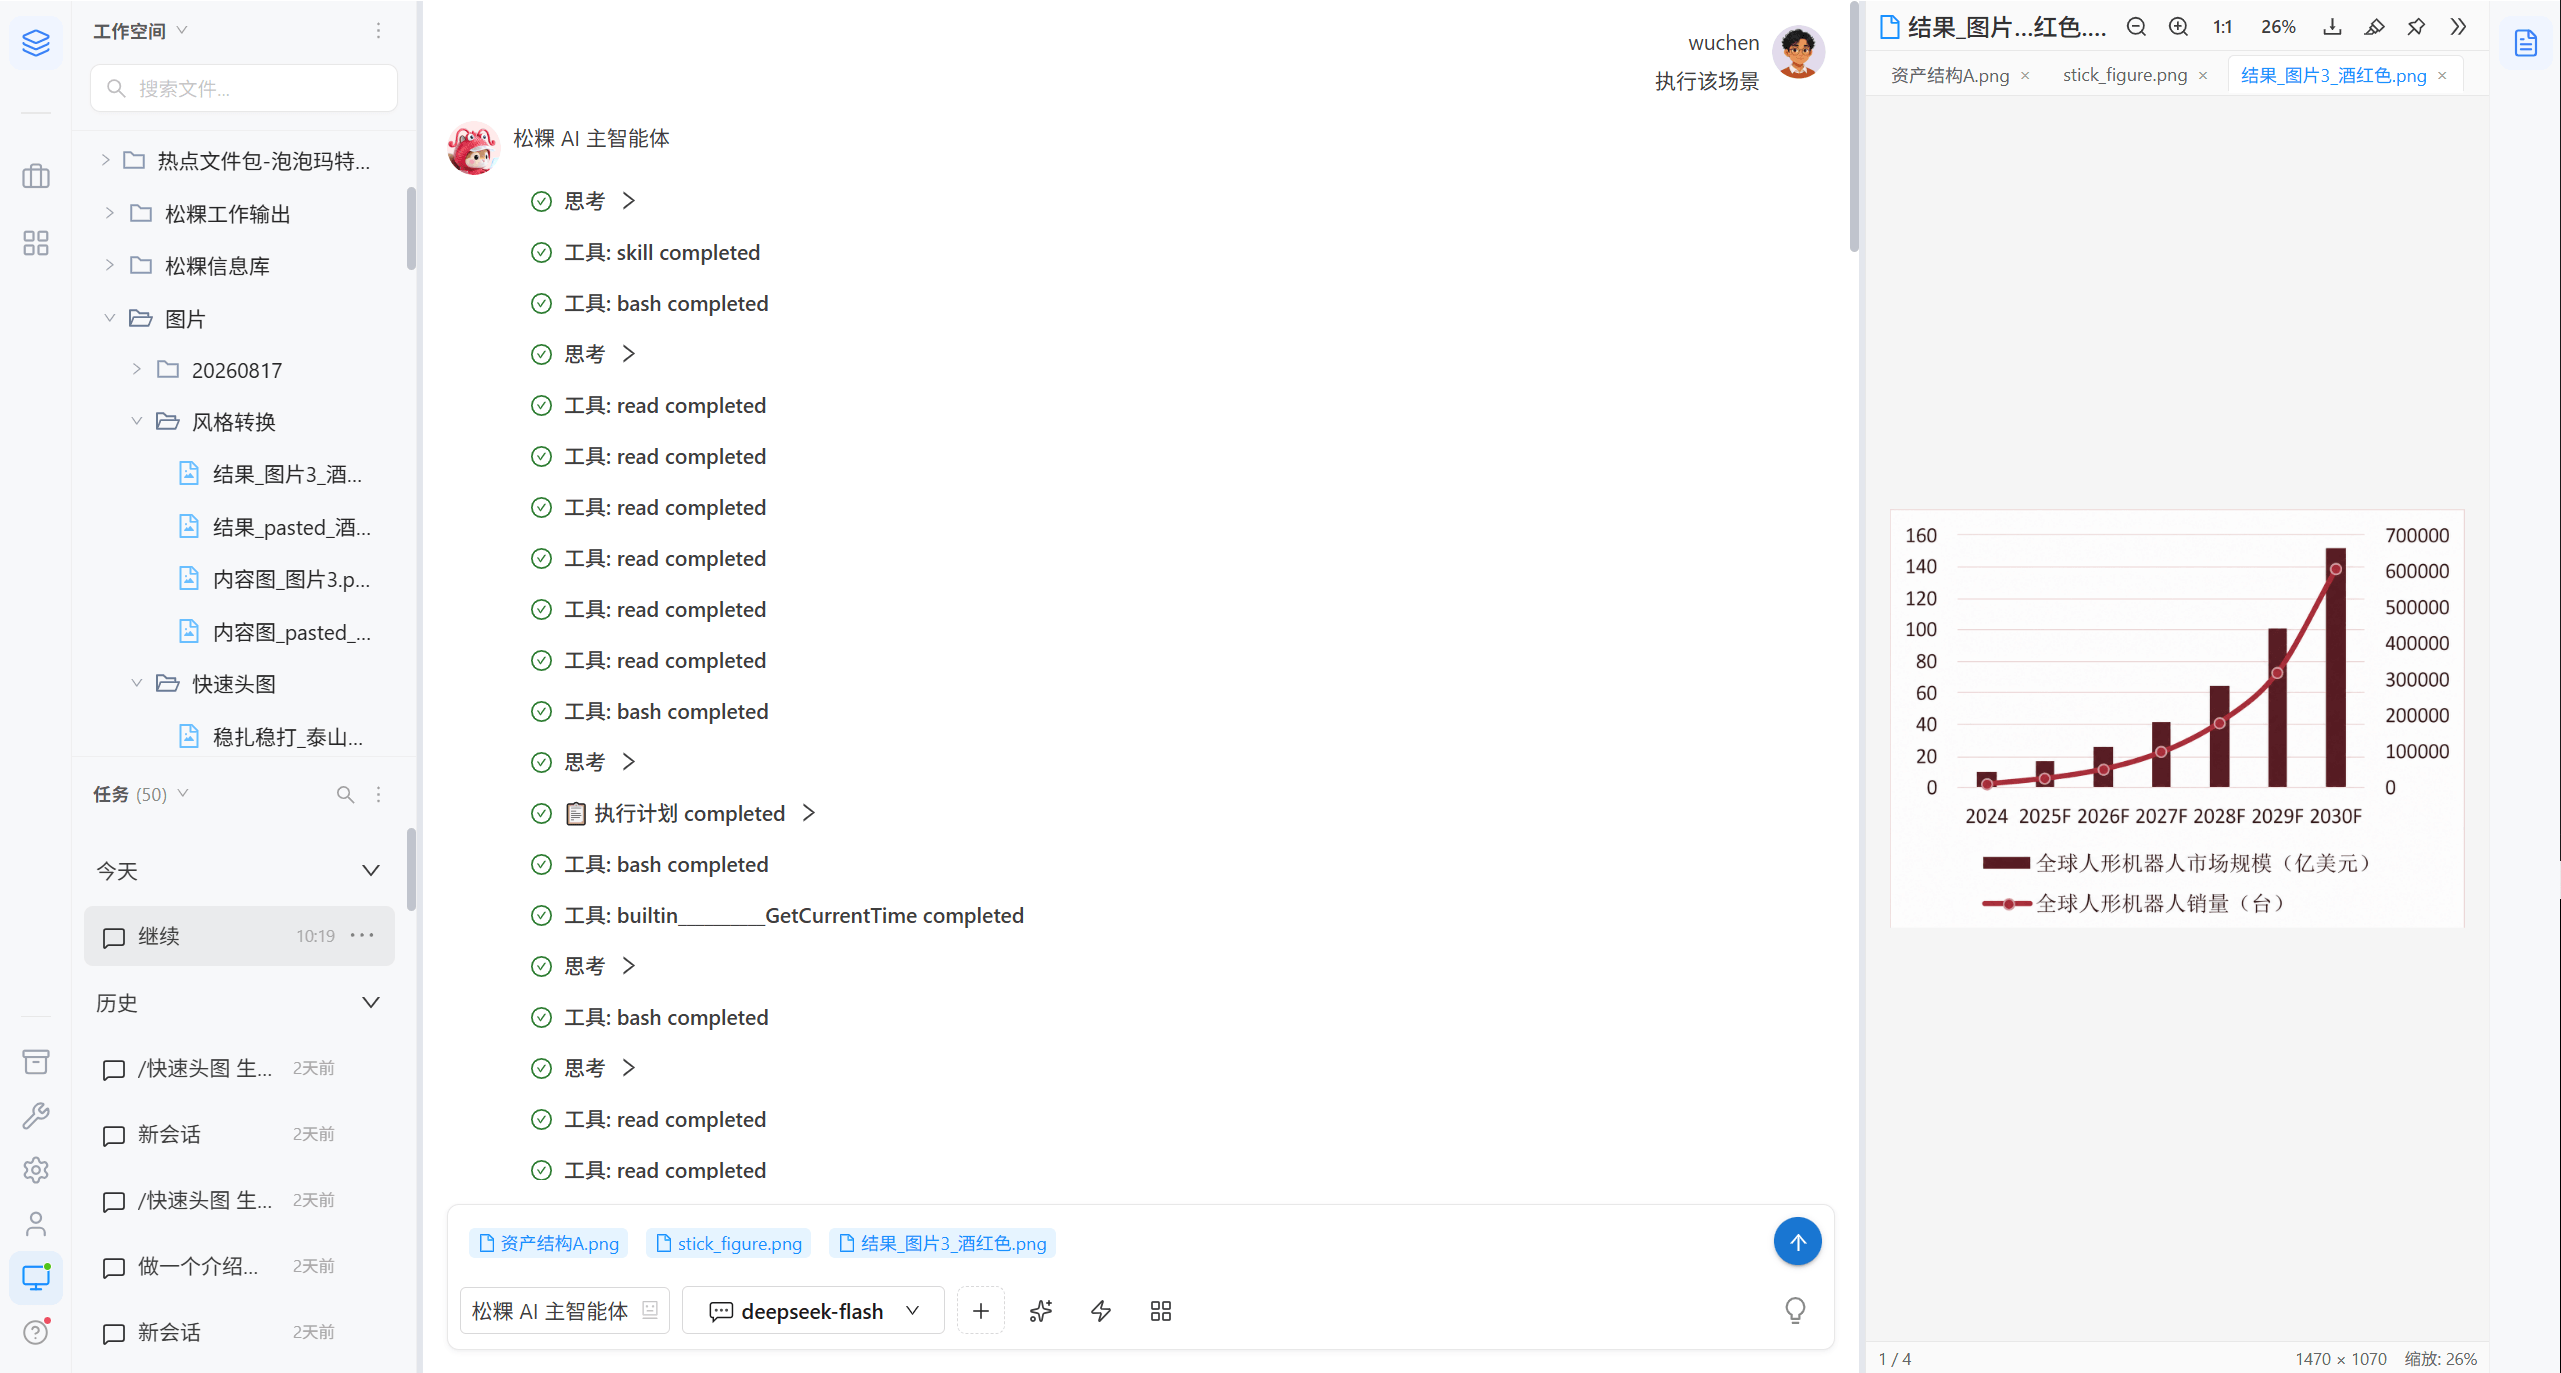
Side preview
Modal preview
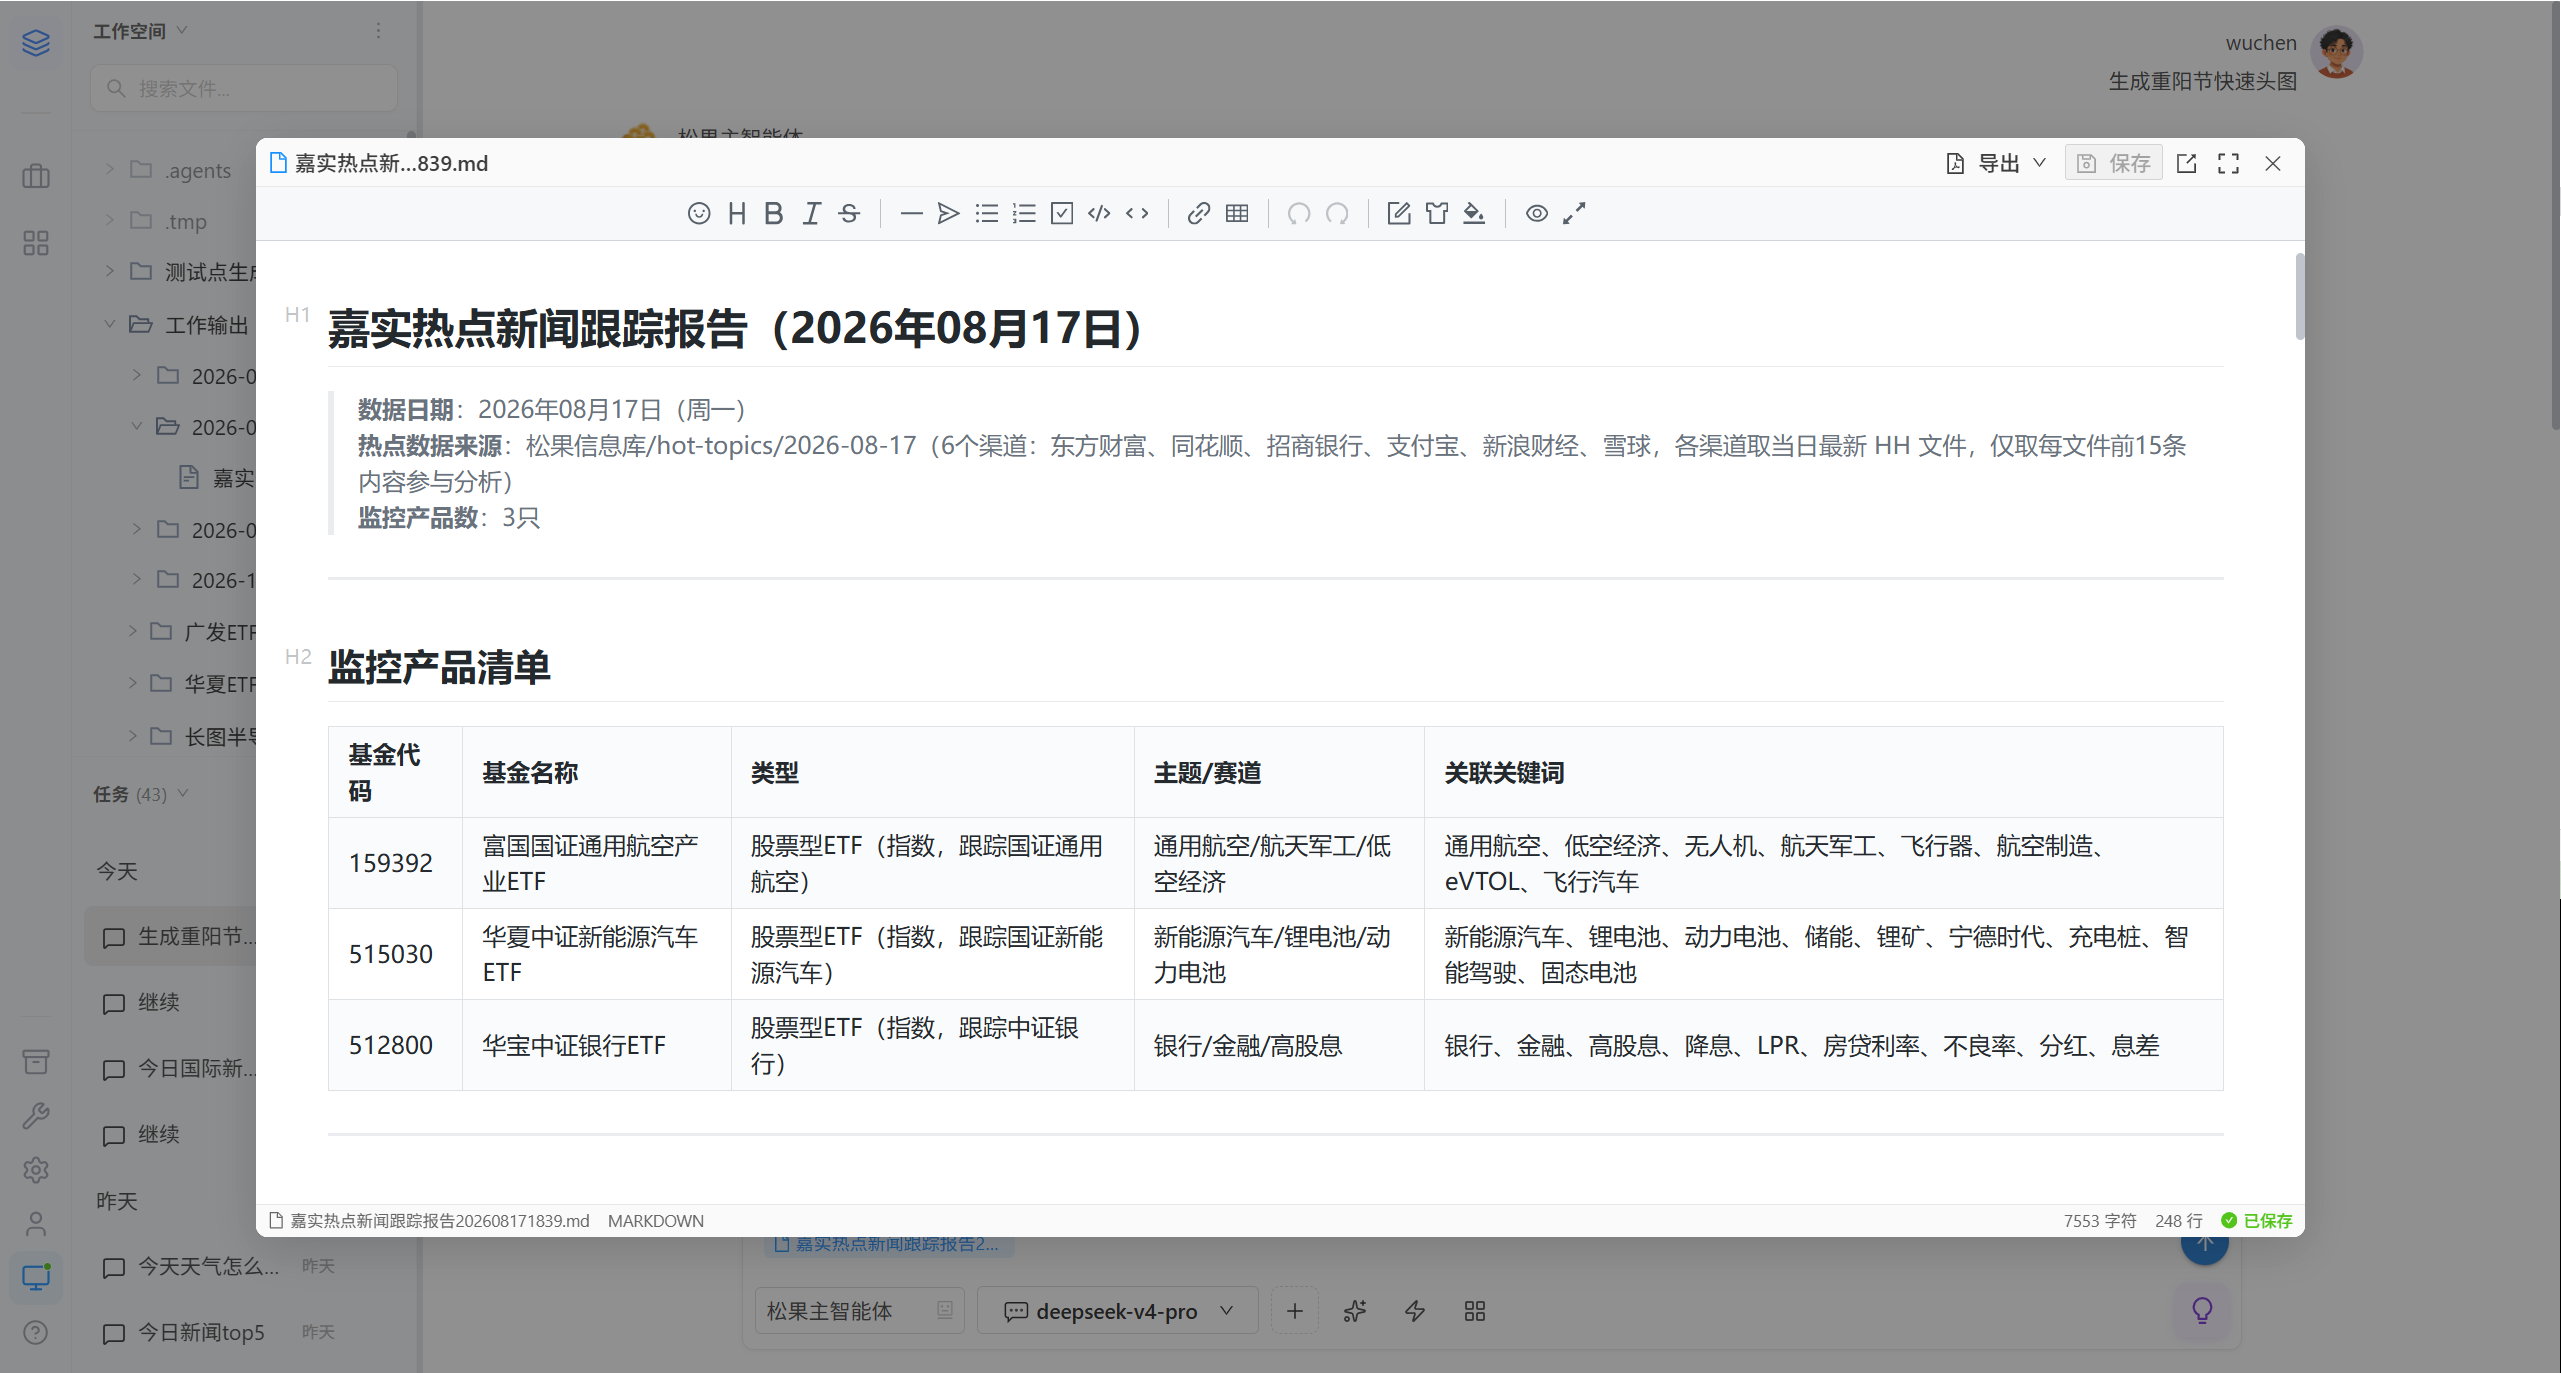
| Mode | Description |
|---|---|
| Preview | Read-only rendering |
| Code | Source mode, editable and savable |
| Dock to the right | Fixed to the right panel without covering the conversation |
| Undock | Returns to floating |
| Collapse to the side | Collapses into a narrow strip |
| Pinned mode | Always visible, does not shrink automatically with the conversation |
| AI agent control | Shrinks automatically while the conversation is running (default) |
Markdown files support export to PDF / Word / HTML.
4. Right Panel
The icon bar on the far right of the conversation area appears as needed. 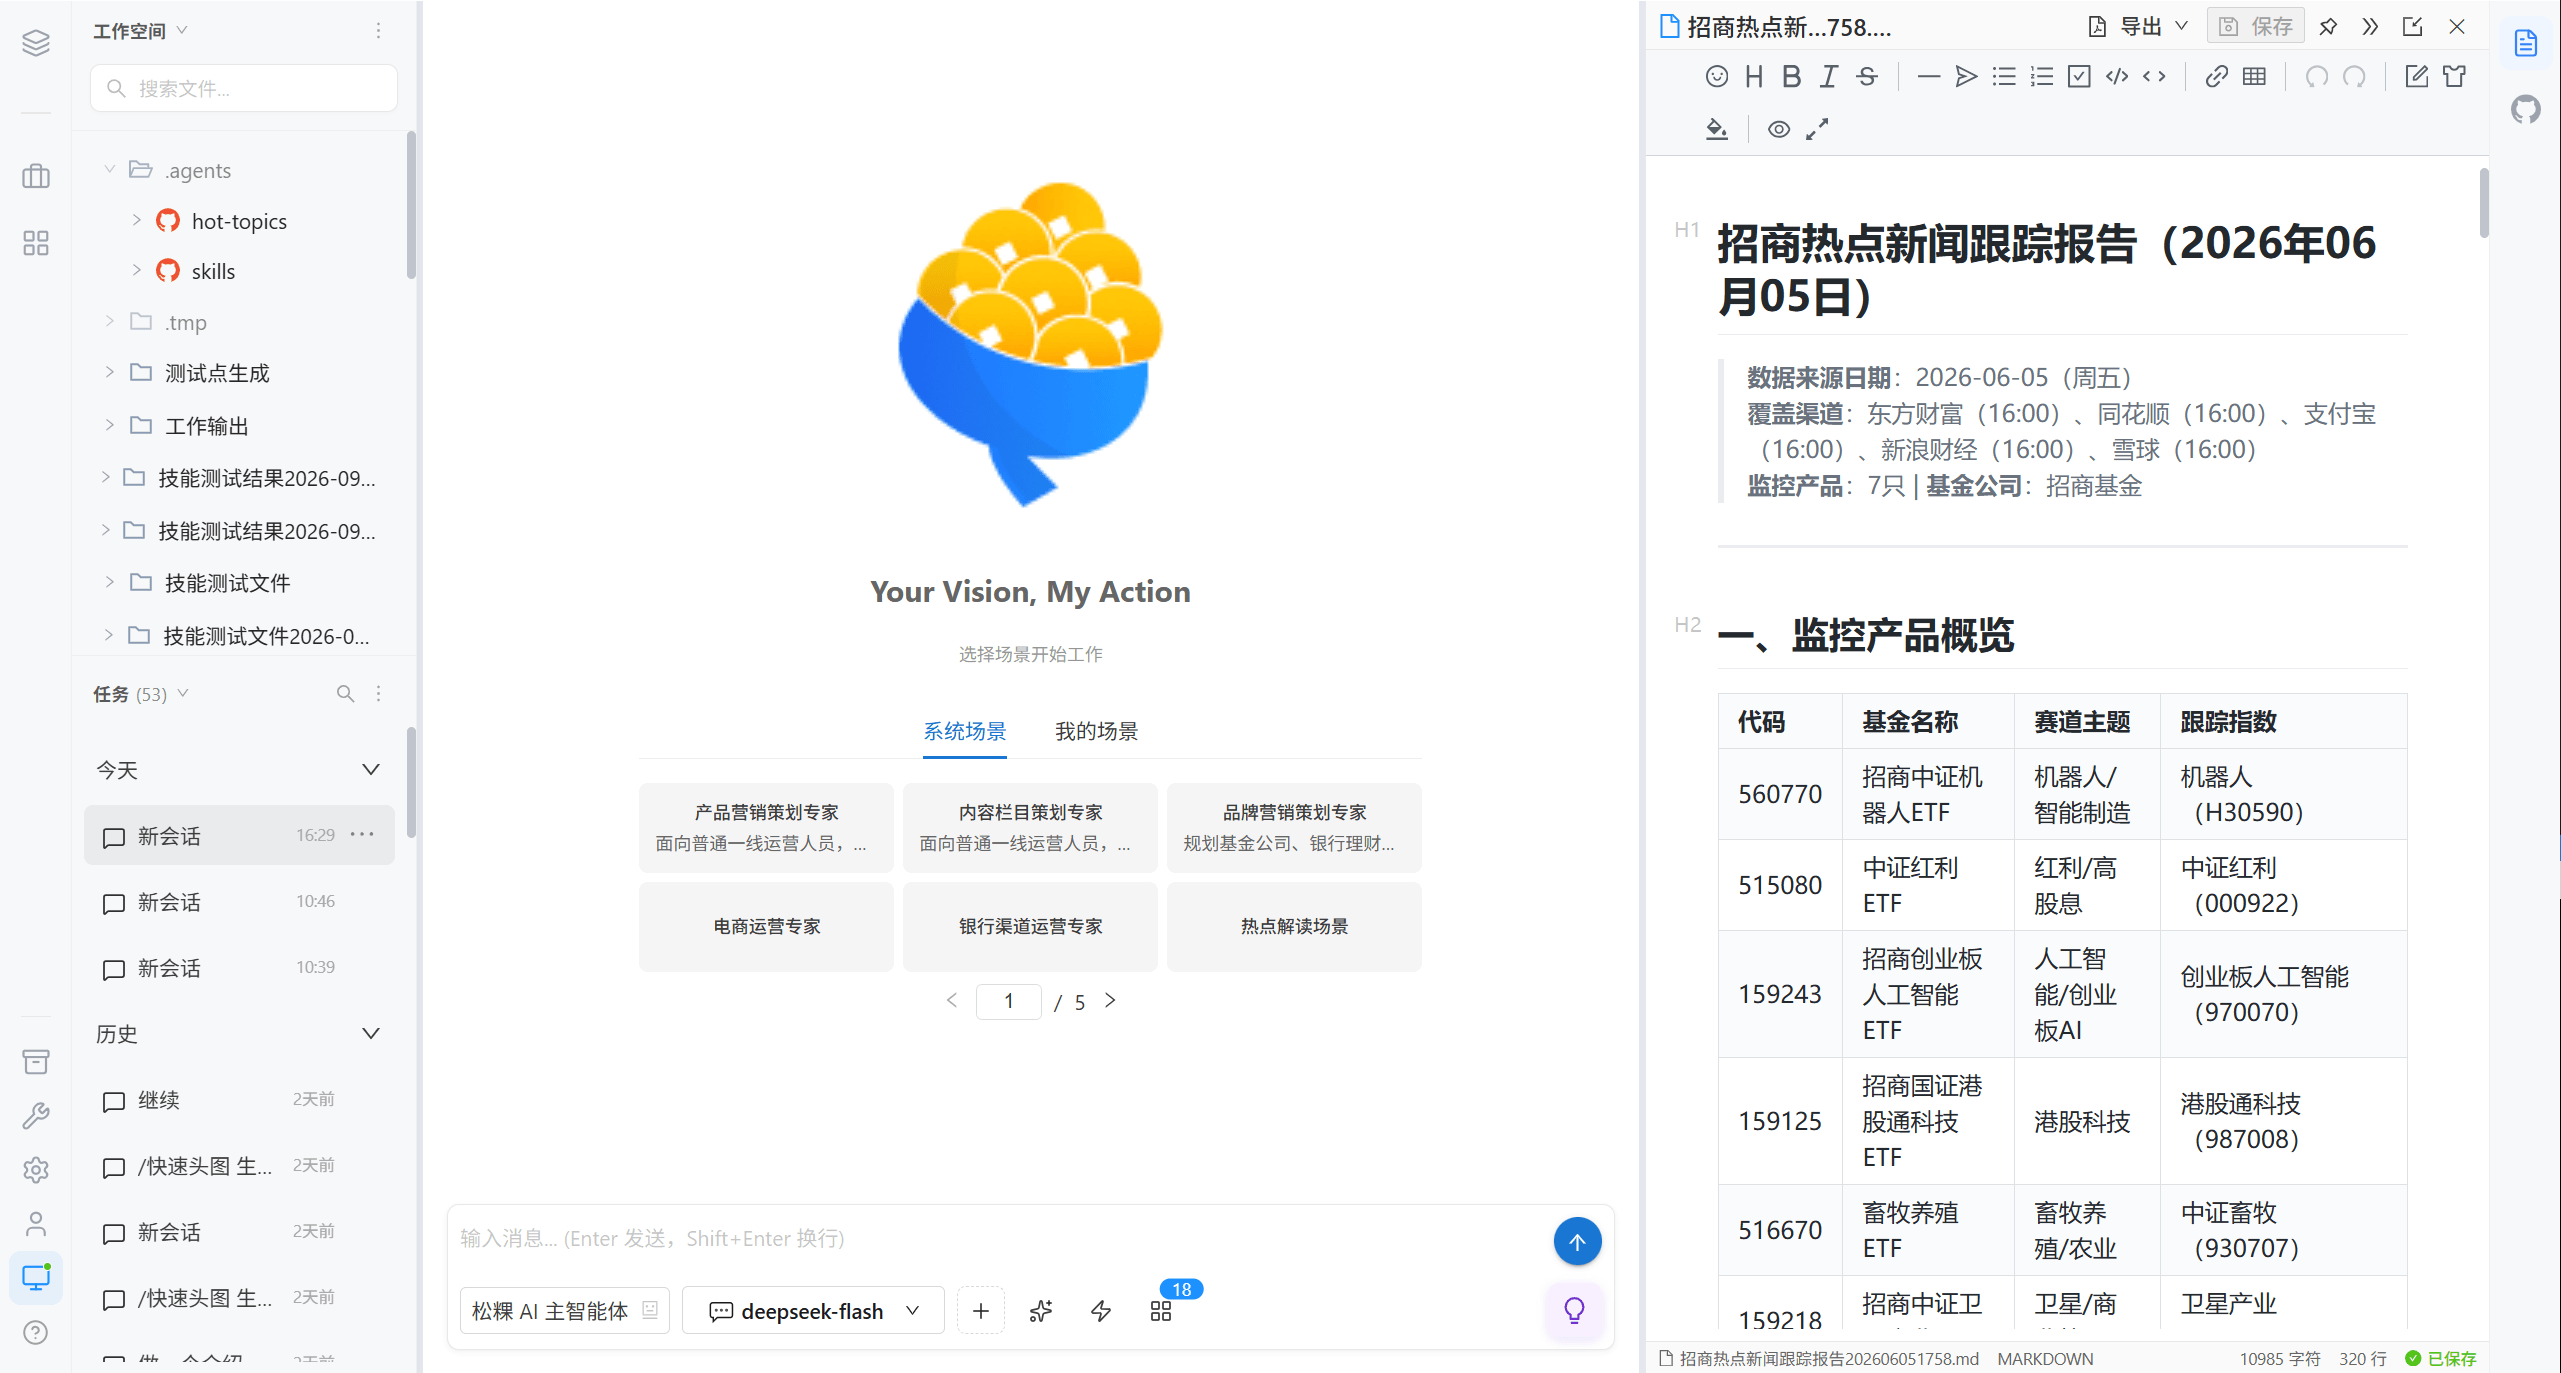
| Icon | Panel | Purpose |
|---|---|---|
| Git icon | Repository management | View repository status, commits, and pushes |
| Folder icon | Session-related files | The list of outputs from this session |
| Document icon | File preview | Preview and edit files |
| Collapsed document icon | File preview (collapsed) | The collapsed preview panel |
Clicking an icon focuses that panel, and a close button appears on hover. Multiple panels stack into a tab bar in order.
5. Git Repository Management
Git directories in the workspace carry a repository marker icon.
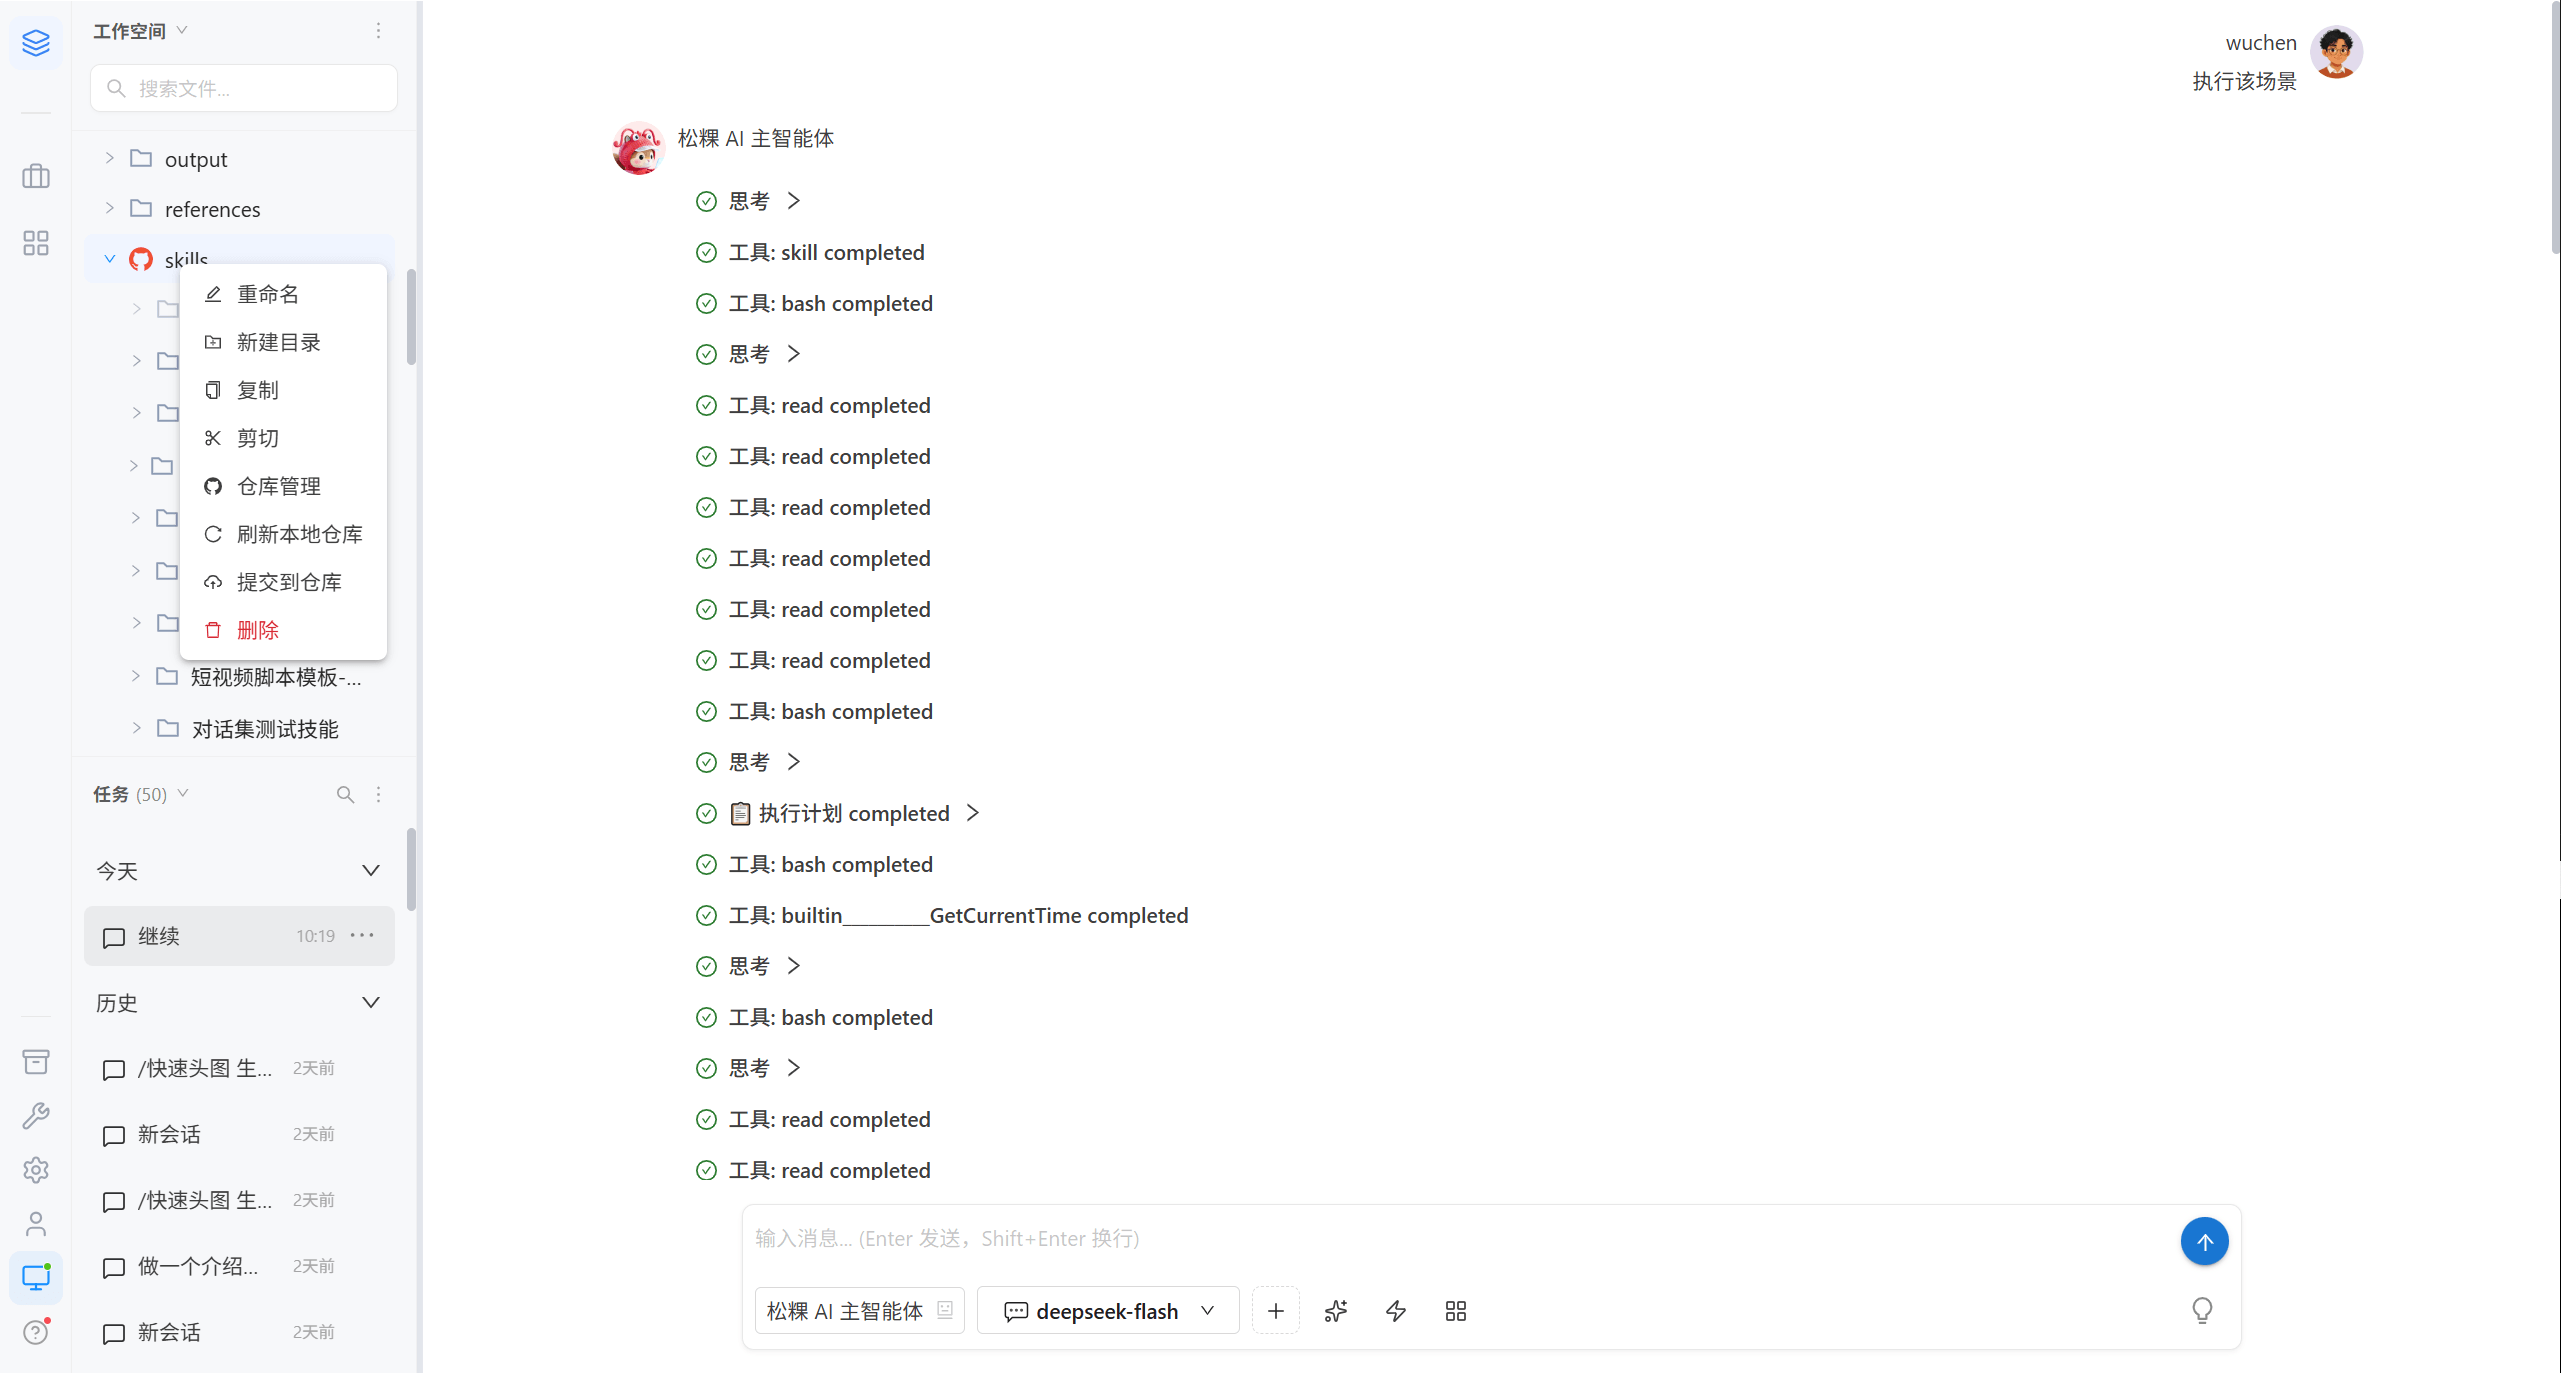
5.1 Open the Repository Panel
Right-click on a repository directory → "Repository management".
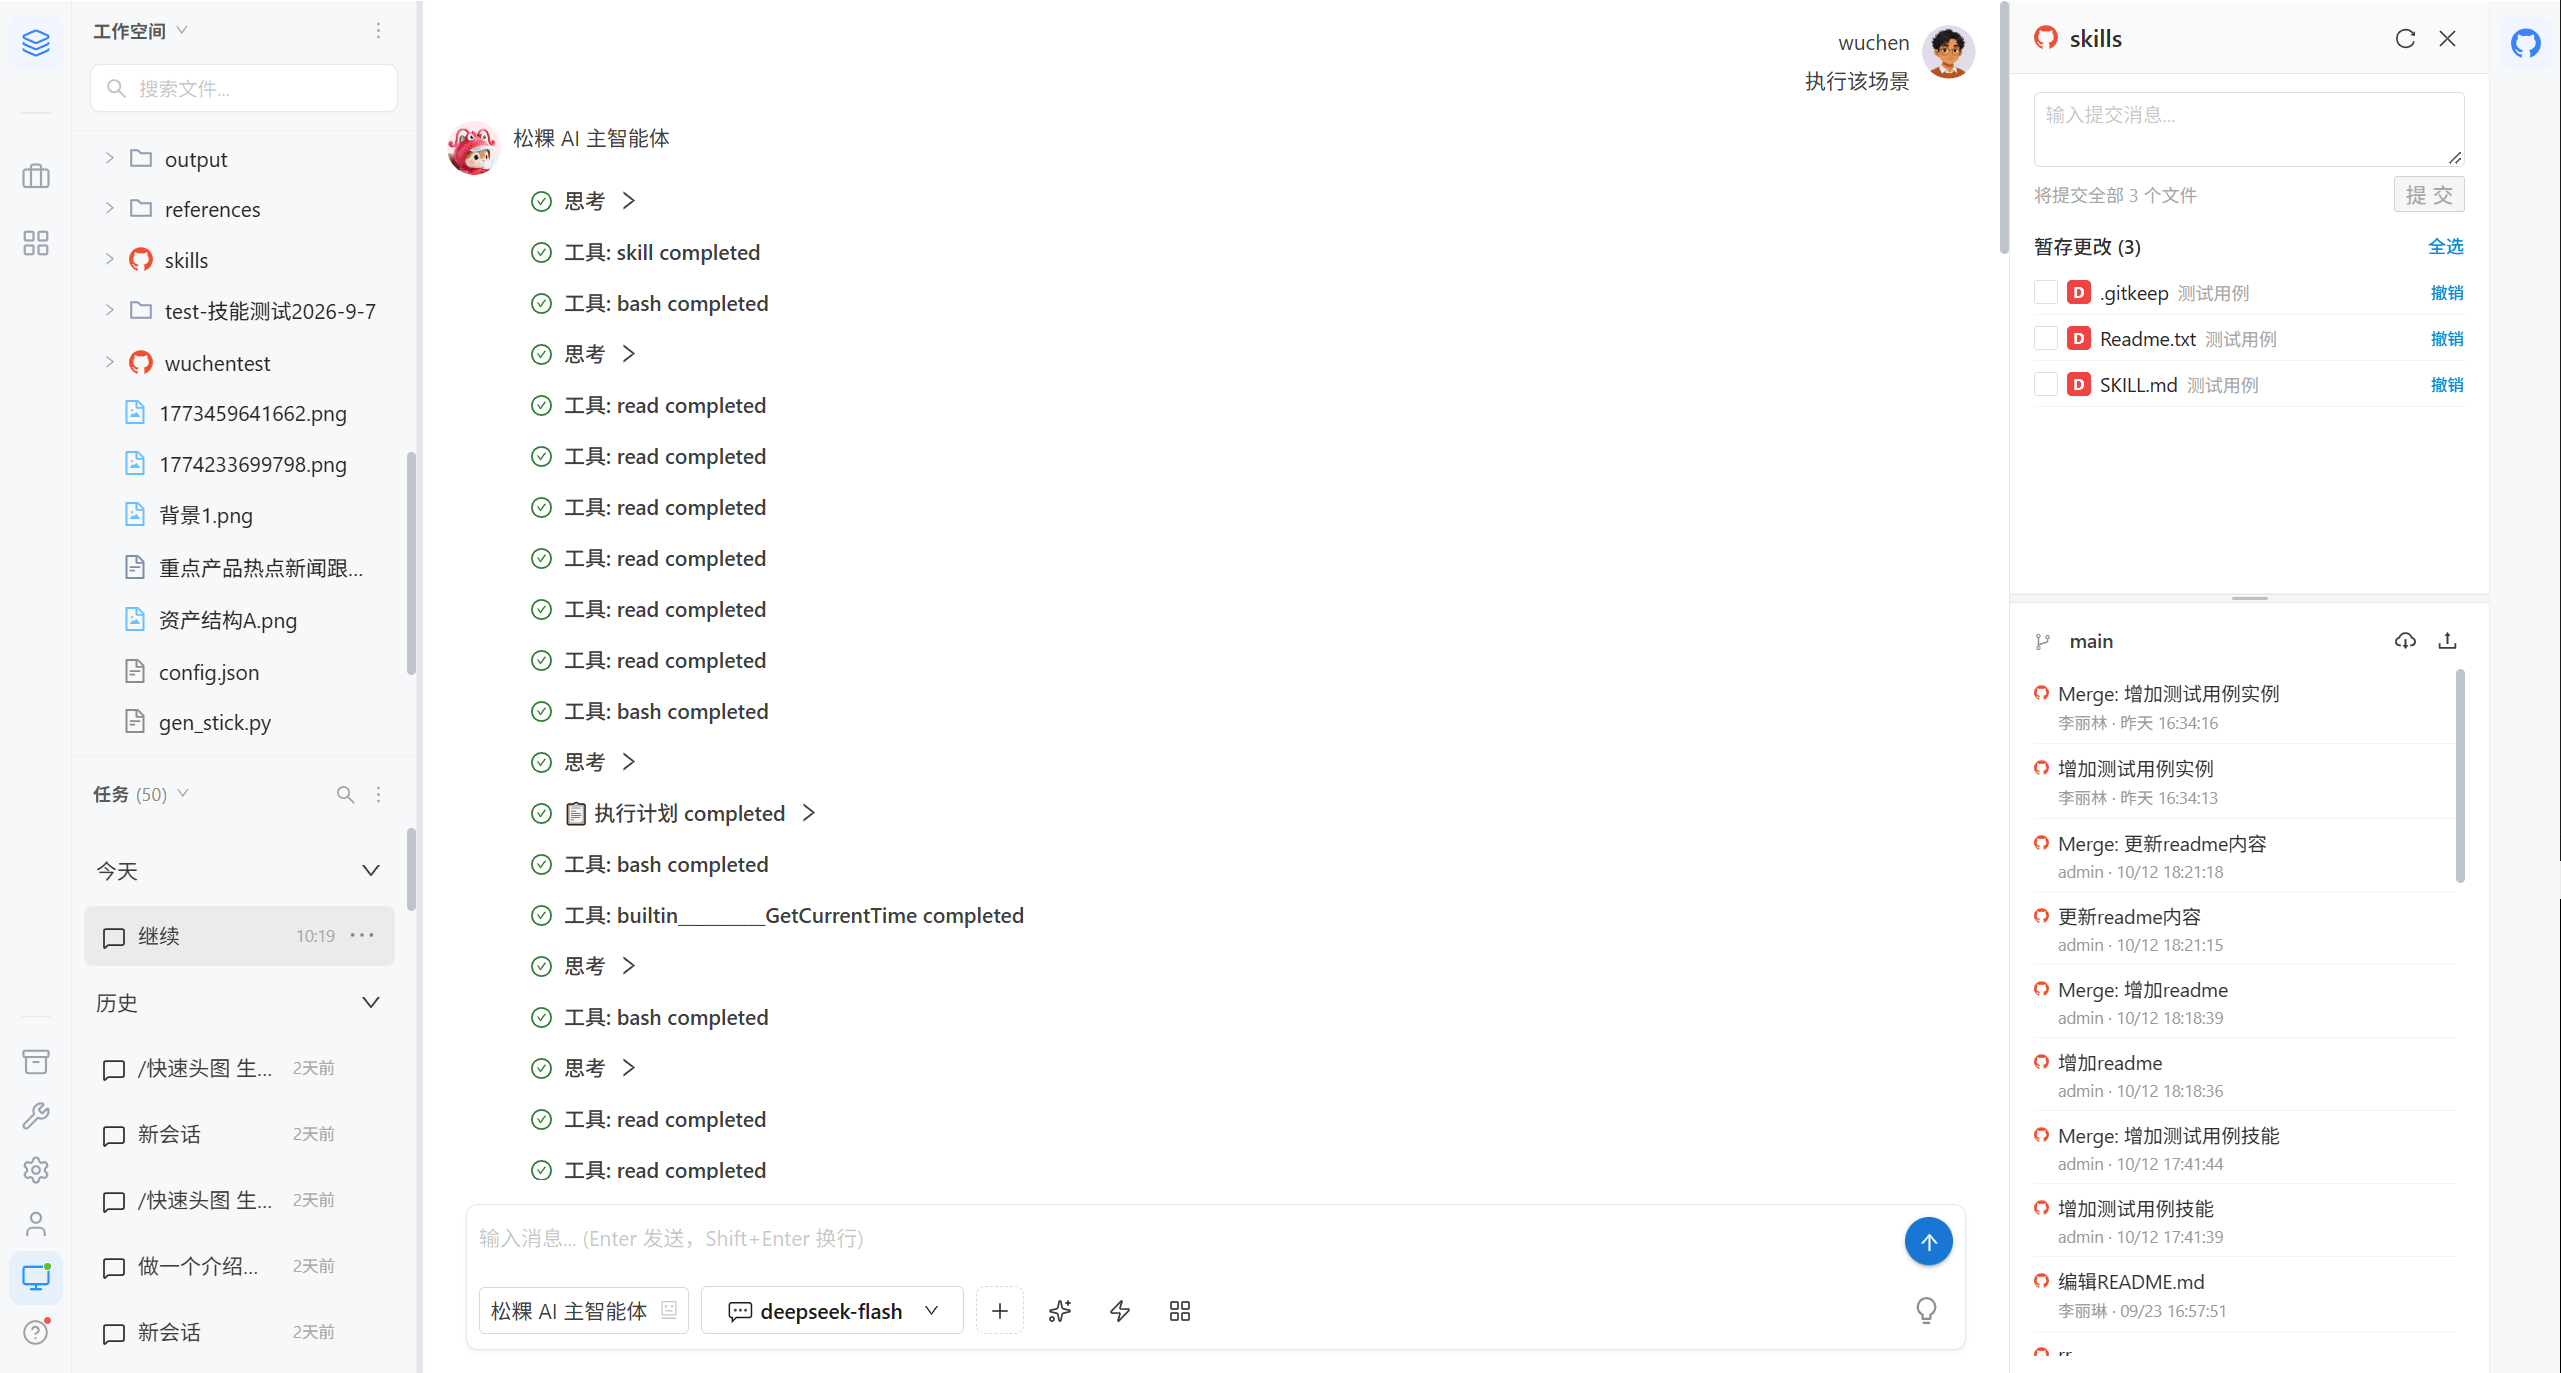
The panel provides:
| Feature | Description |
|---|---|
| Status | Modified / Added / Deleted / Conflicted / Untracked |
| Stage changes | Select all or check files one by one to stage for commit |
| Commit | Enter a commit message and commit to the local repository |
| Pull / Push | Sync with the remote repository |
| Discard | Revert the changes to the selected files, cannot be undone |
| Commit history | View past commits; double-click one to see the changes of that commit |
| Branch | View and switch local / remote branches |
5.2 Commit Changes
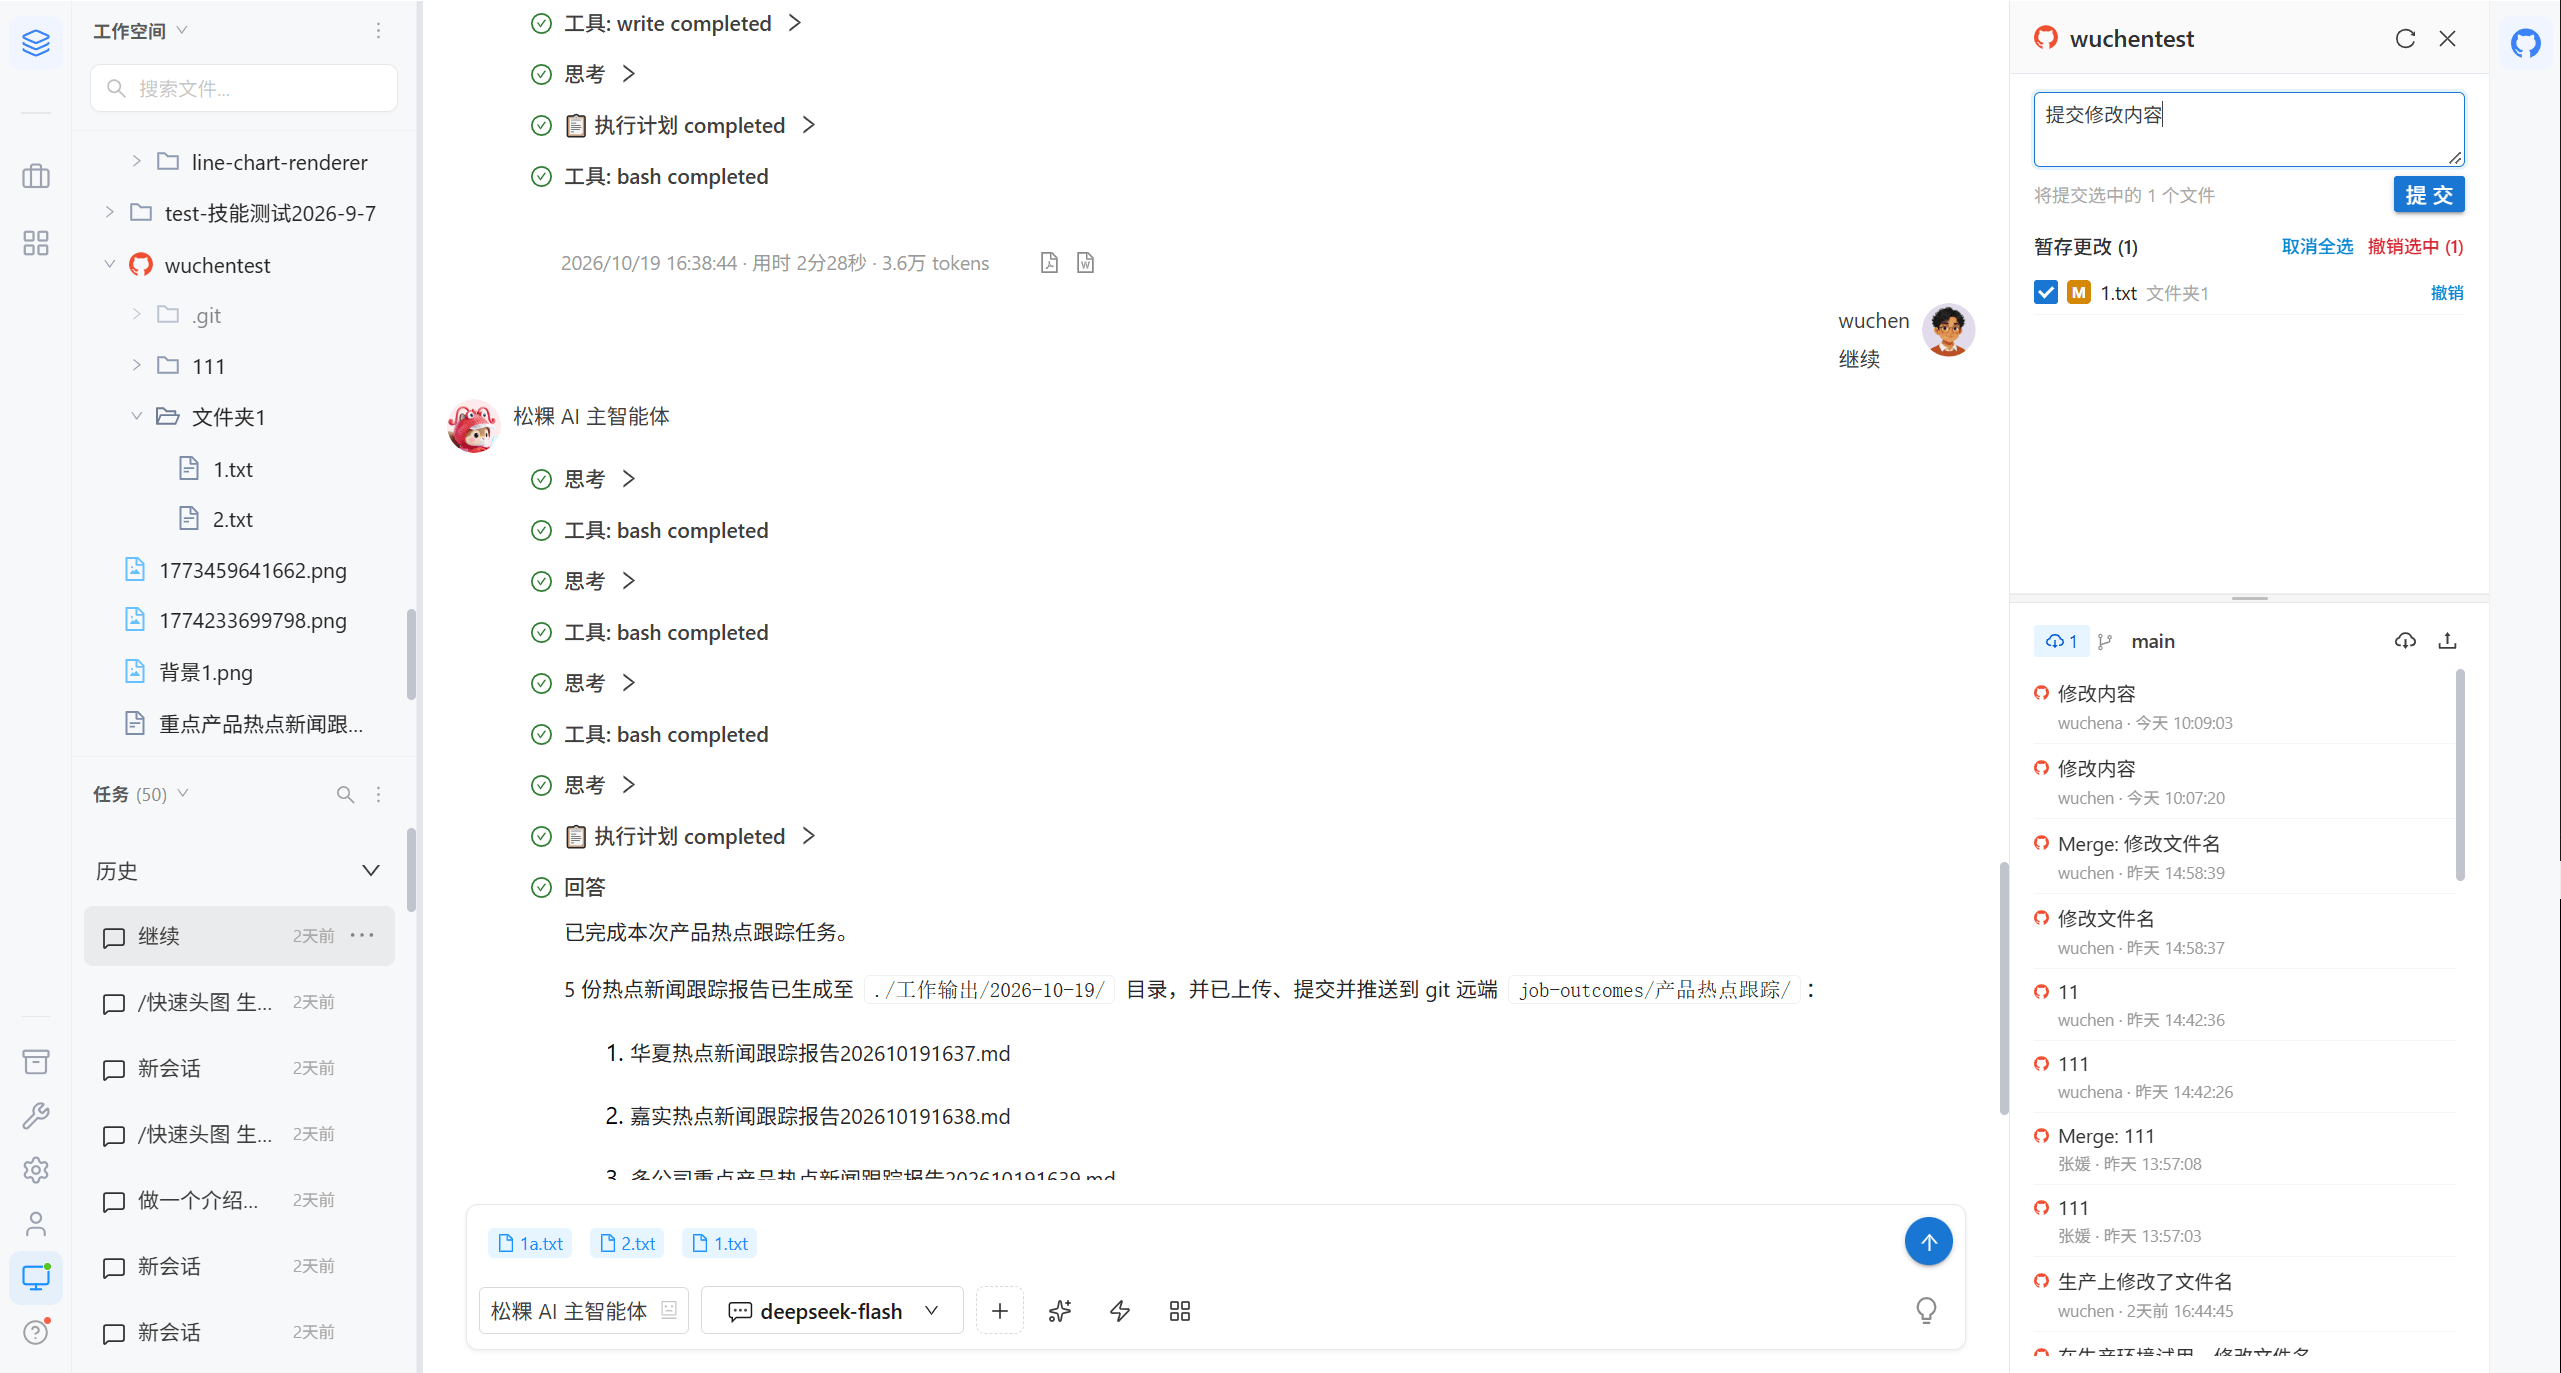
- Check the files to commit in the "Staged changes" area (you can select all)
- Enter a commit message (required)
- Click "Commit"
5.3 Commit to the Repository
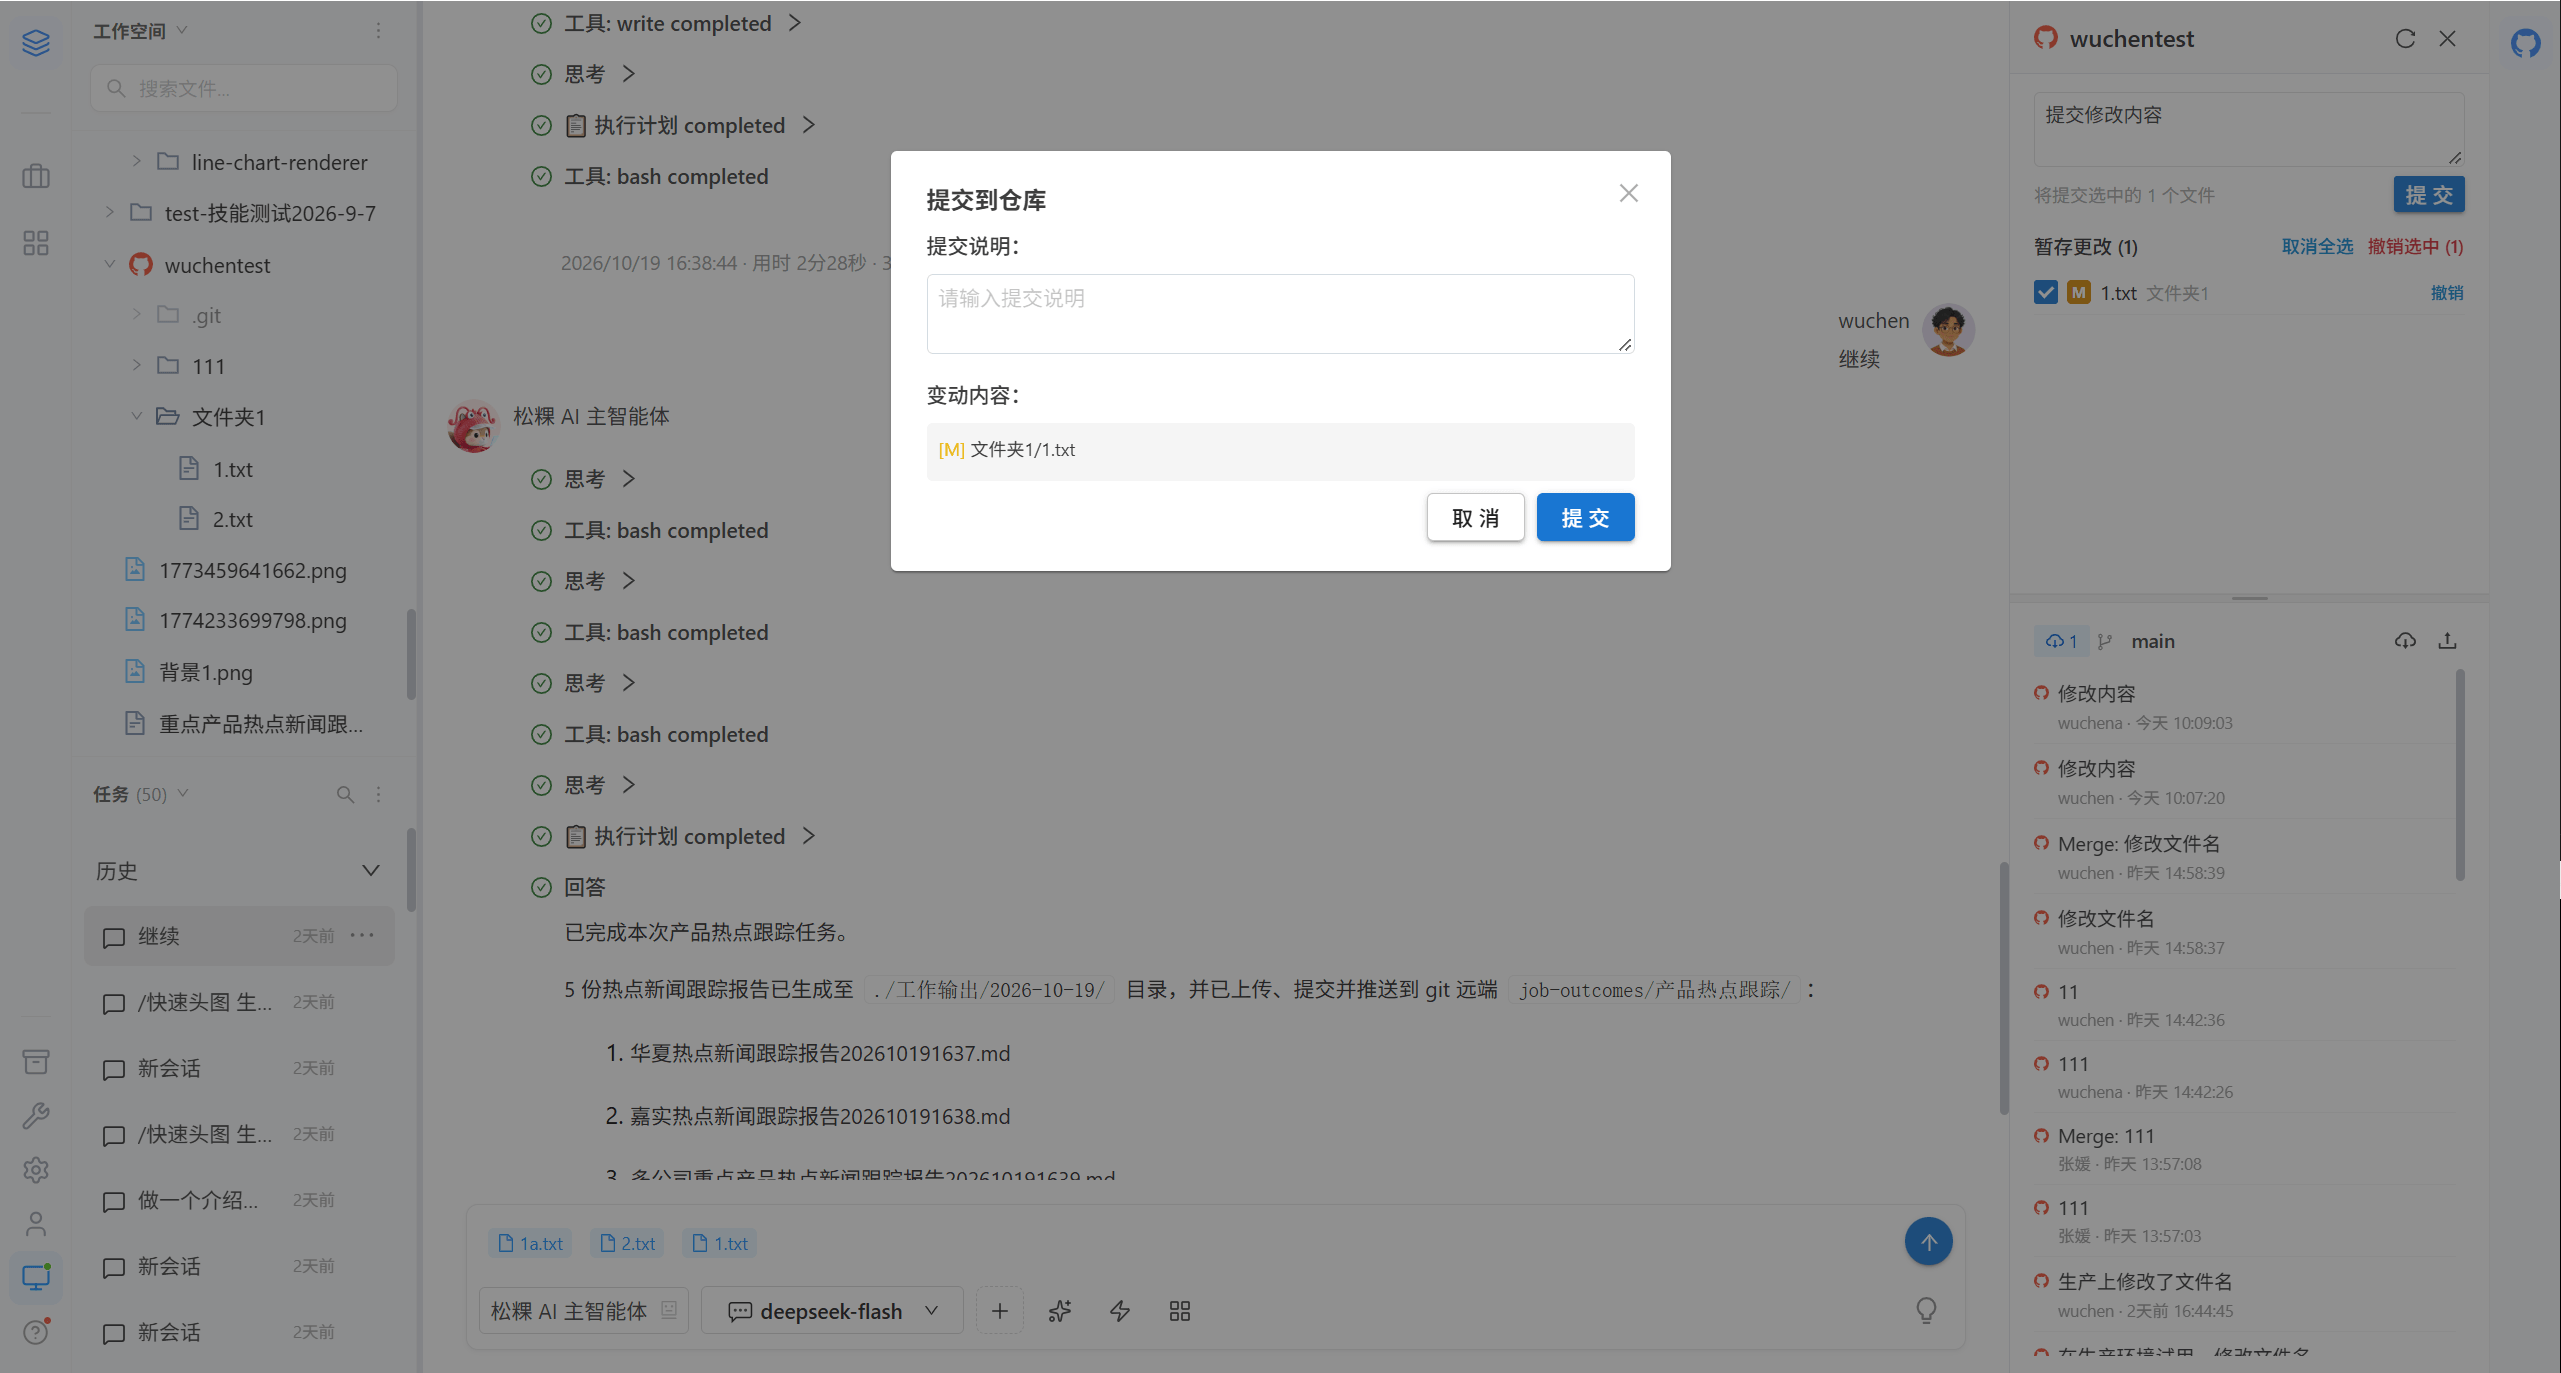
"Commit to repository" first syncs remote updates before committing, and shows a list of the changes in this commit. If syncing fails or conflicts exist, a prompt appears first.
5.4 Review the Diff
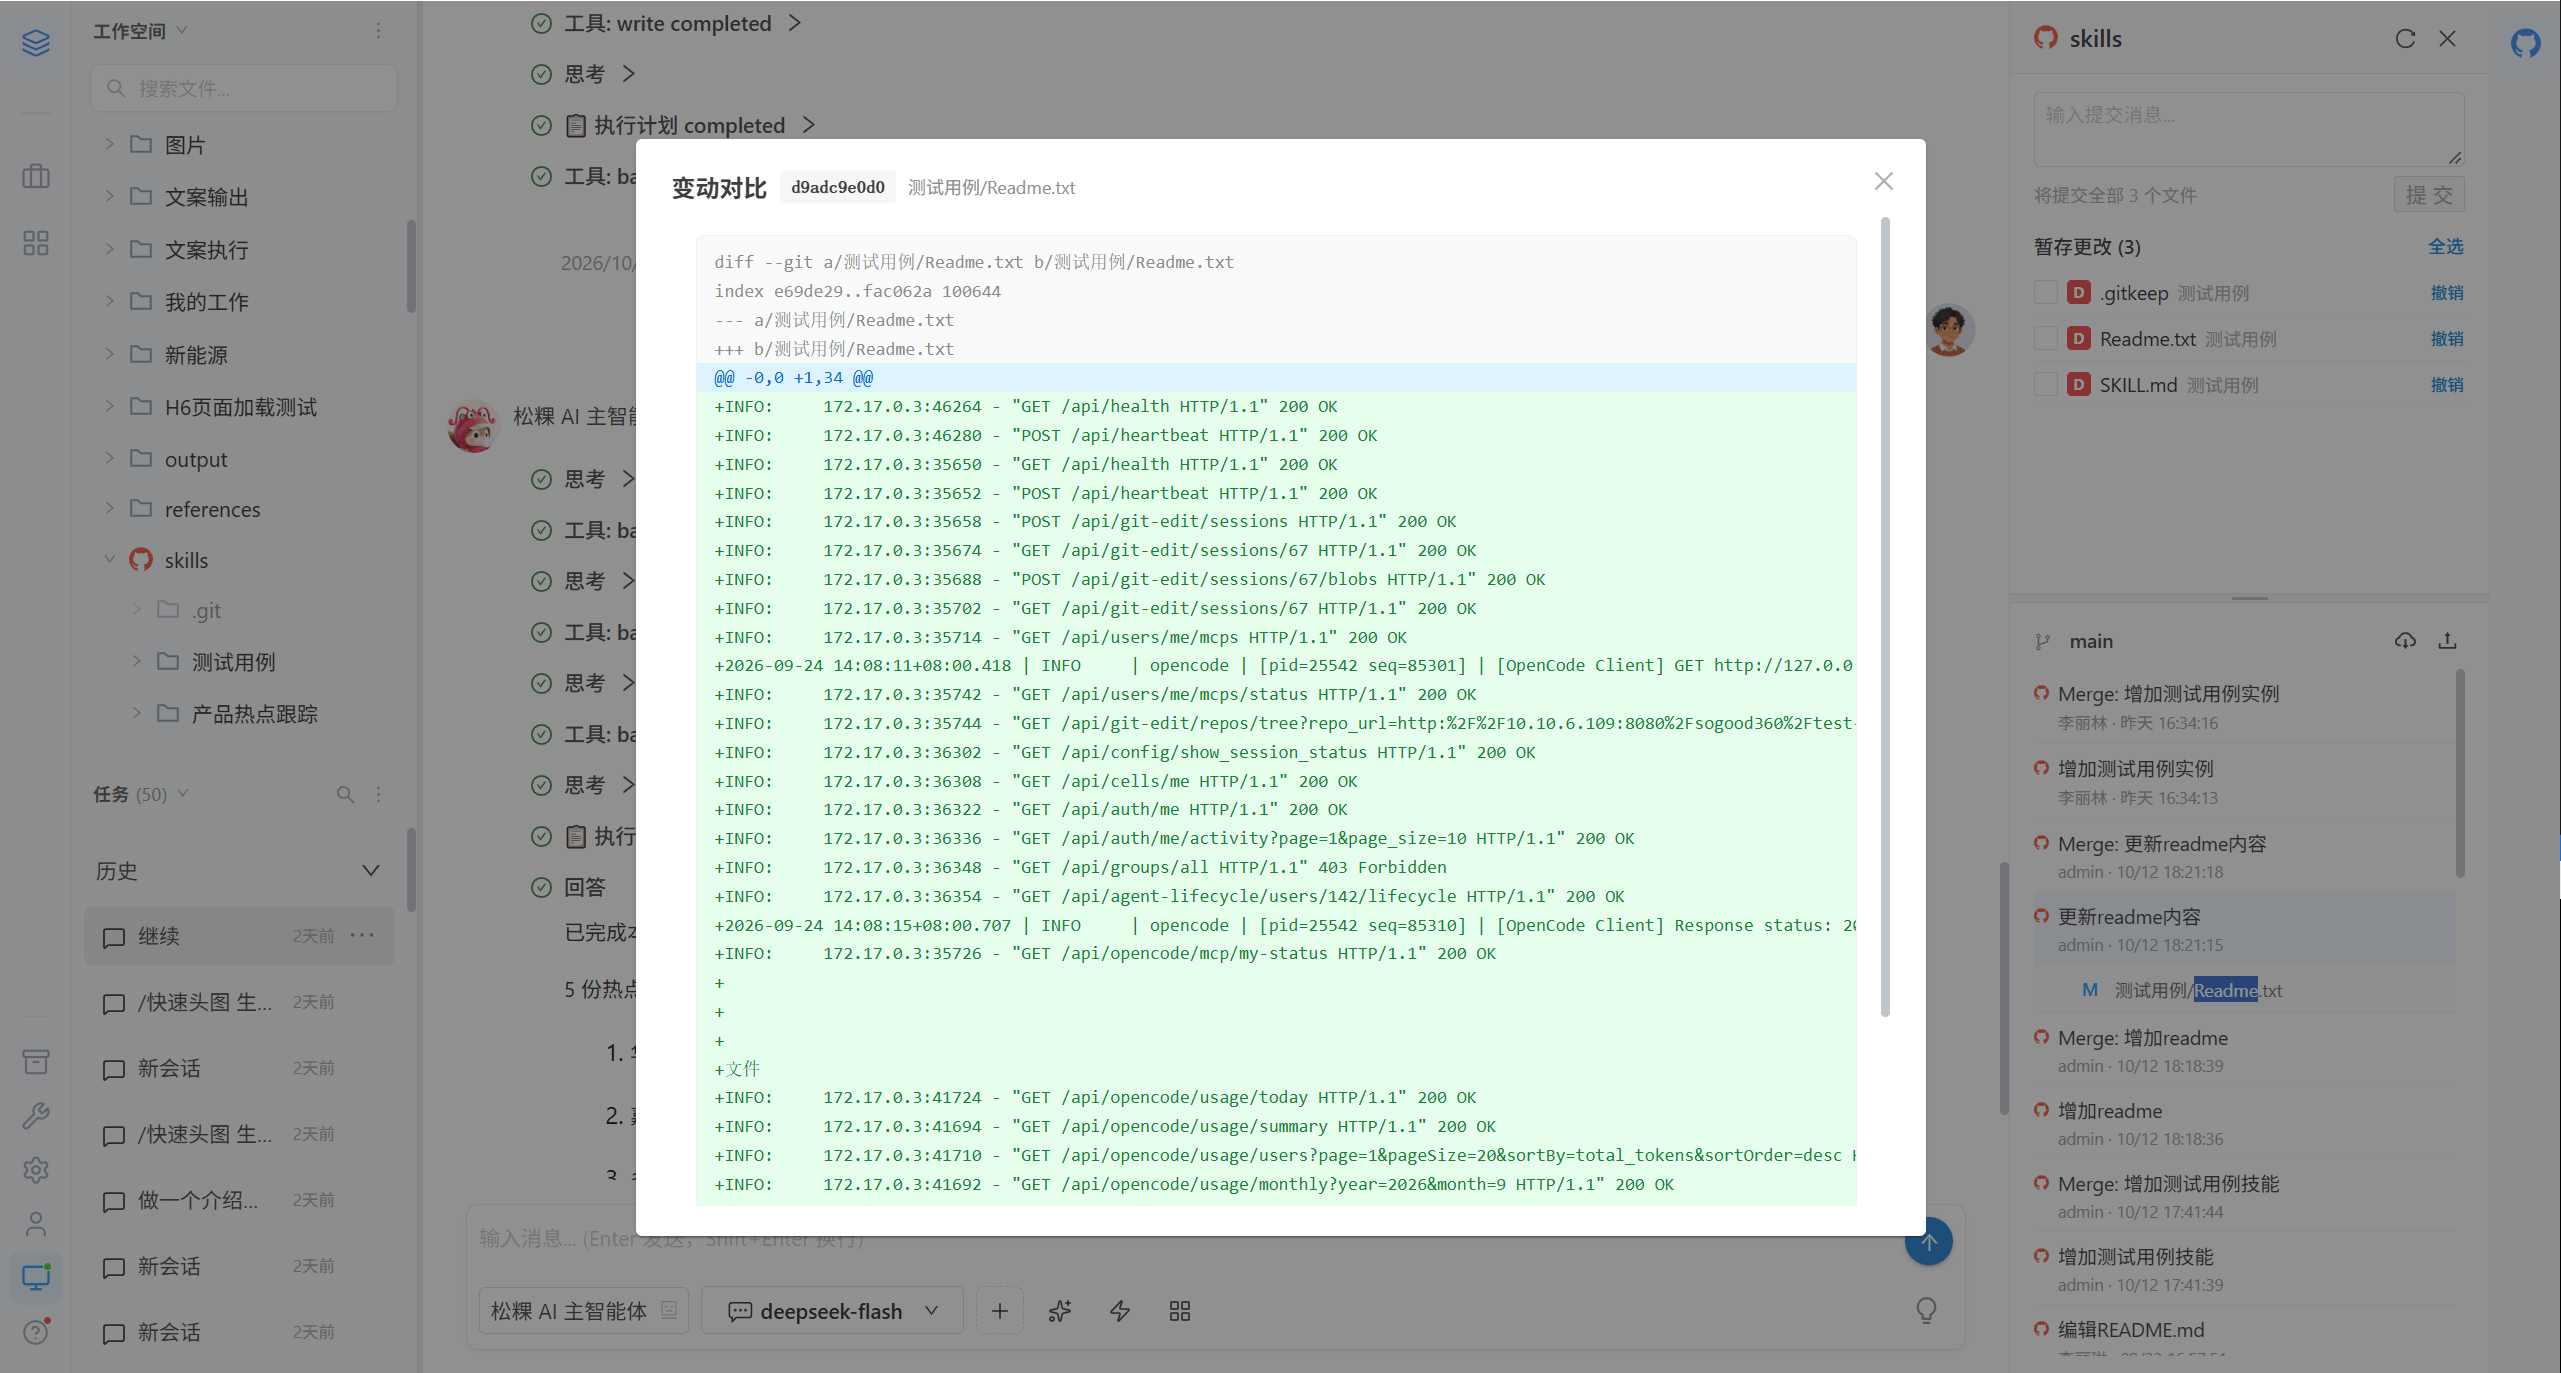
Compare the changes file by file before and after; binary files are labeled separately.
5.5 Resolve Commit Conflicts
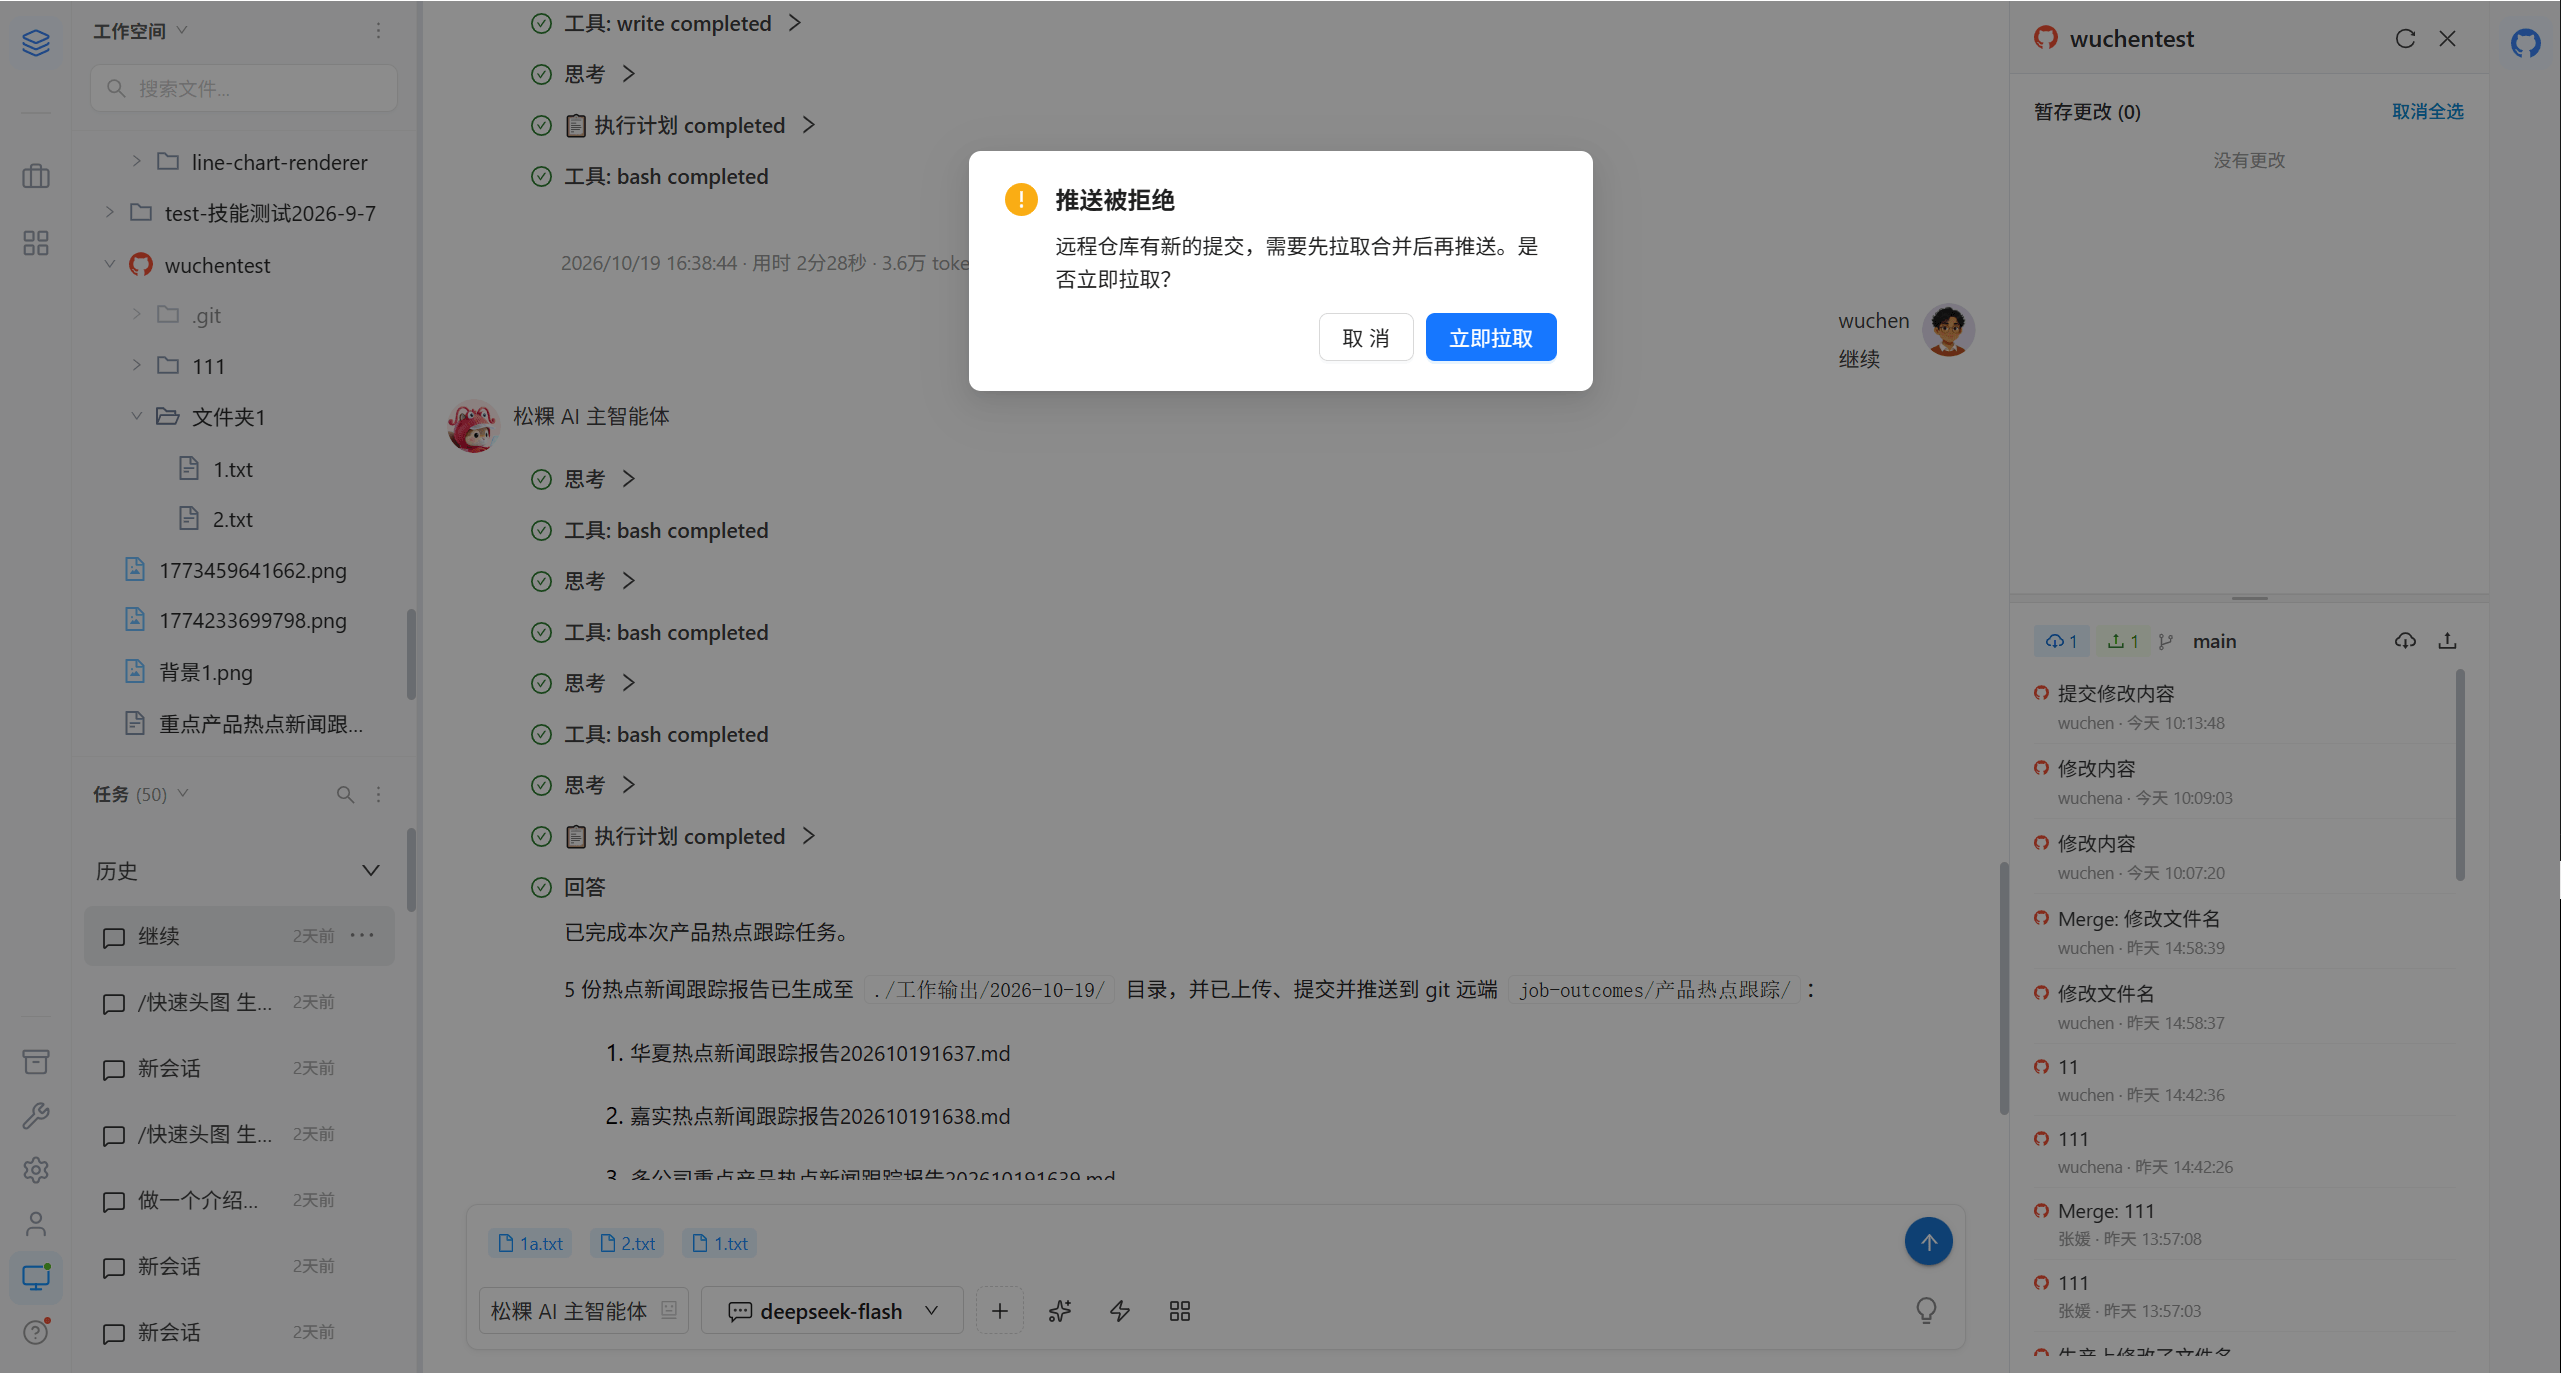
Conflict alert
Resolve conflicts
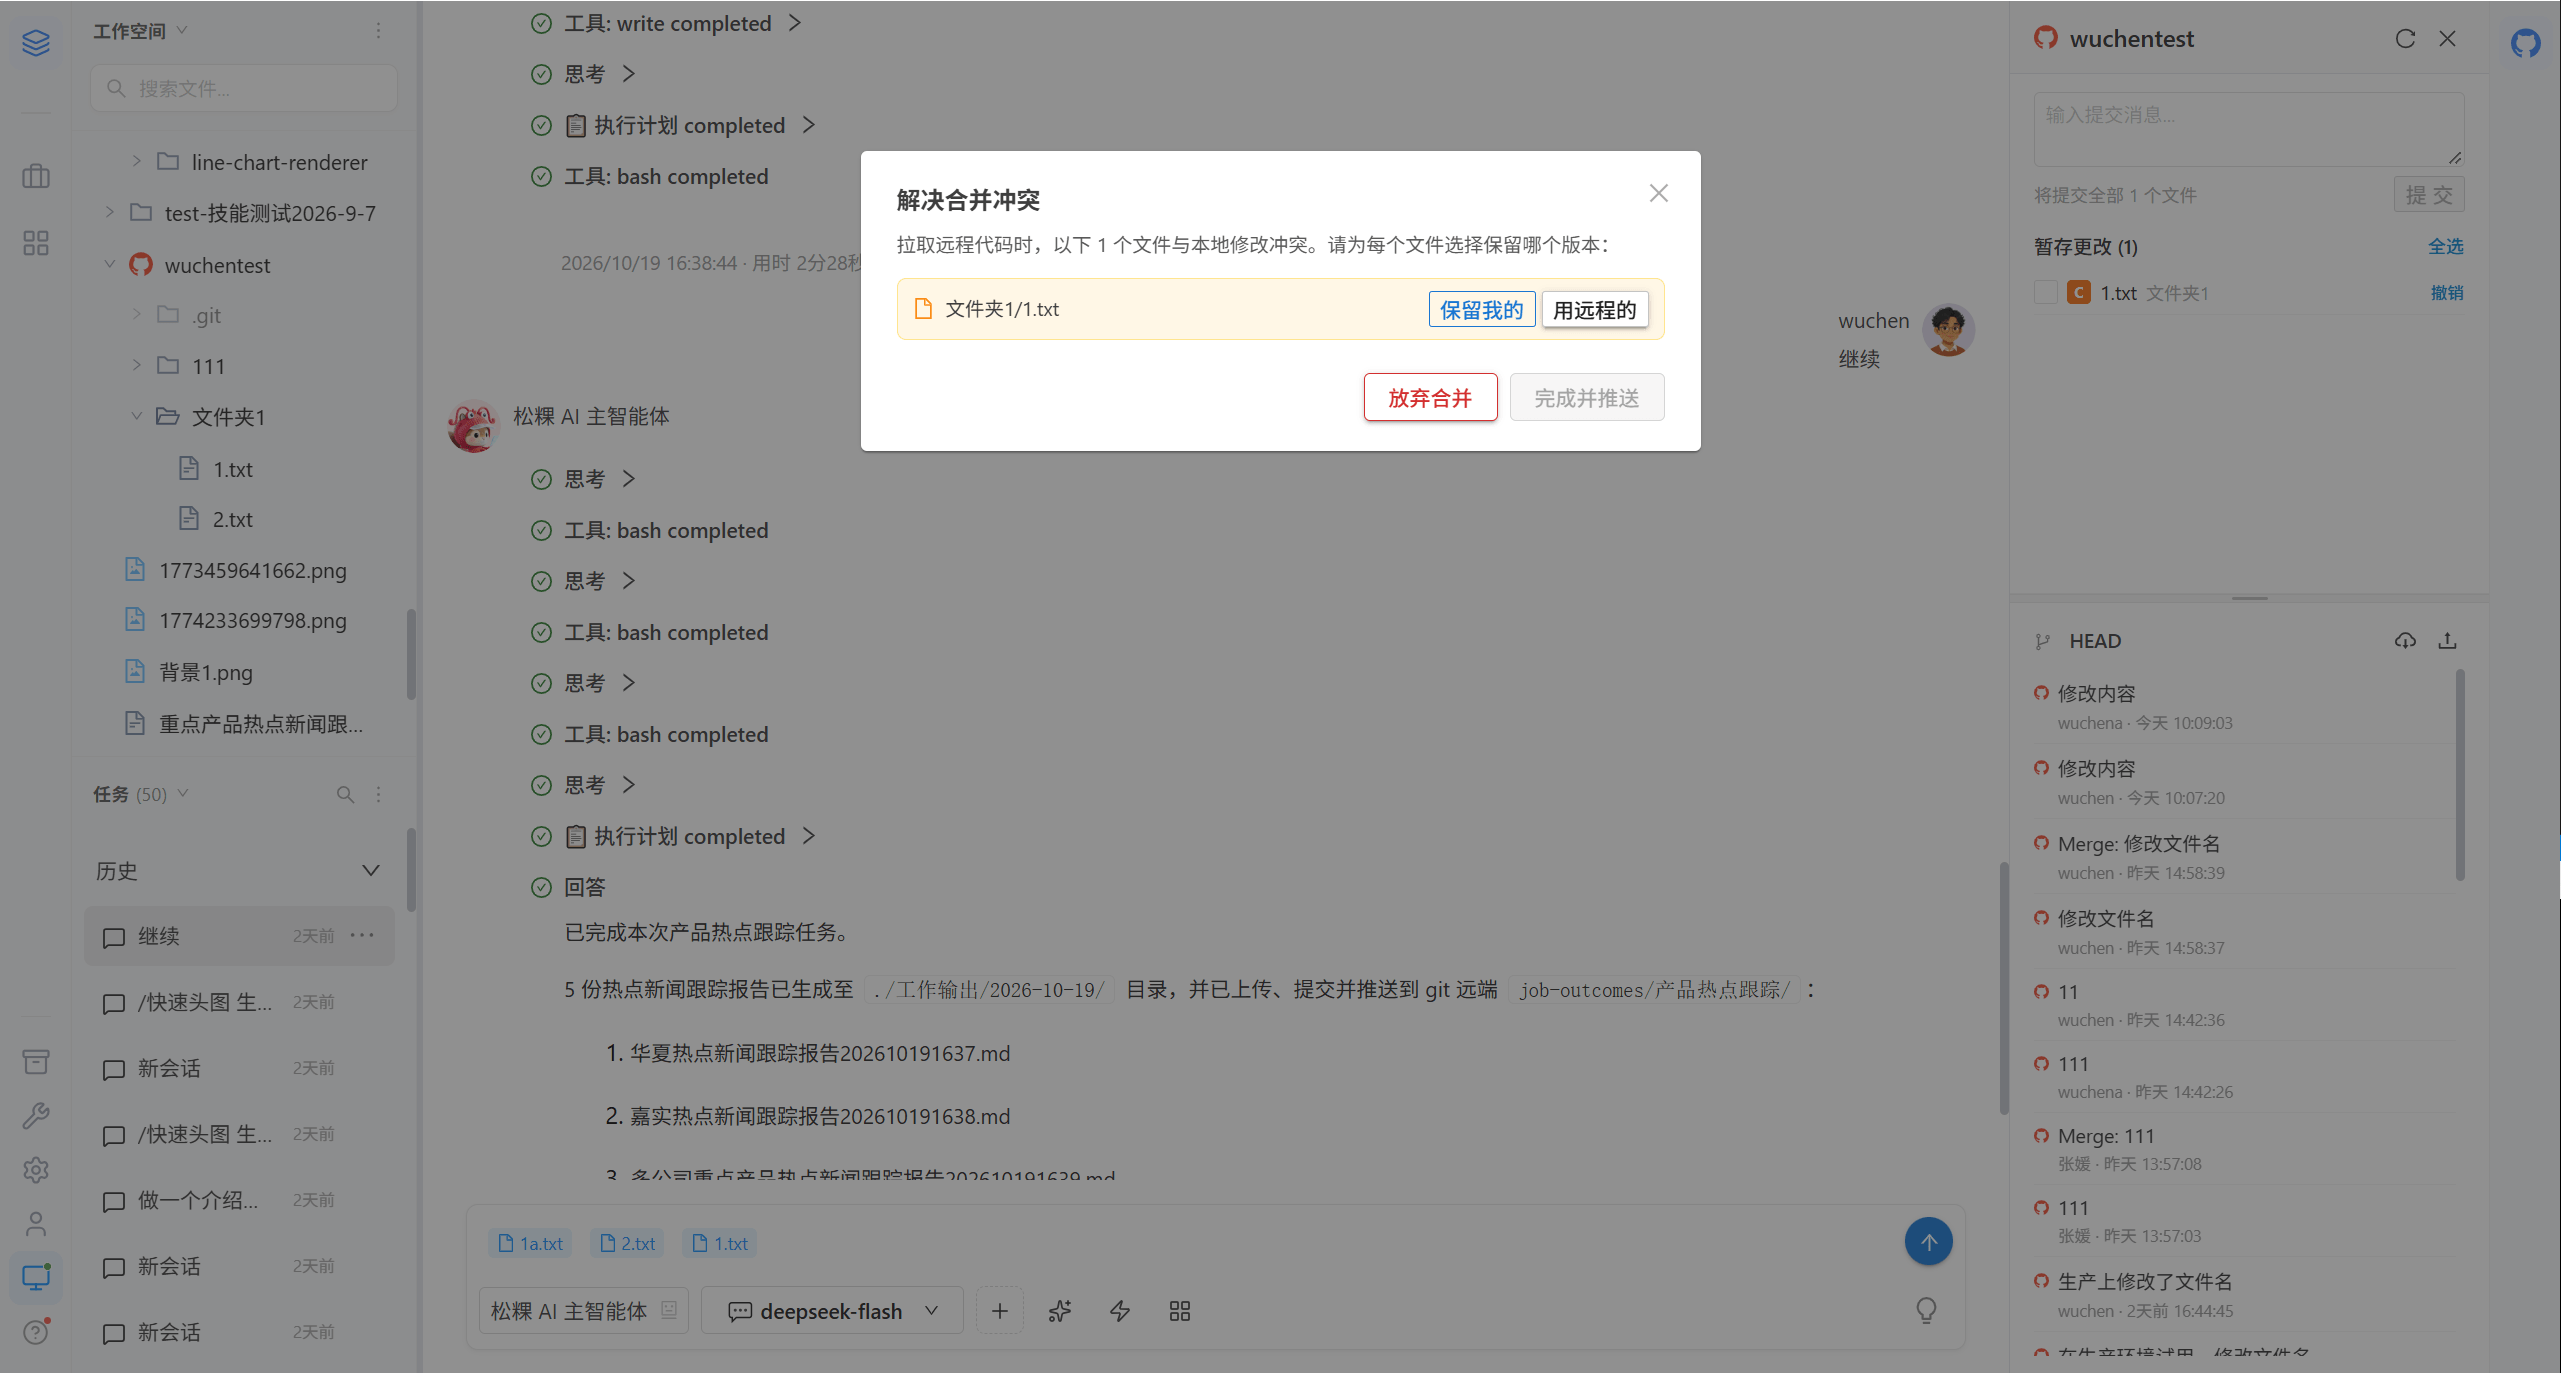
When pulling remote code, if the same file has local changes, you are asked to choose which version to keep, file by file.
| Option | Result |
|---|---|
| Keep mine | Overwrite the remote version with the local version |
| Use the remote one | Discard local changes and take the remote version |
After handling everything, click "Finish and push"; you can also "abandon the merge" to return to the state before the pull (local commits are kept, but remote updates are not merged).
5.6 Push Rejected
A push is rejected when the remote repository has new commits. Click "Pull now" to sync first and then push.
Note · You cannot switch branches when there are uncommitted changes; commit or discard them first.
6. Common Questions
| Symptom | Cause | Resolution |
|---|---|---|
| Cannot find a certain skill | The directory that contains the skill is not authorized for your group | Contact the administrator |
| Importing a repository reports an authentication failure | Git credentials are not configured, or they have expired | Contact the administrator |
| The skill list is empty | No skill has been imported yet | Import skills |
| No model is available in the dropdown | The model is not on the administrator's allowlist | Contact the administrator |
| The conversation keeps spinning | The AI task is complex or a tool is stuck | Wait, or press Esc to interrupt |
| "Please enter a commit message" appears when committing | The commit message is empty | Fill it in and try again |
7. Related Pages
| Page | Content |
|---|---|
| Assets | Management and authorization of skills and important documents |
| Account | Personal settings, my MCP, my scenes |
| Extensions | Third-party sub-apps embedded in the platform |